
Use Alibaba Cloud ECS to experience Zhiqingyun
This article introduces how to use Alibaba Cloud's preemptive ECS to quickly deploy the Zhiqingyun platform and complete the core process experience of users, tenants, computing clusters, data sources, and job execution. This method is suitable for product trials, functional demonstrations and non-production environment verification.
The example in this article uses CentOS 7.9, 4-core 8 GB configuration, and starts the Zhiqingyun service through Docker. Please adjust production environment deployment based on actual resource planning, security policies, and high availability requirements.
1. Create a preemptible ECS instance
Log in to the Alibaba Cloud ECS console:
https://ecs.console.aliyun.com/

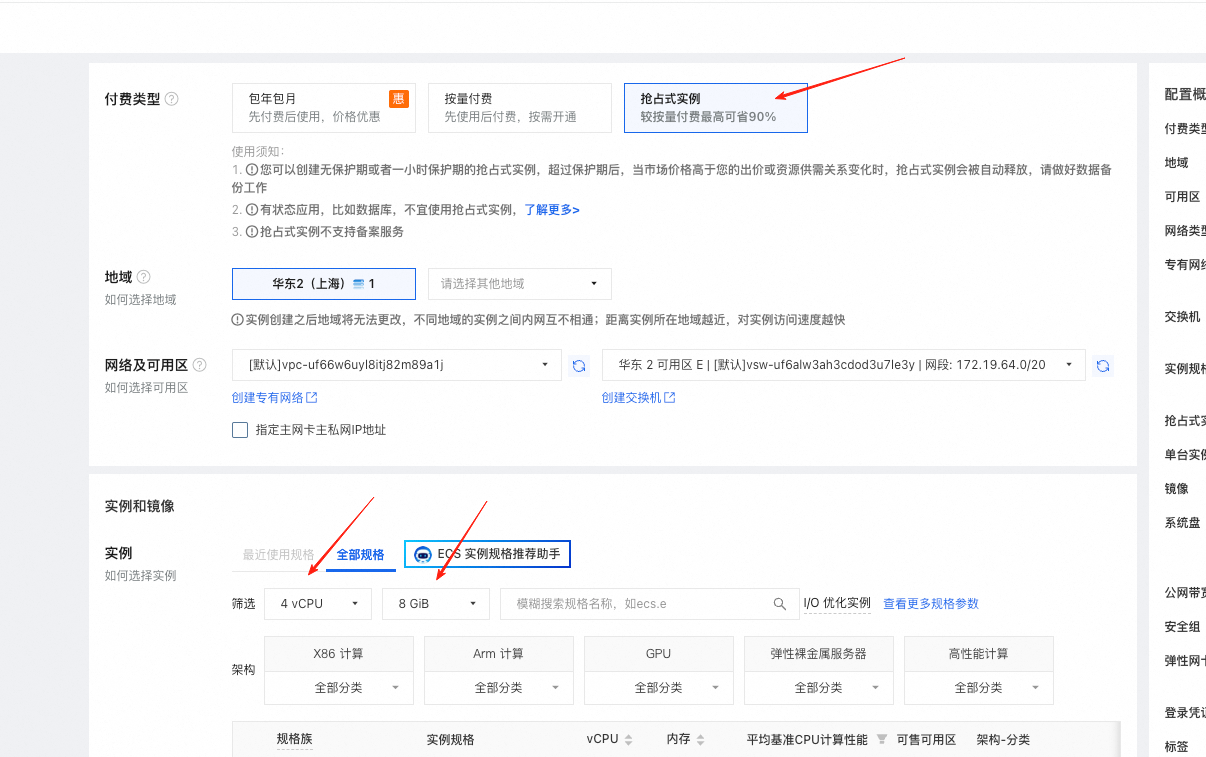
Select Preemptible Instance as the instance type, and the specifications are recommended to be 4 cores, 8 GB or higher.
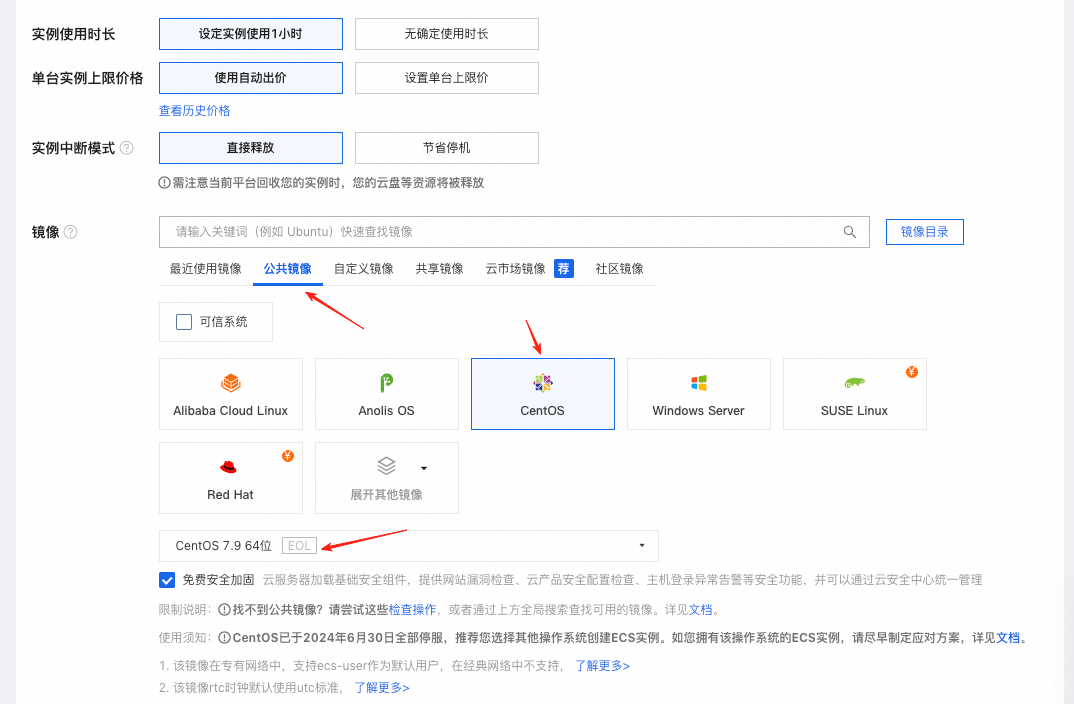
Select CentOS 7.9 64-bit for the operating system.
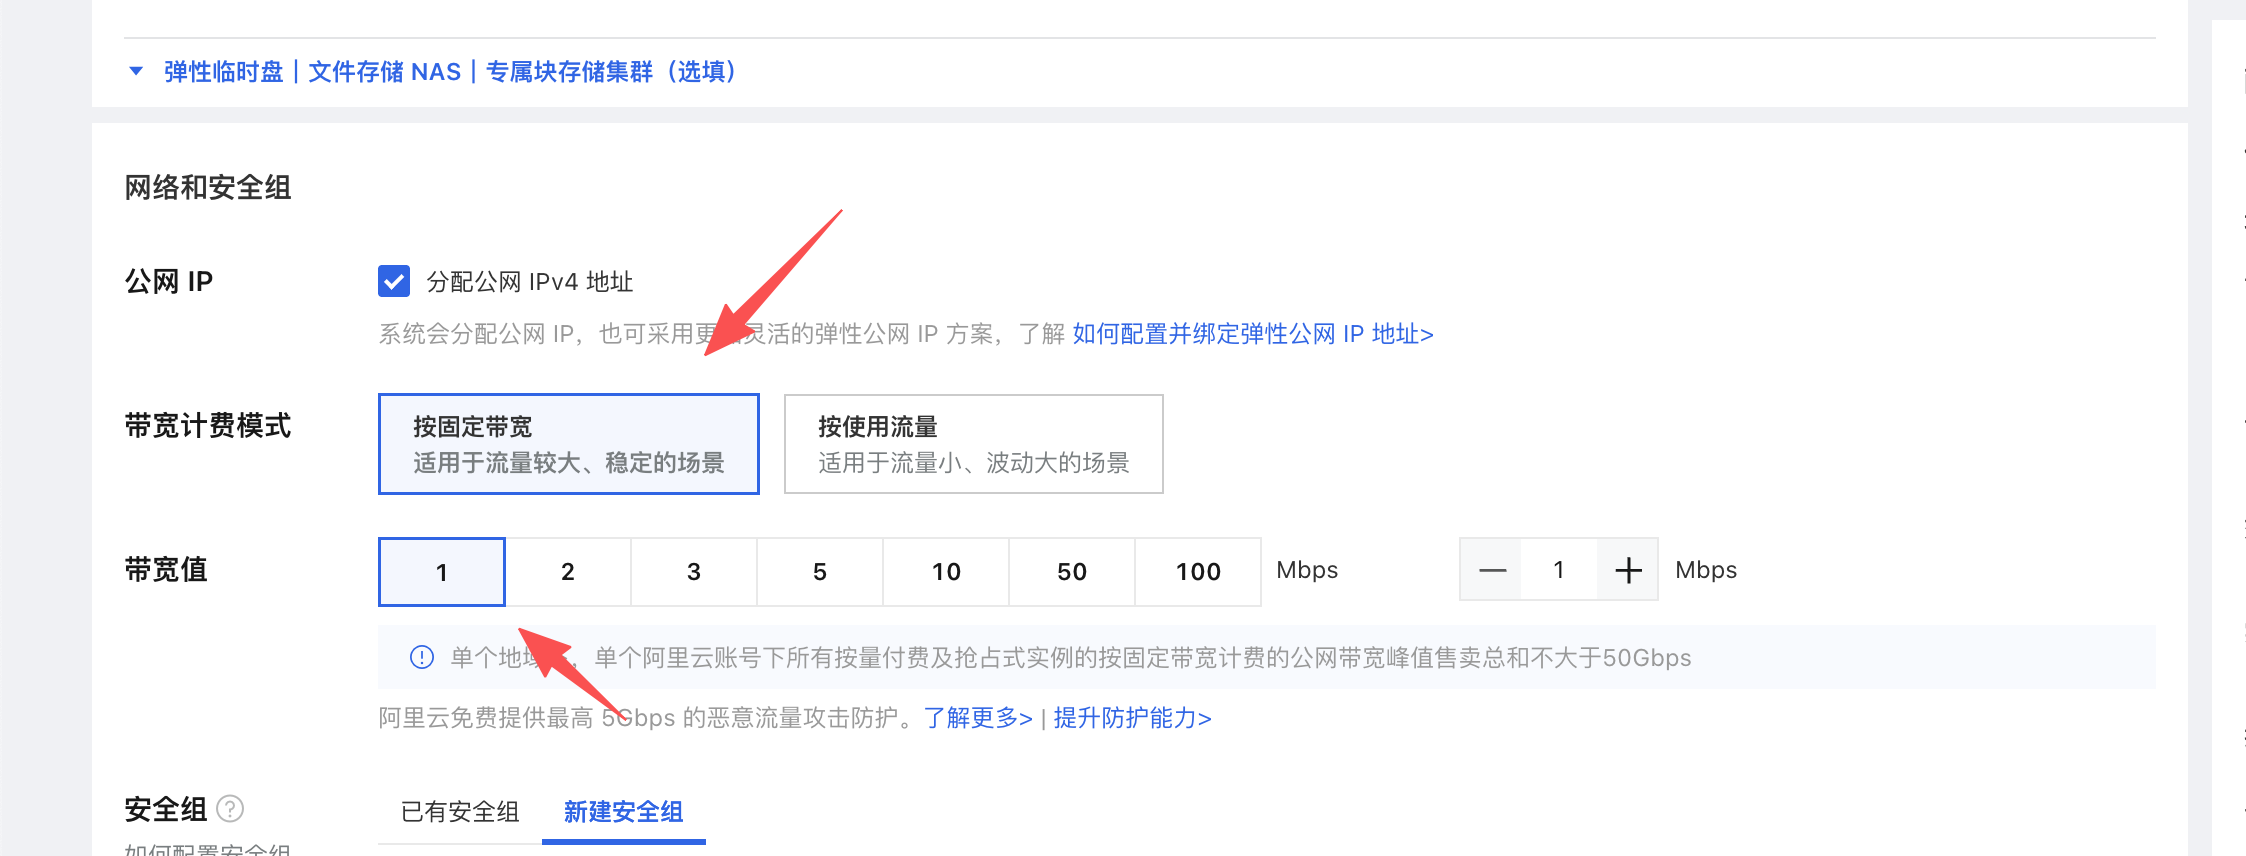
The network bandwidth can be fixed based on the experience environment.
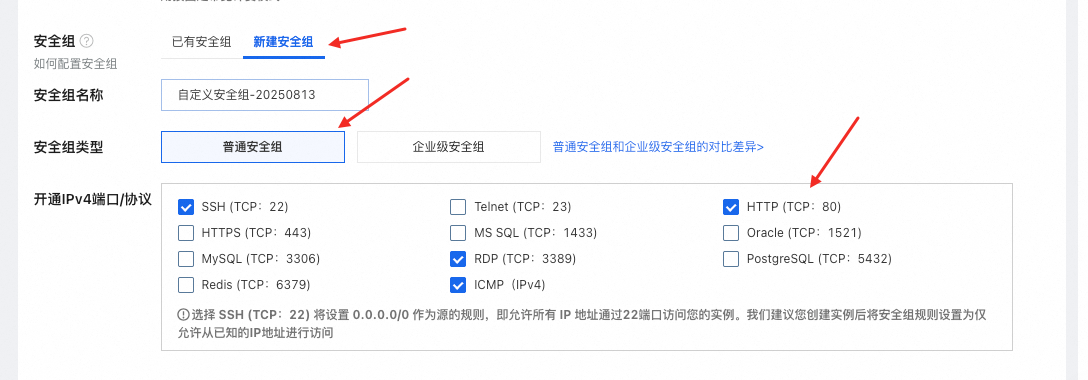
When creating a security group, you need to open access ports. The example in this article maps the host 80 port to the container 8080 port, so the 80 port needs to be opened.
Set the root user password.
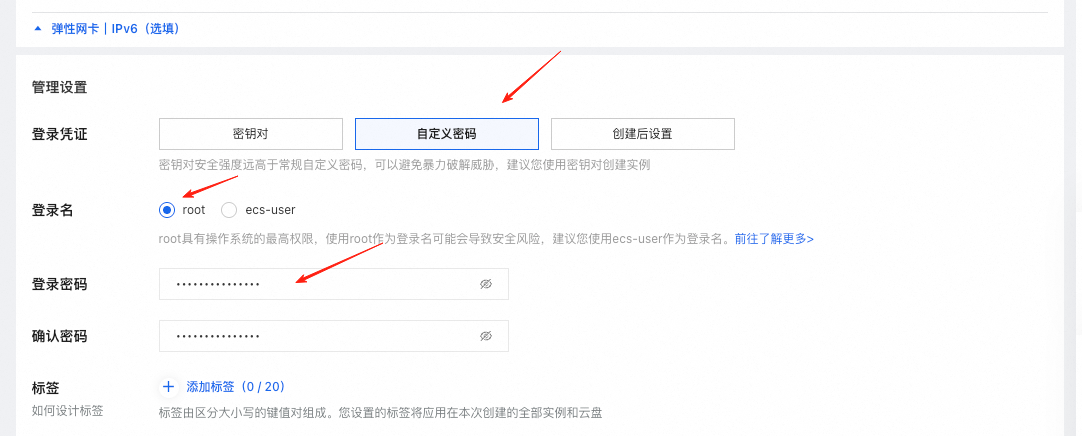
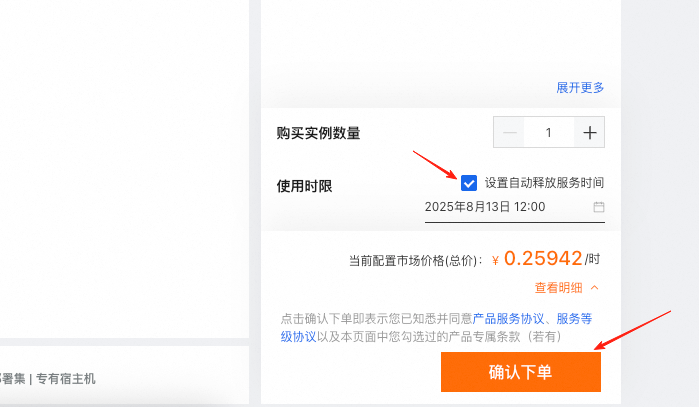
Set the preemption duration and create a server instance.
After the instance is created, record the intranet IP and public IP of the server.
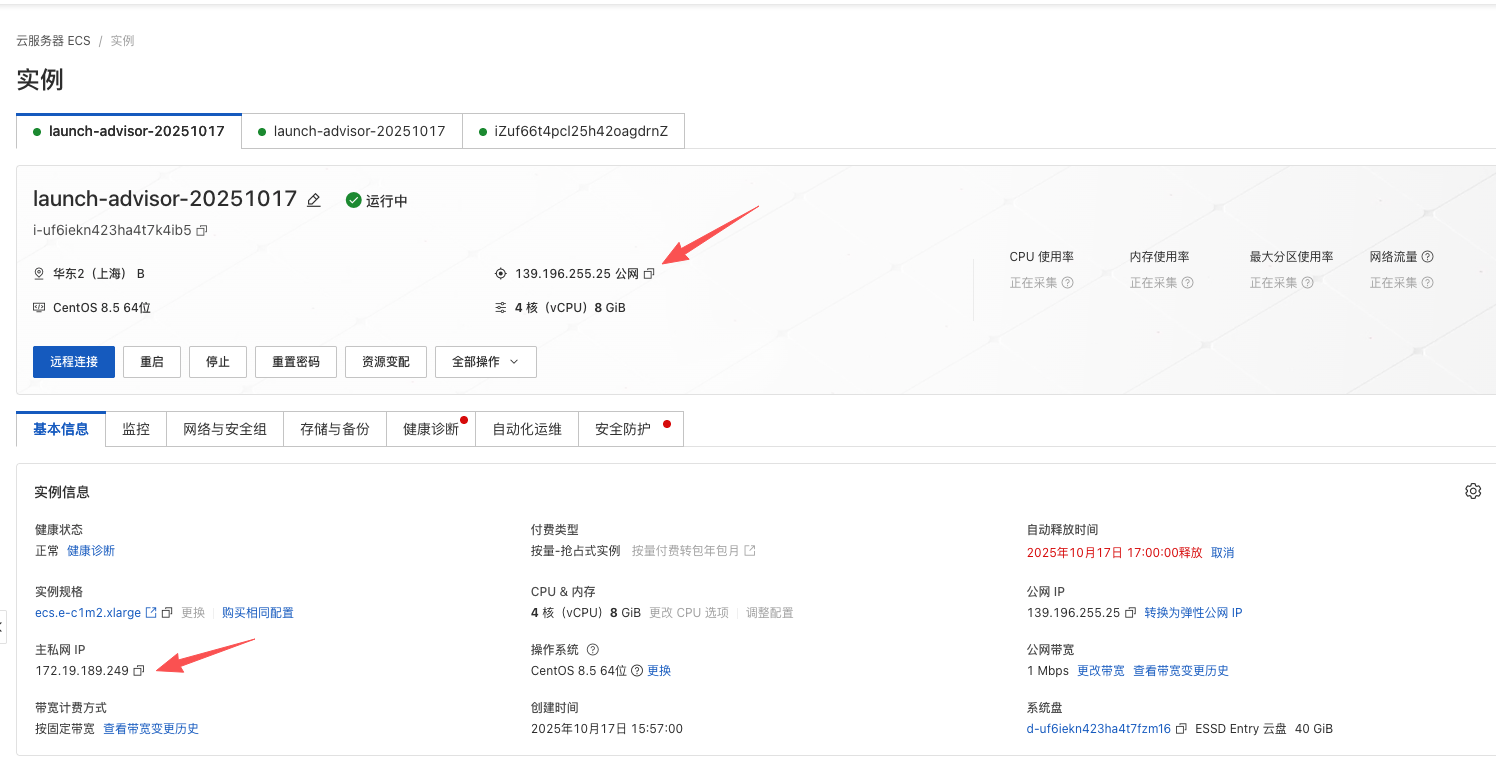
The sample server information in this article is as follows:
| Configuration items | Example value |
|---|---|
| operating system | CentOS 7.9 |
| Resource specification | 4 cores 8 GB |
| Public IP | 47.100.8.119 |
| Intranet IP | 172.19.73.181 |
| Login account | root |
| Login password | Zhiqingyun123.. |
2. Log in to the server
Log in to the ECS server using a local terminal:
ssh root@47.100.8.119
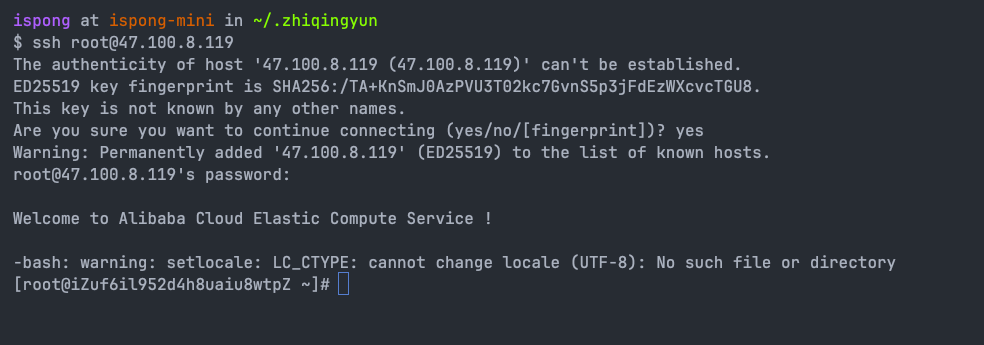
It is recommended to adjust the maximum number of open files on the server to 65535 to avoid file handle limitations affecting execution performance during job running.
# 临时配置方式
ulimit -n 65535
3. Install Java environment
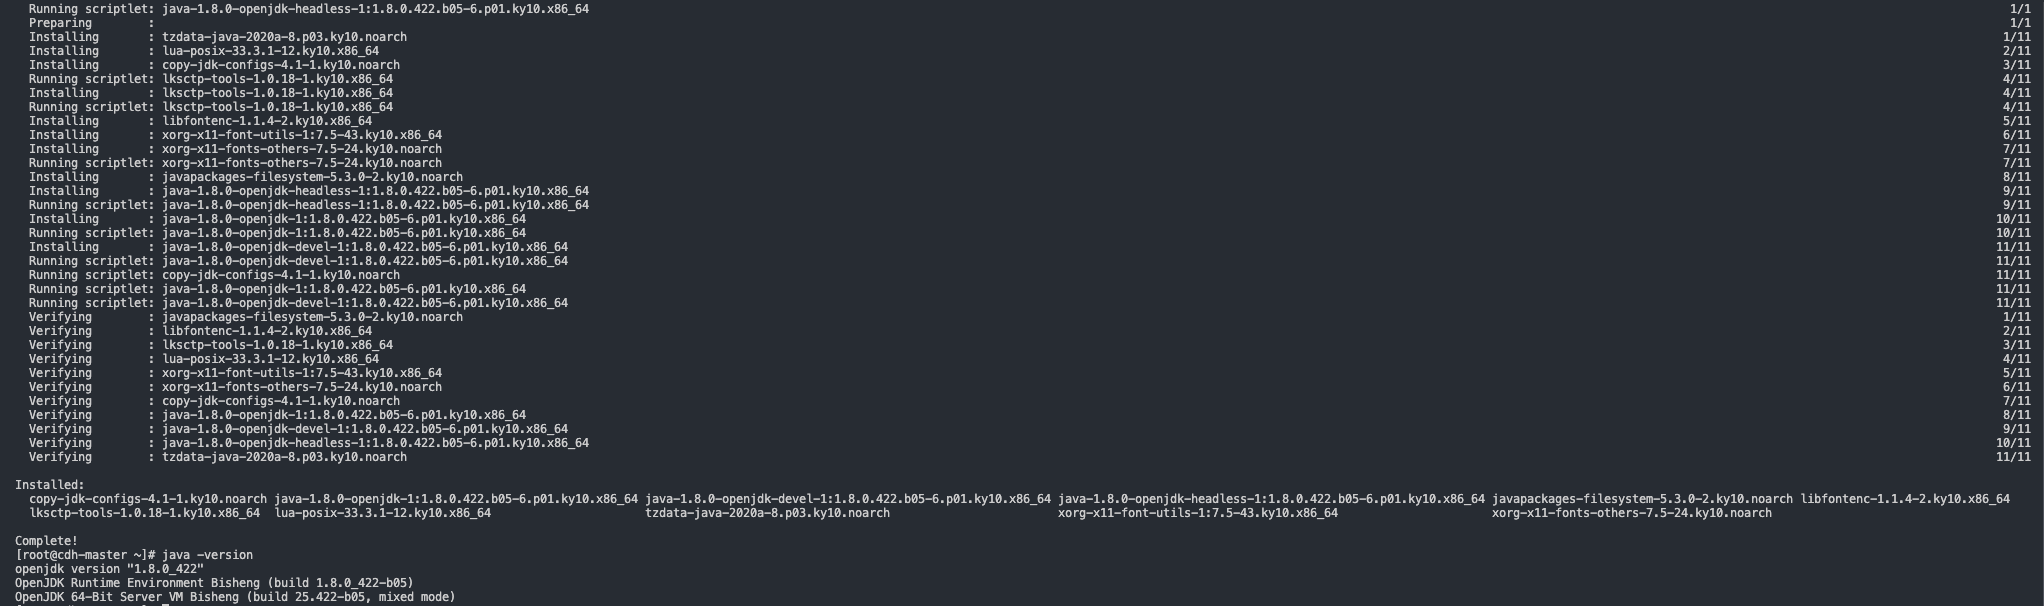
Zhiqingyun depends on Java environment to run. Execute the following command to install OpenJDK 17:
yum install java-17-openjdk-devel java-17-openjdk -y
4. Install Docker
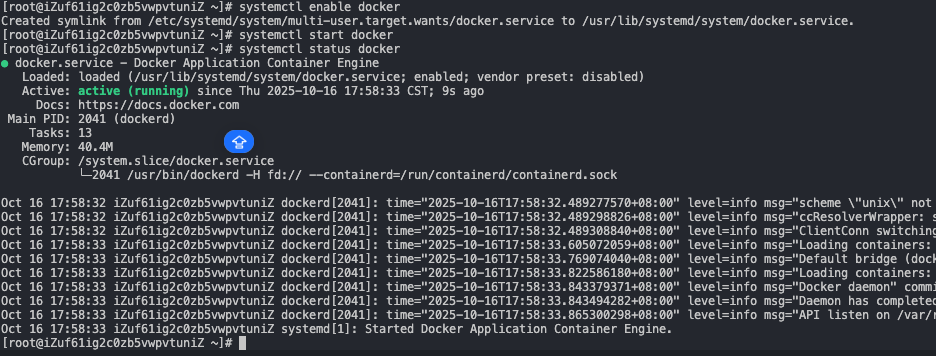
Configure the Docker software source and install Docker related components:
yum install -y yum-utils
yum-config-manager --add-repo https://mirrors.aliyun.com/docker-ce/linux/centos/docker-ce.repo
yum install -y docker-ce docker-ce-cli containerd.io docker-buildx-plugin docker-compose-plugin
systemctl start docker
5. Deploy Zhiqingyun service
Create the data directory and start the Zhiqingyun container through Docker:
mkdir -p /var/lib/zhiqingyun
docker run \
    --restart=always \
    --name zhiqingyun \
    -e ADMIN_PASSWORD=admin123 \
    -v /var/lib/zhiqingyun:/var/lib/zhiqingyun \
    -p 80:8080 \
    -d registry.cn-shanghai.aliyuncs.com/isxcode/zhiqingyun:latest-amd64
docker logs -f zhiqingyun
Parameter description:
| parameters | Description |
|---|---|
ADMIN_PASSWORD | Backend administrator initial password |
/var/lib/zhiqingyun | Zhiqingyun data persistence directory |
-p 80:8080 | Map server 80 port to container 8080 port |
6. Visit Zhiqingyun platform
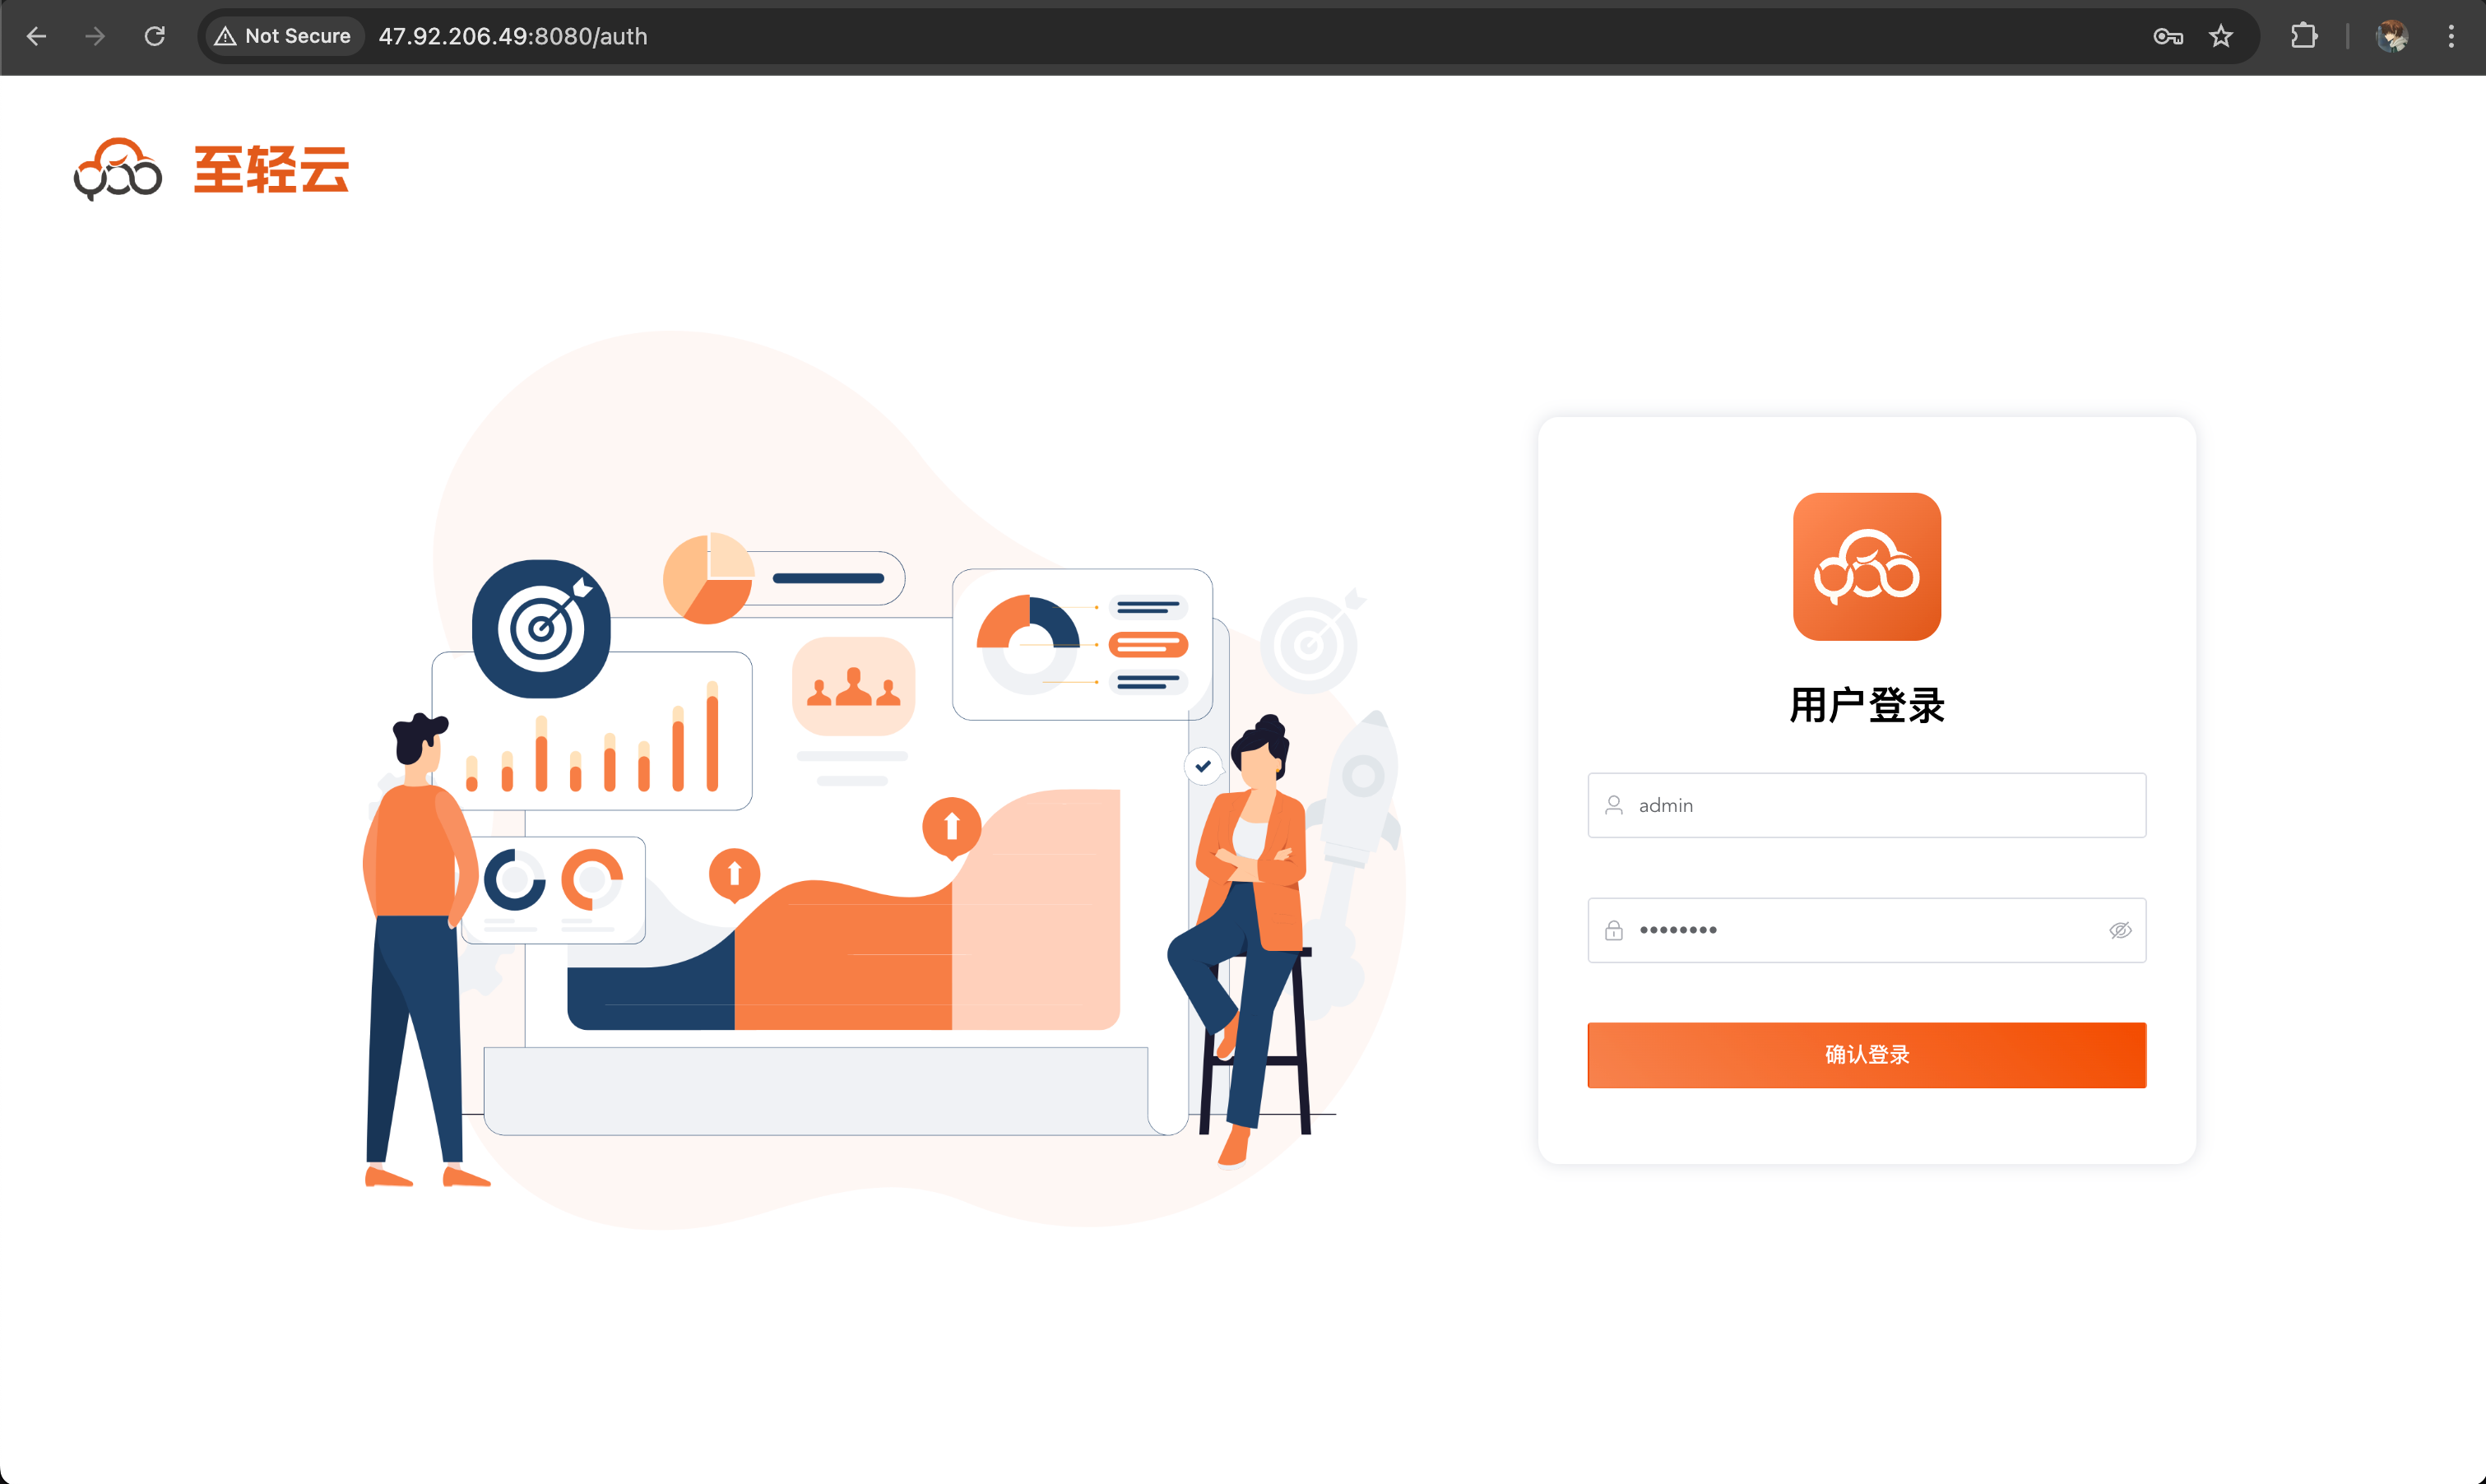
After the container is started, access the server's public network address through the browser:
- Access address:
http://47.100.8.119 - Backend administrator account:
admin - Default password:
admin123
If the server bandwidth is 1 Mbps, the first load may take about 40 seconds, please wait patiently for the page resources to load.
7. Create users and tenants
After entering the background management, create users and tenants for experiencing business functions:
- Create user:
zhiqingyun - Create a tenant:
Experience Tenant
For detailed operations of users and tenants, please refer to the product manual.
8. Upload license (optional)
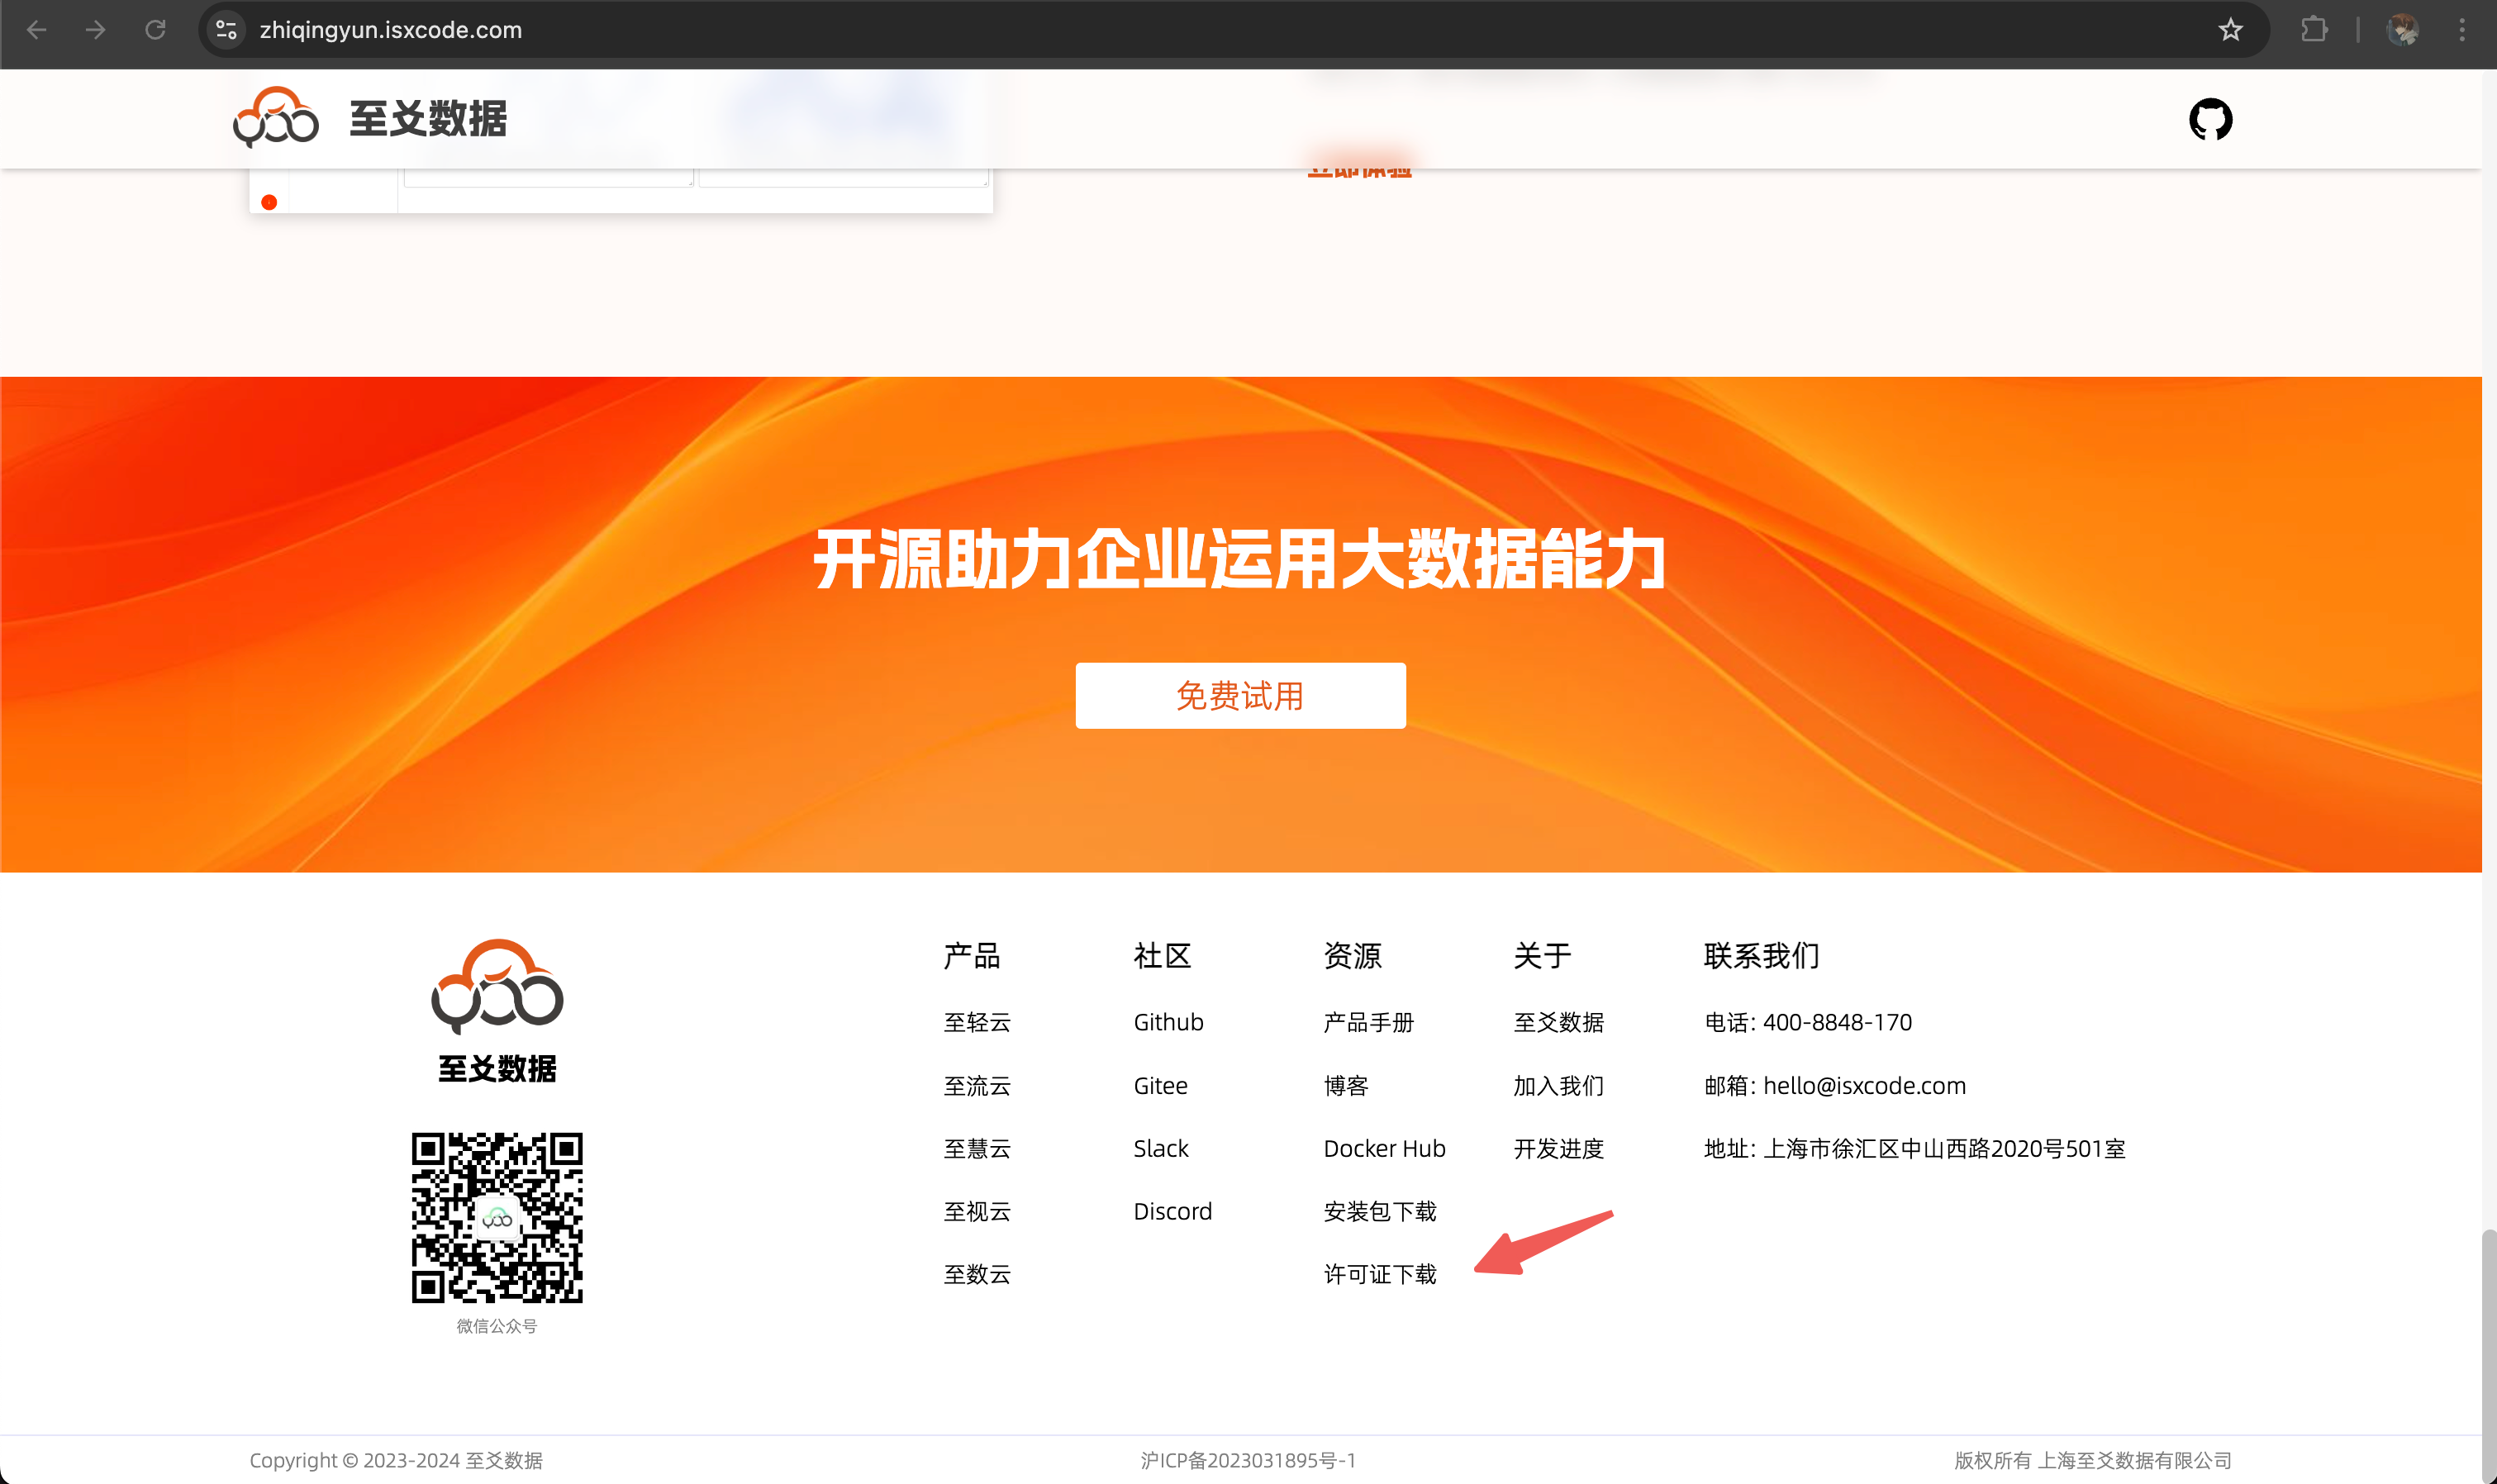
If you only want to experience basic functions, you can skip the license upload. If you want to experience commercial functions, you can obtain a free trial license at the bottom of the official website.
Trial version license download address:
https://zhiqingyun-saas.isxcode.com/tools/open/file/license.lic
9. Add a computing cluster
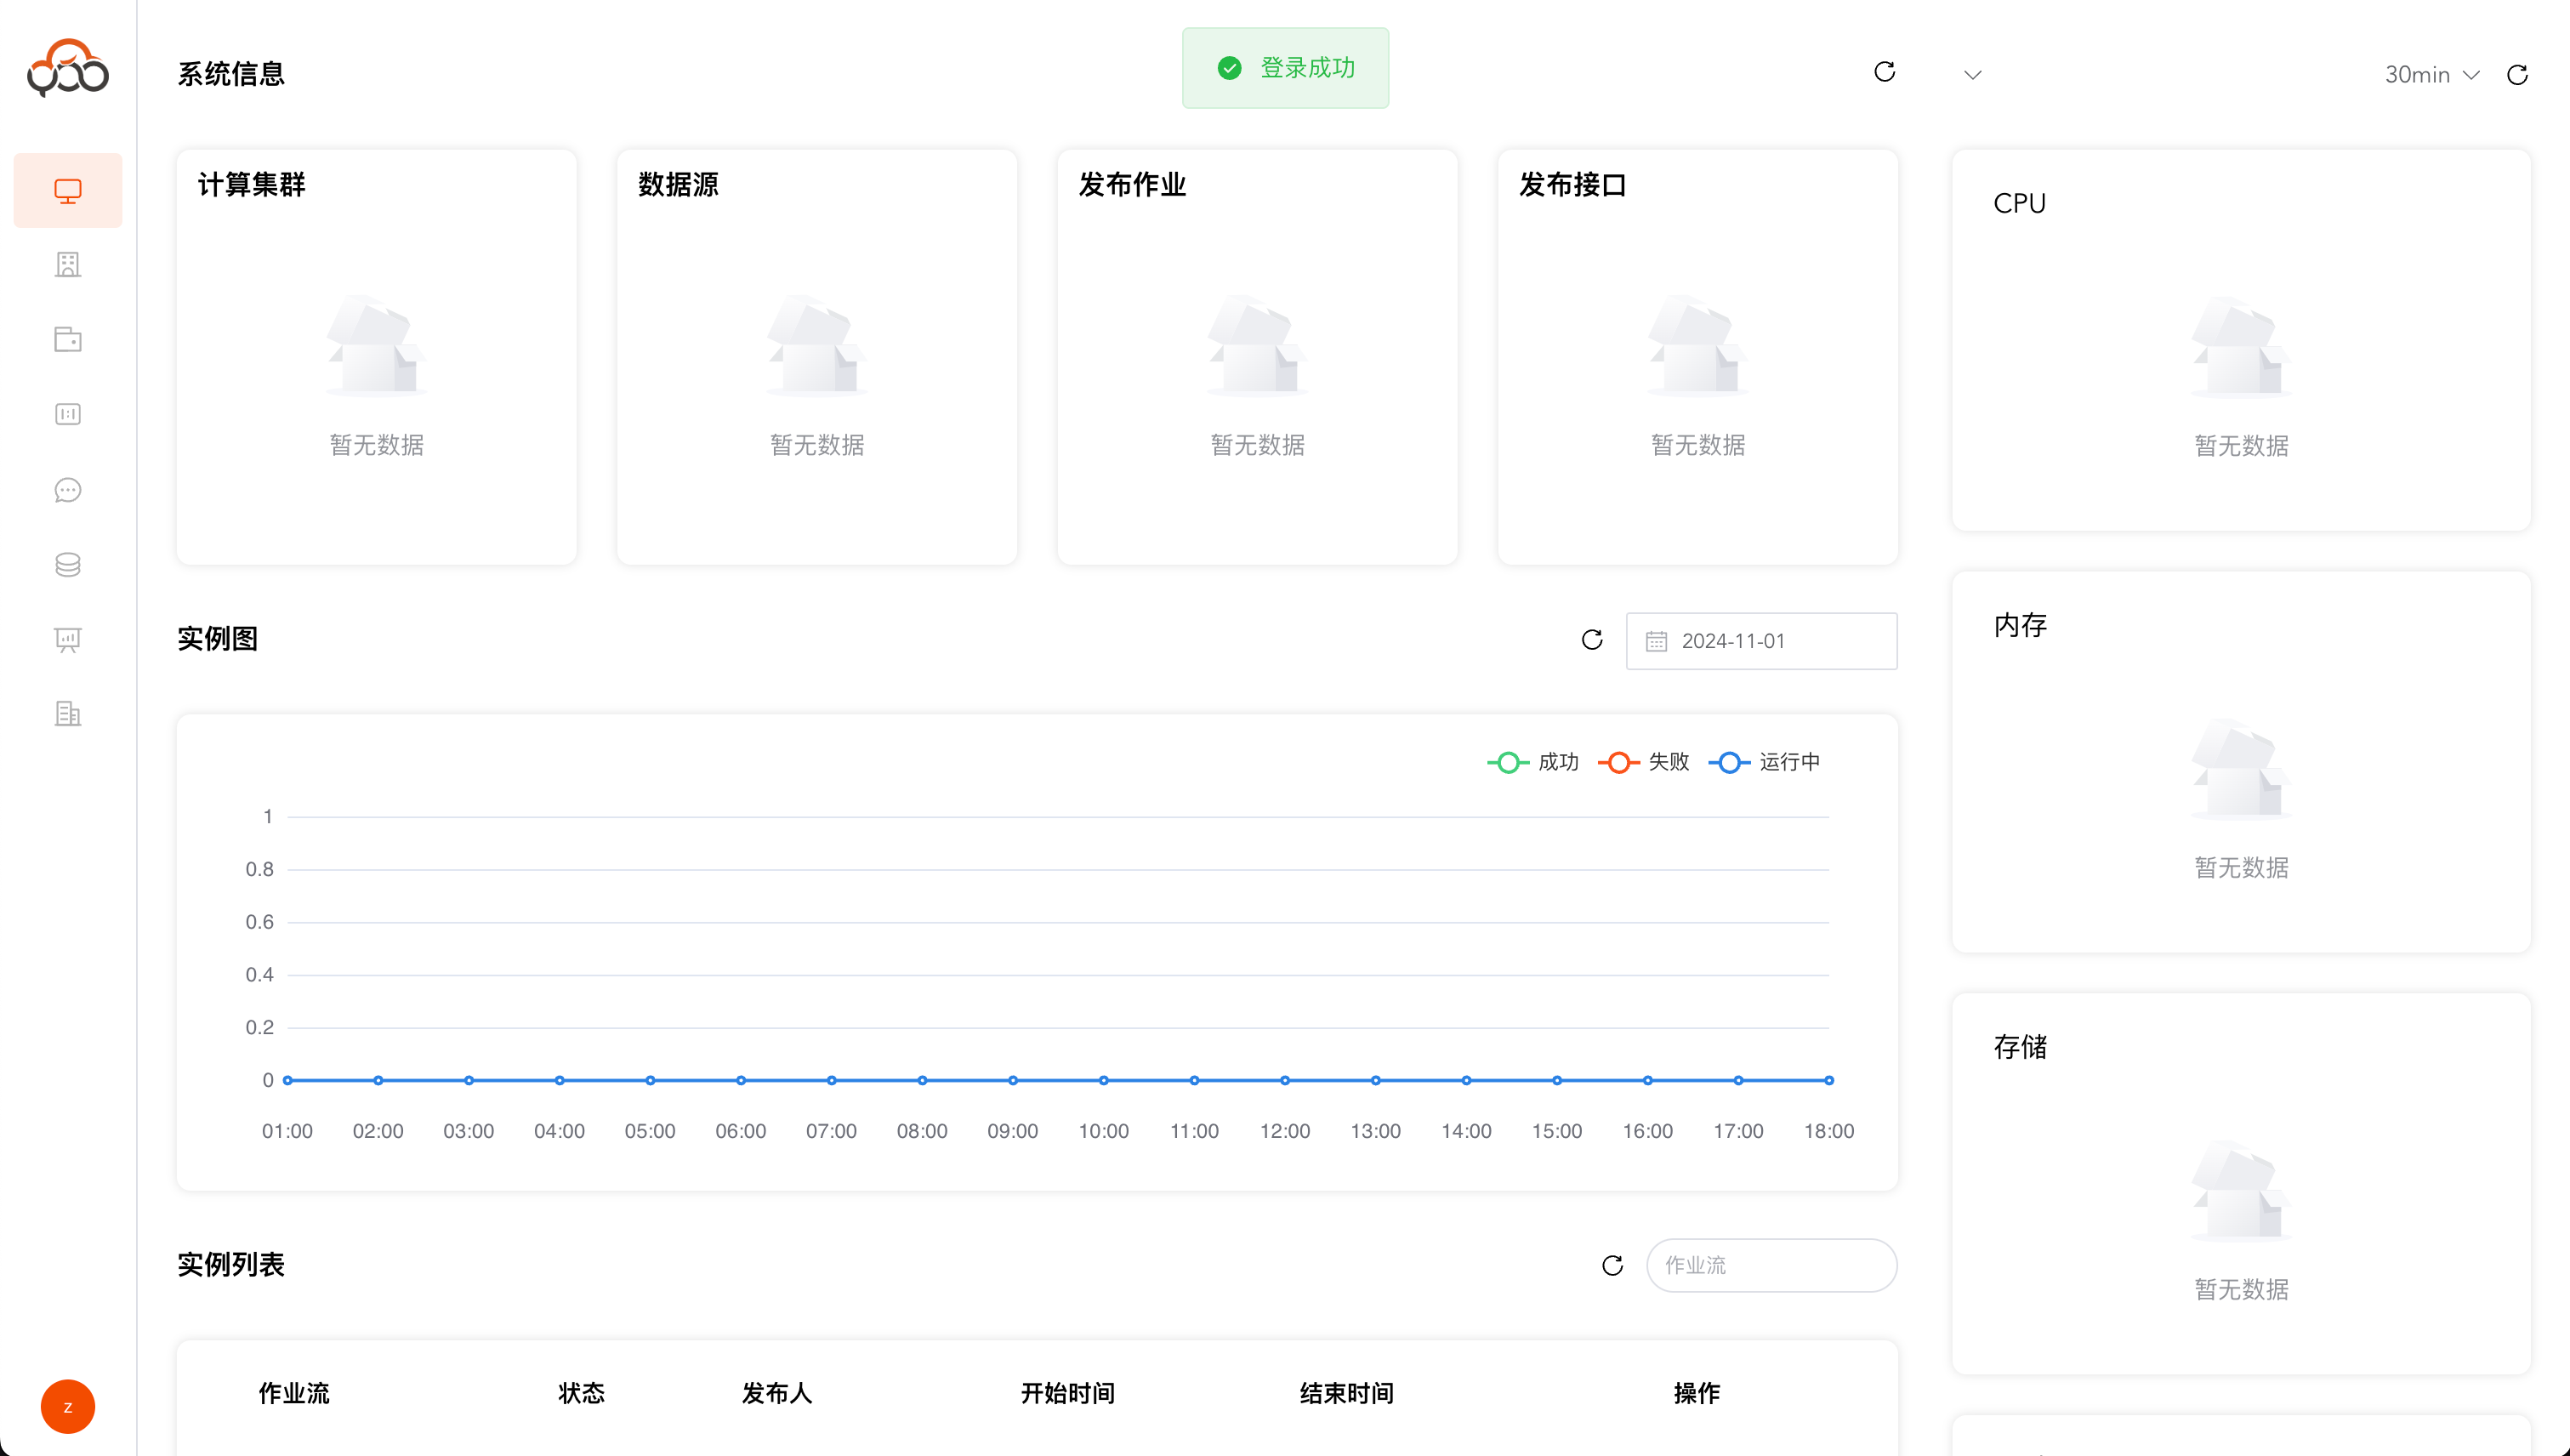
Exit the backend management interface and log in to the platform using the zhiqingyun account.

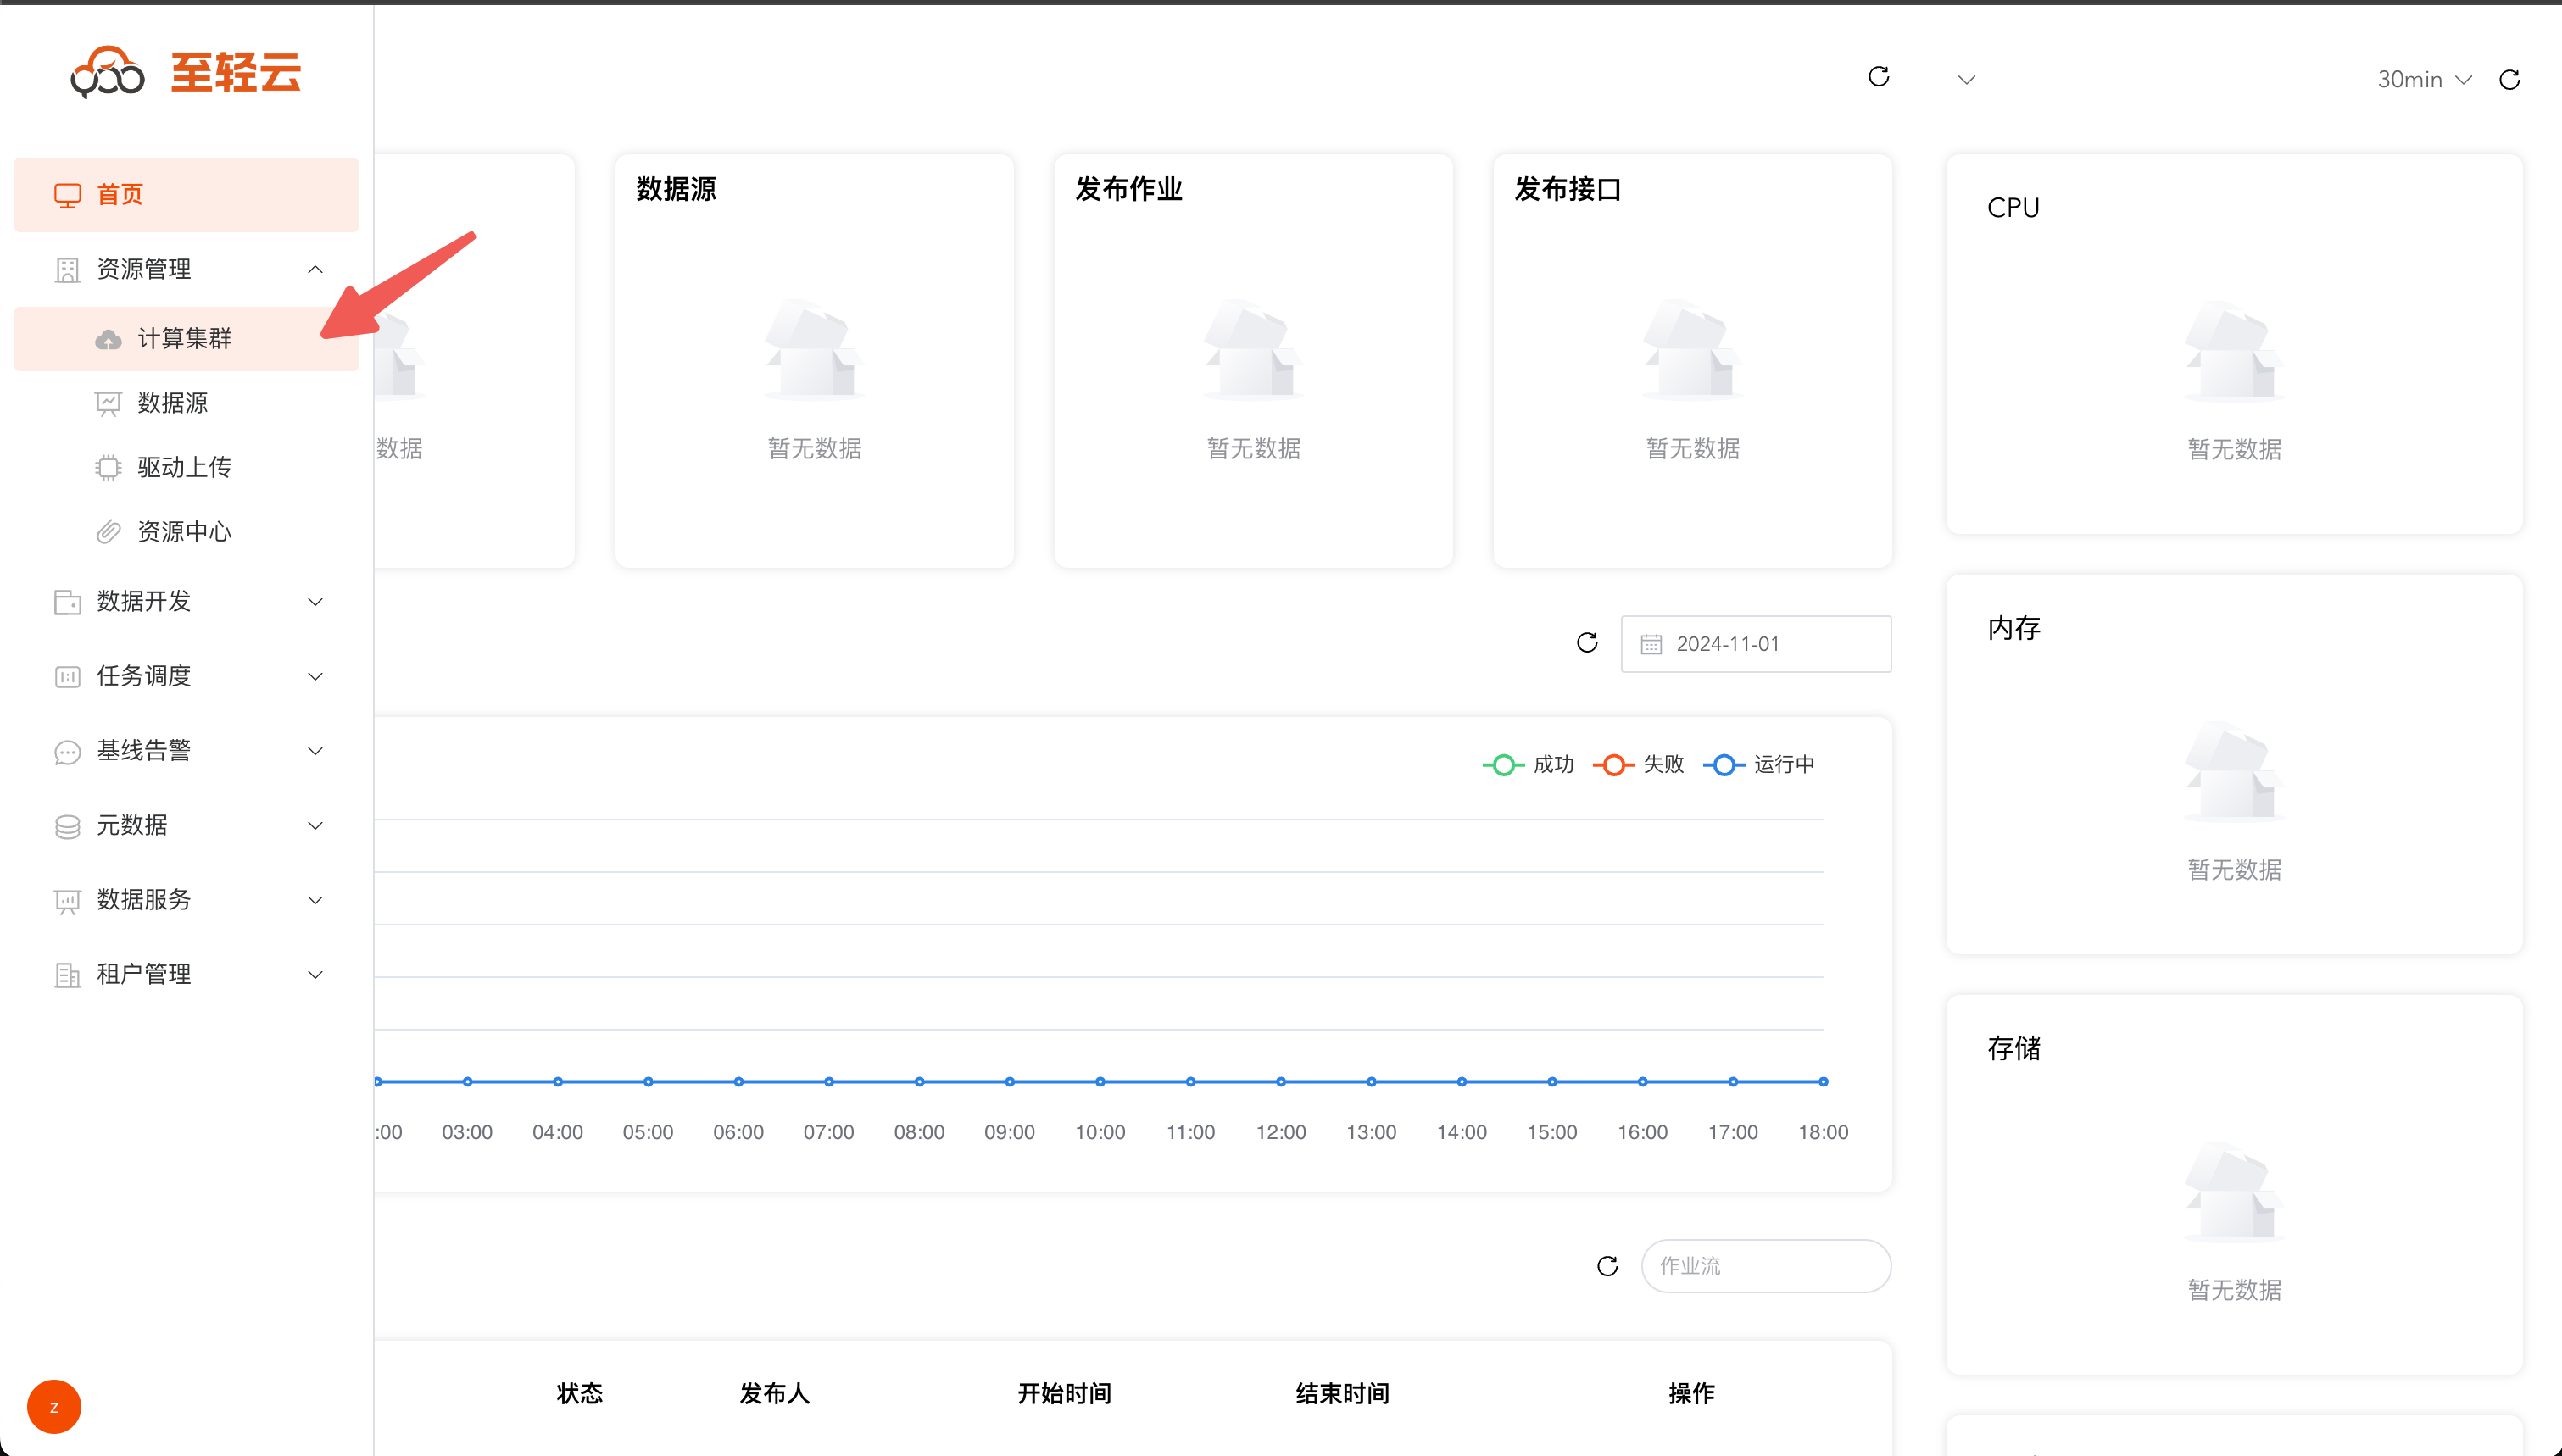
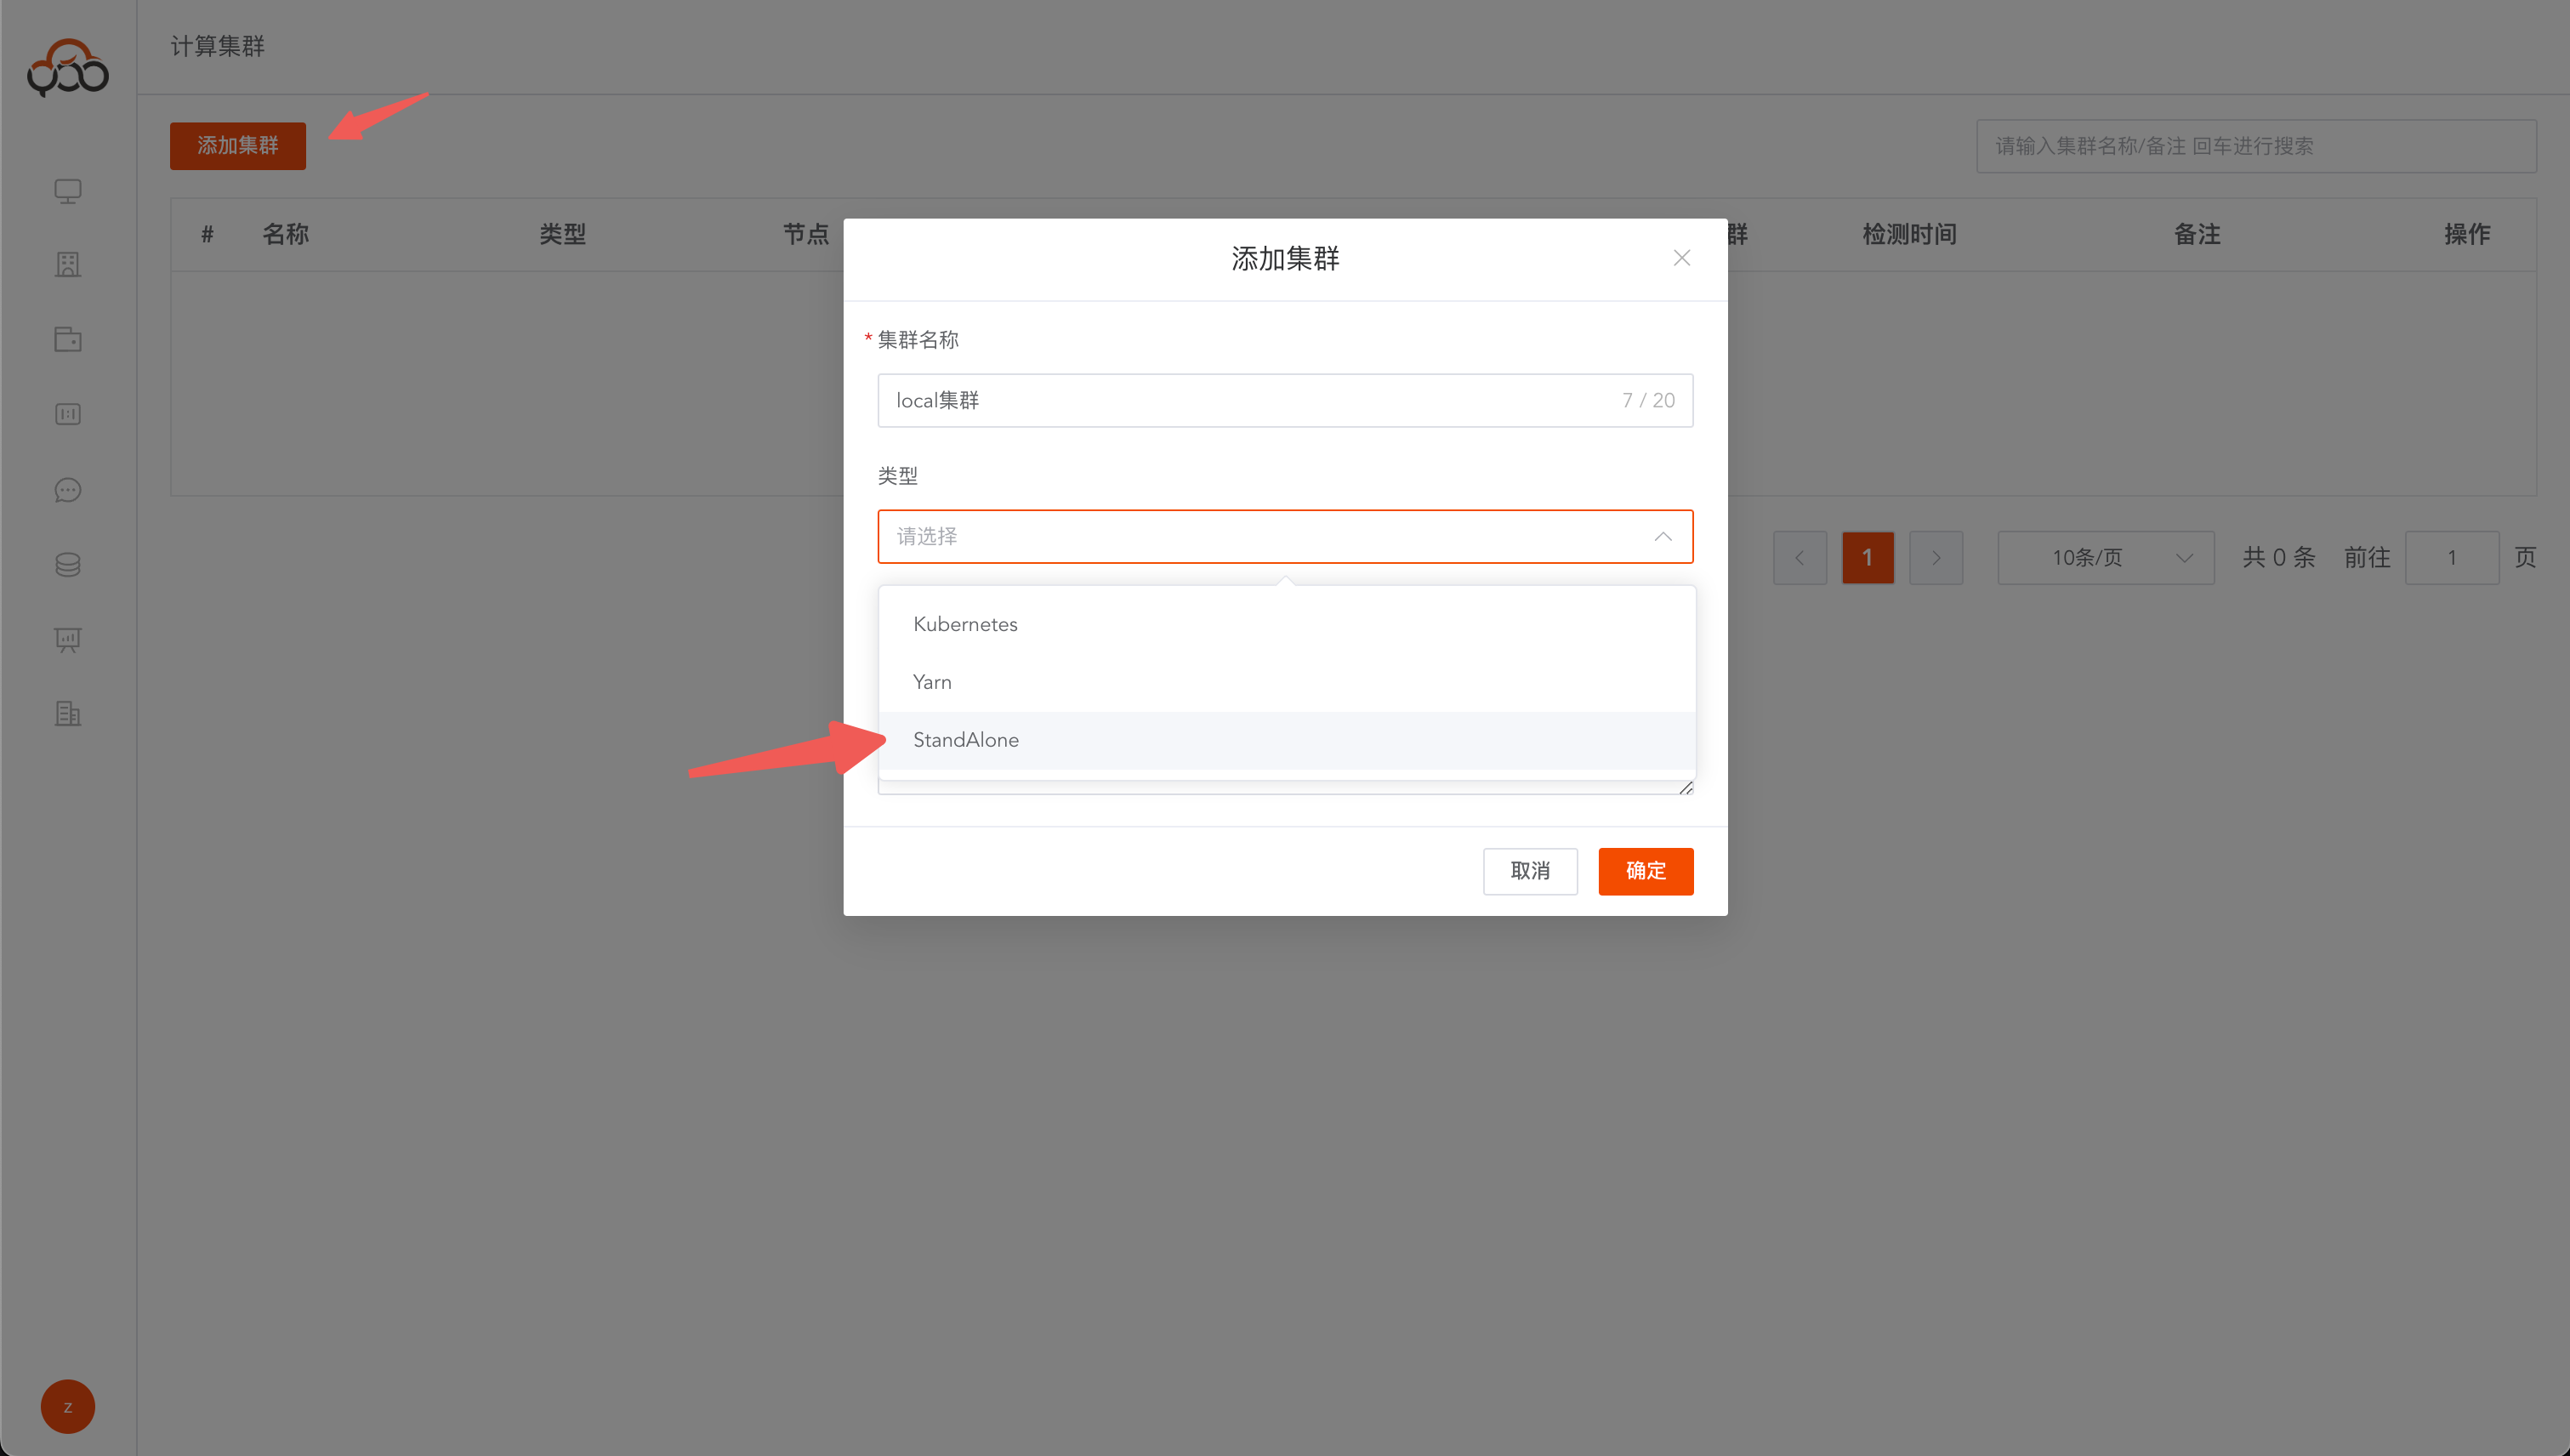
Select StandAlone as the cluster type.
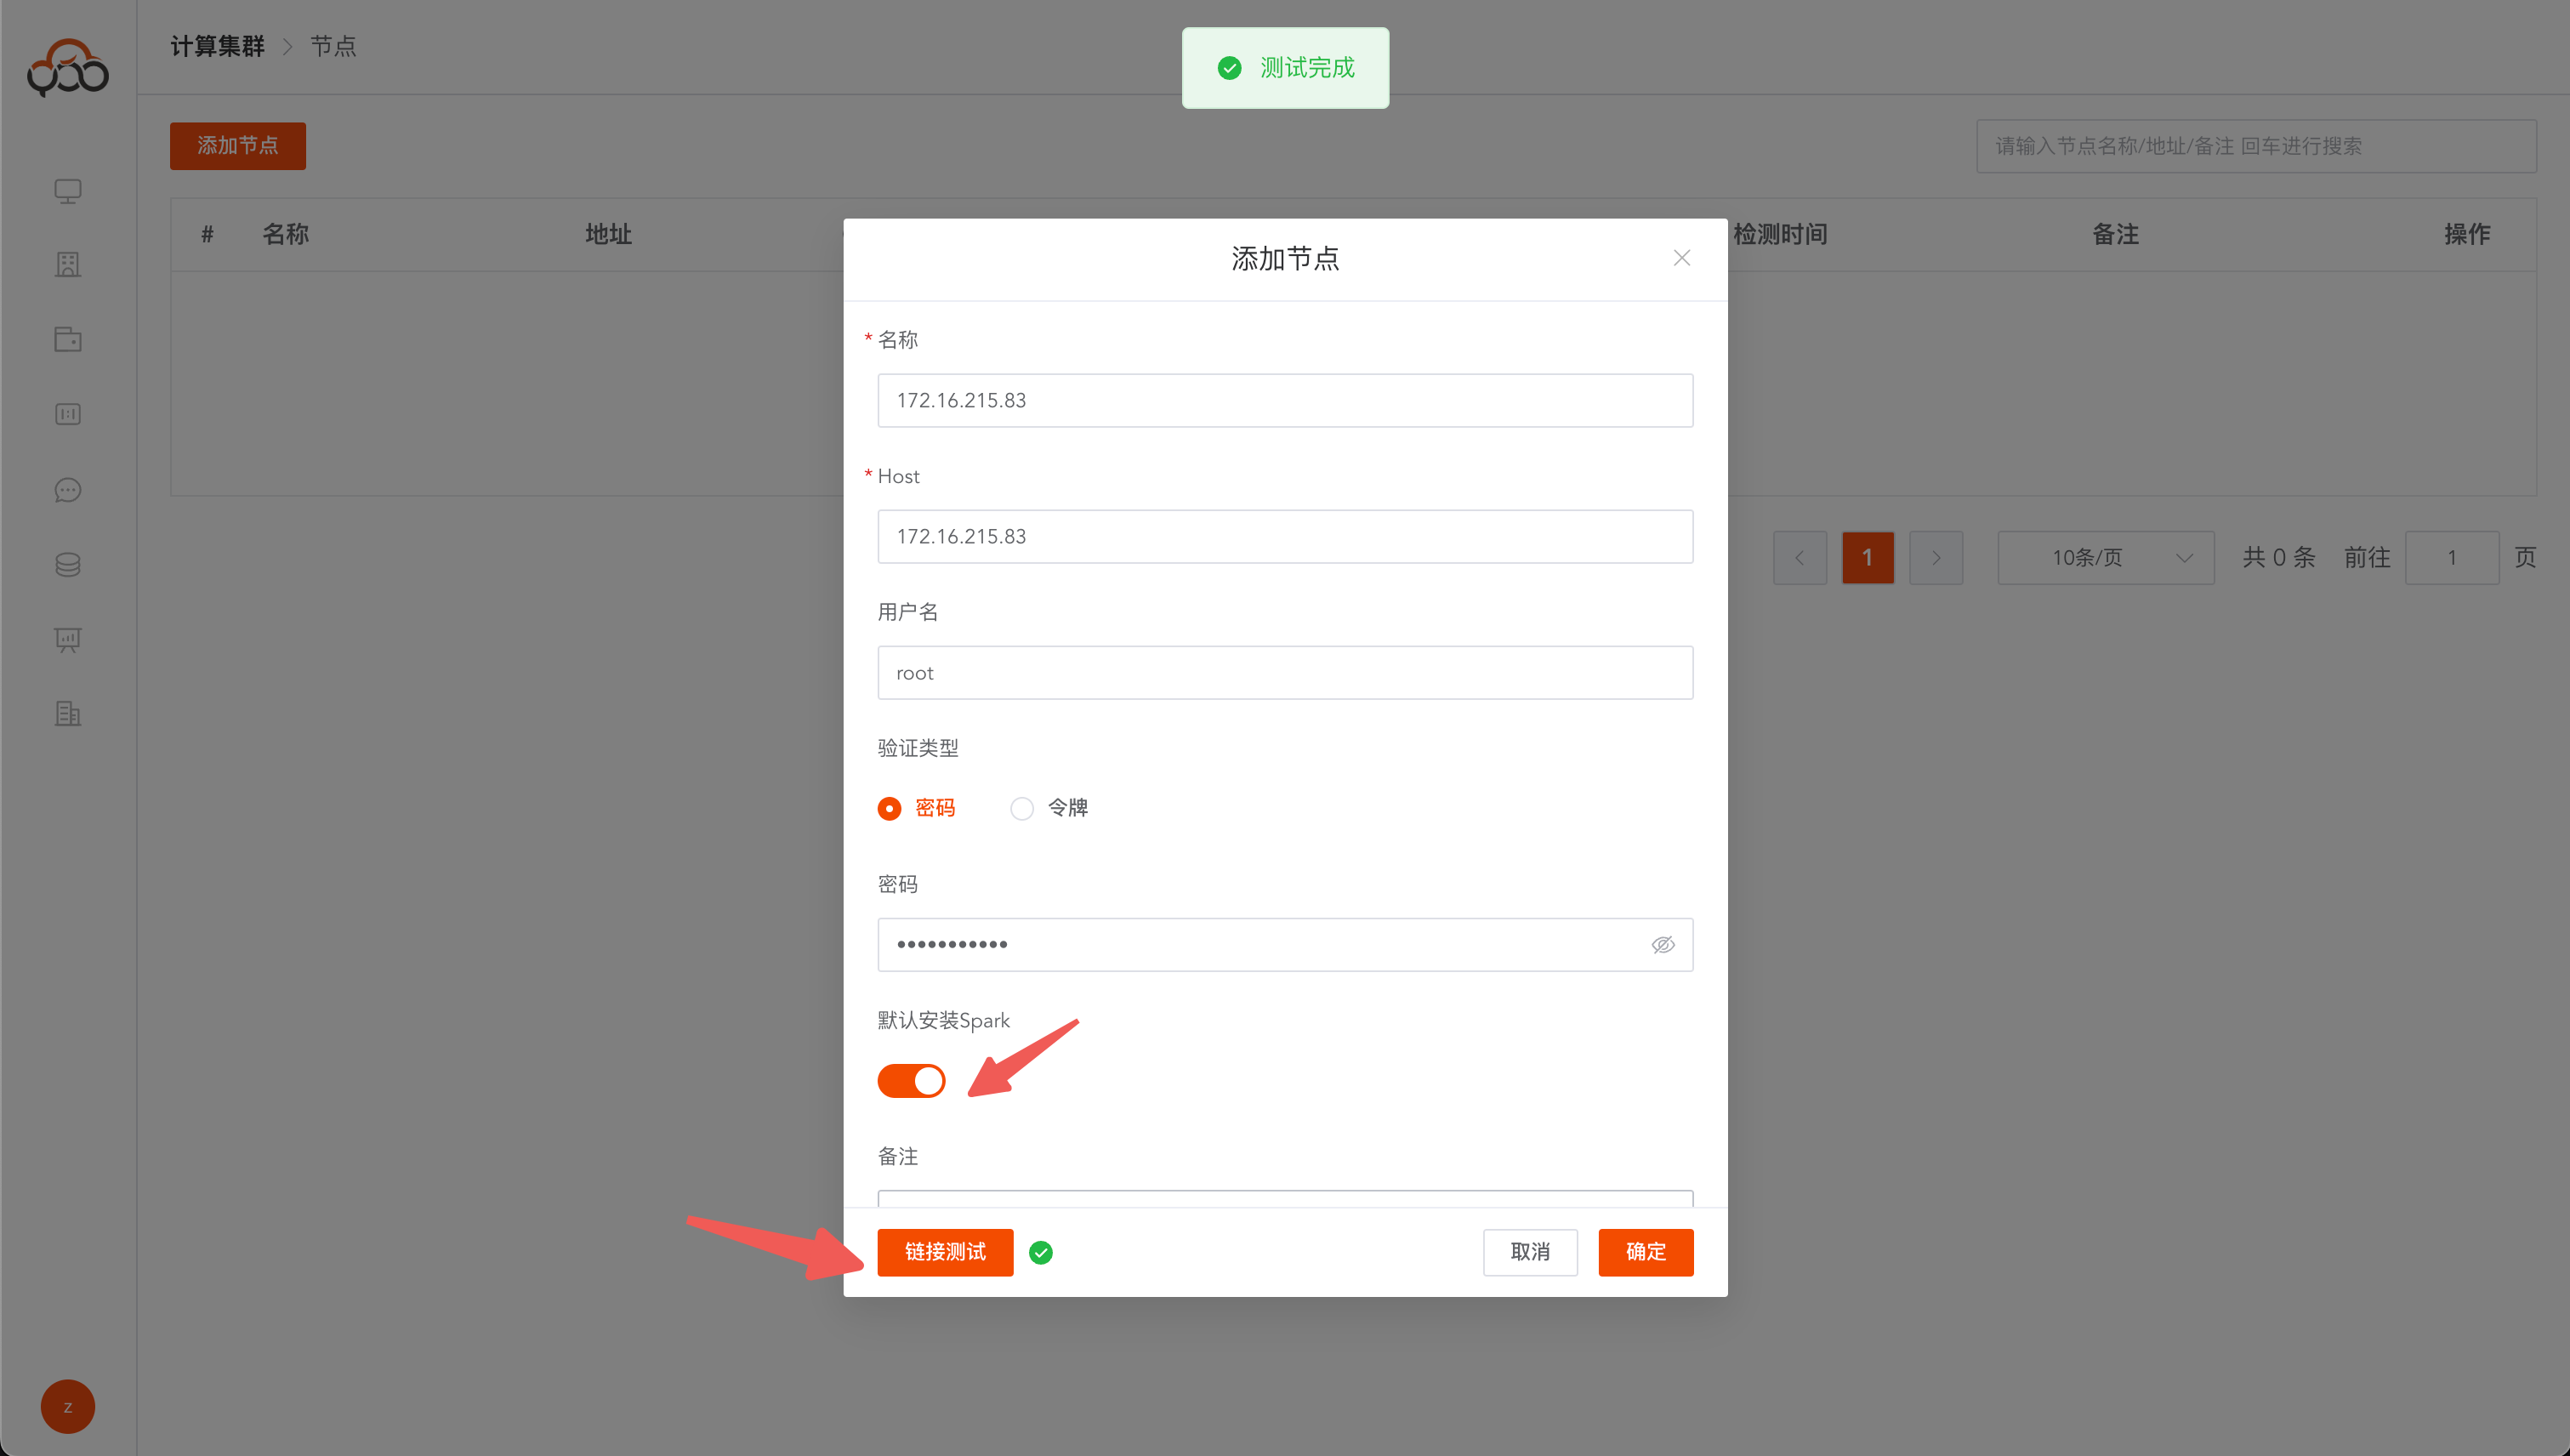
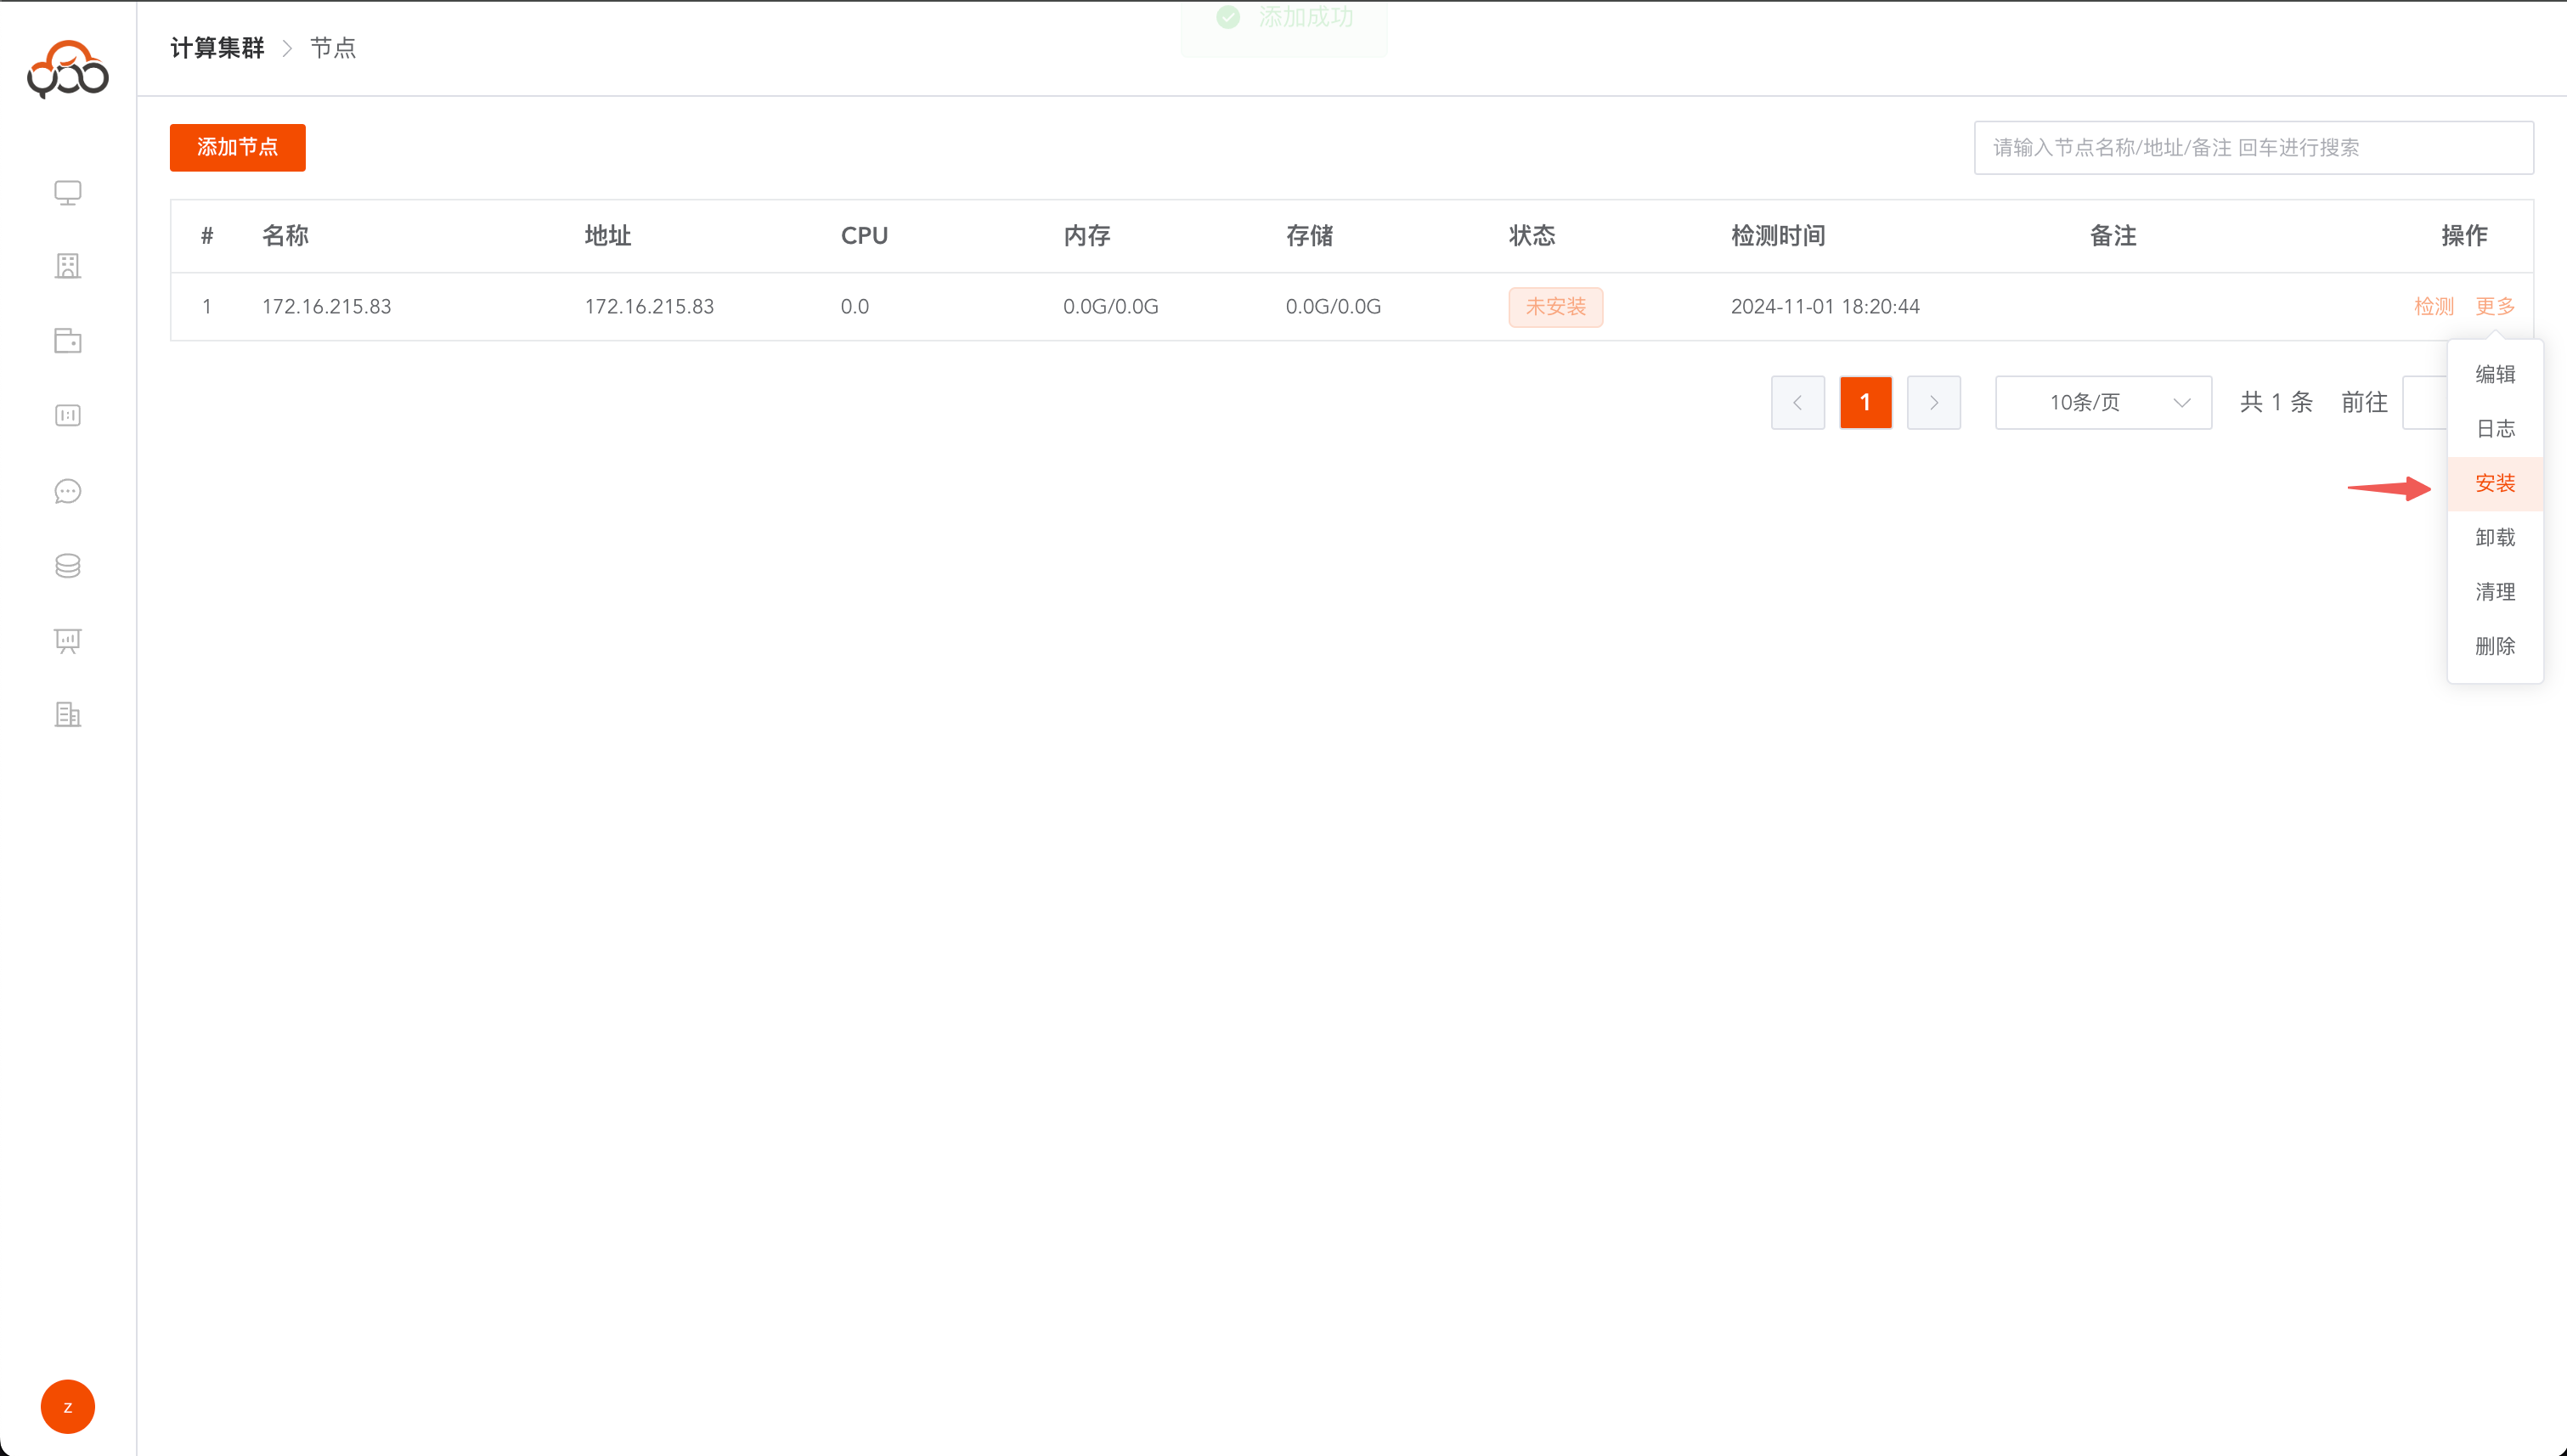
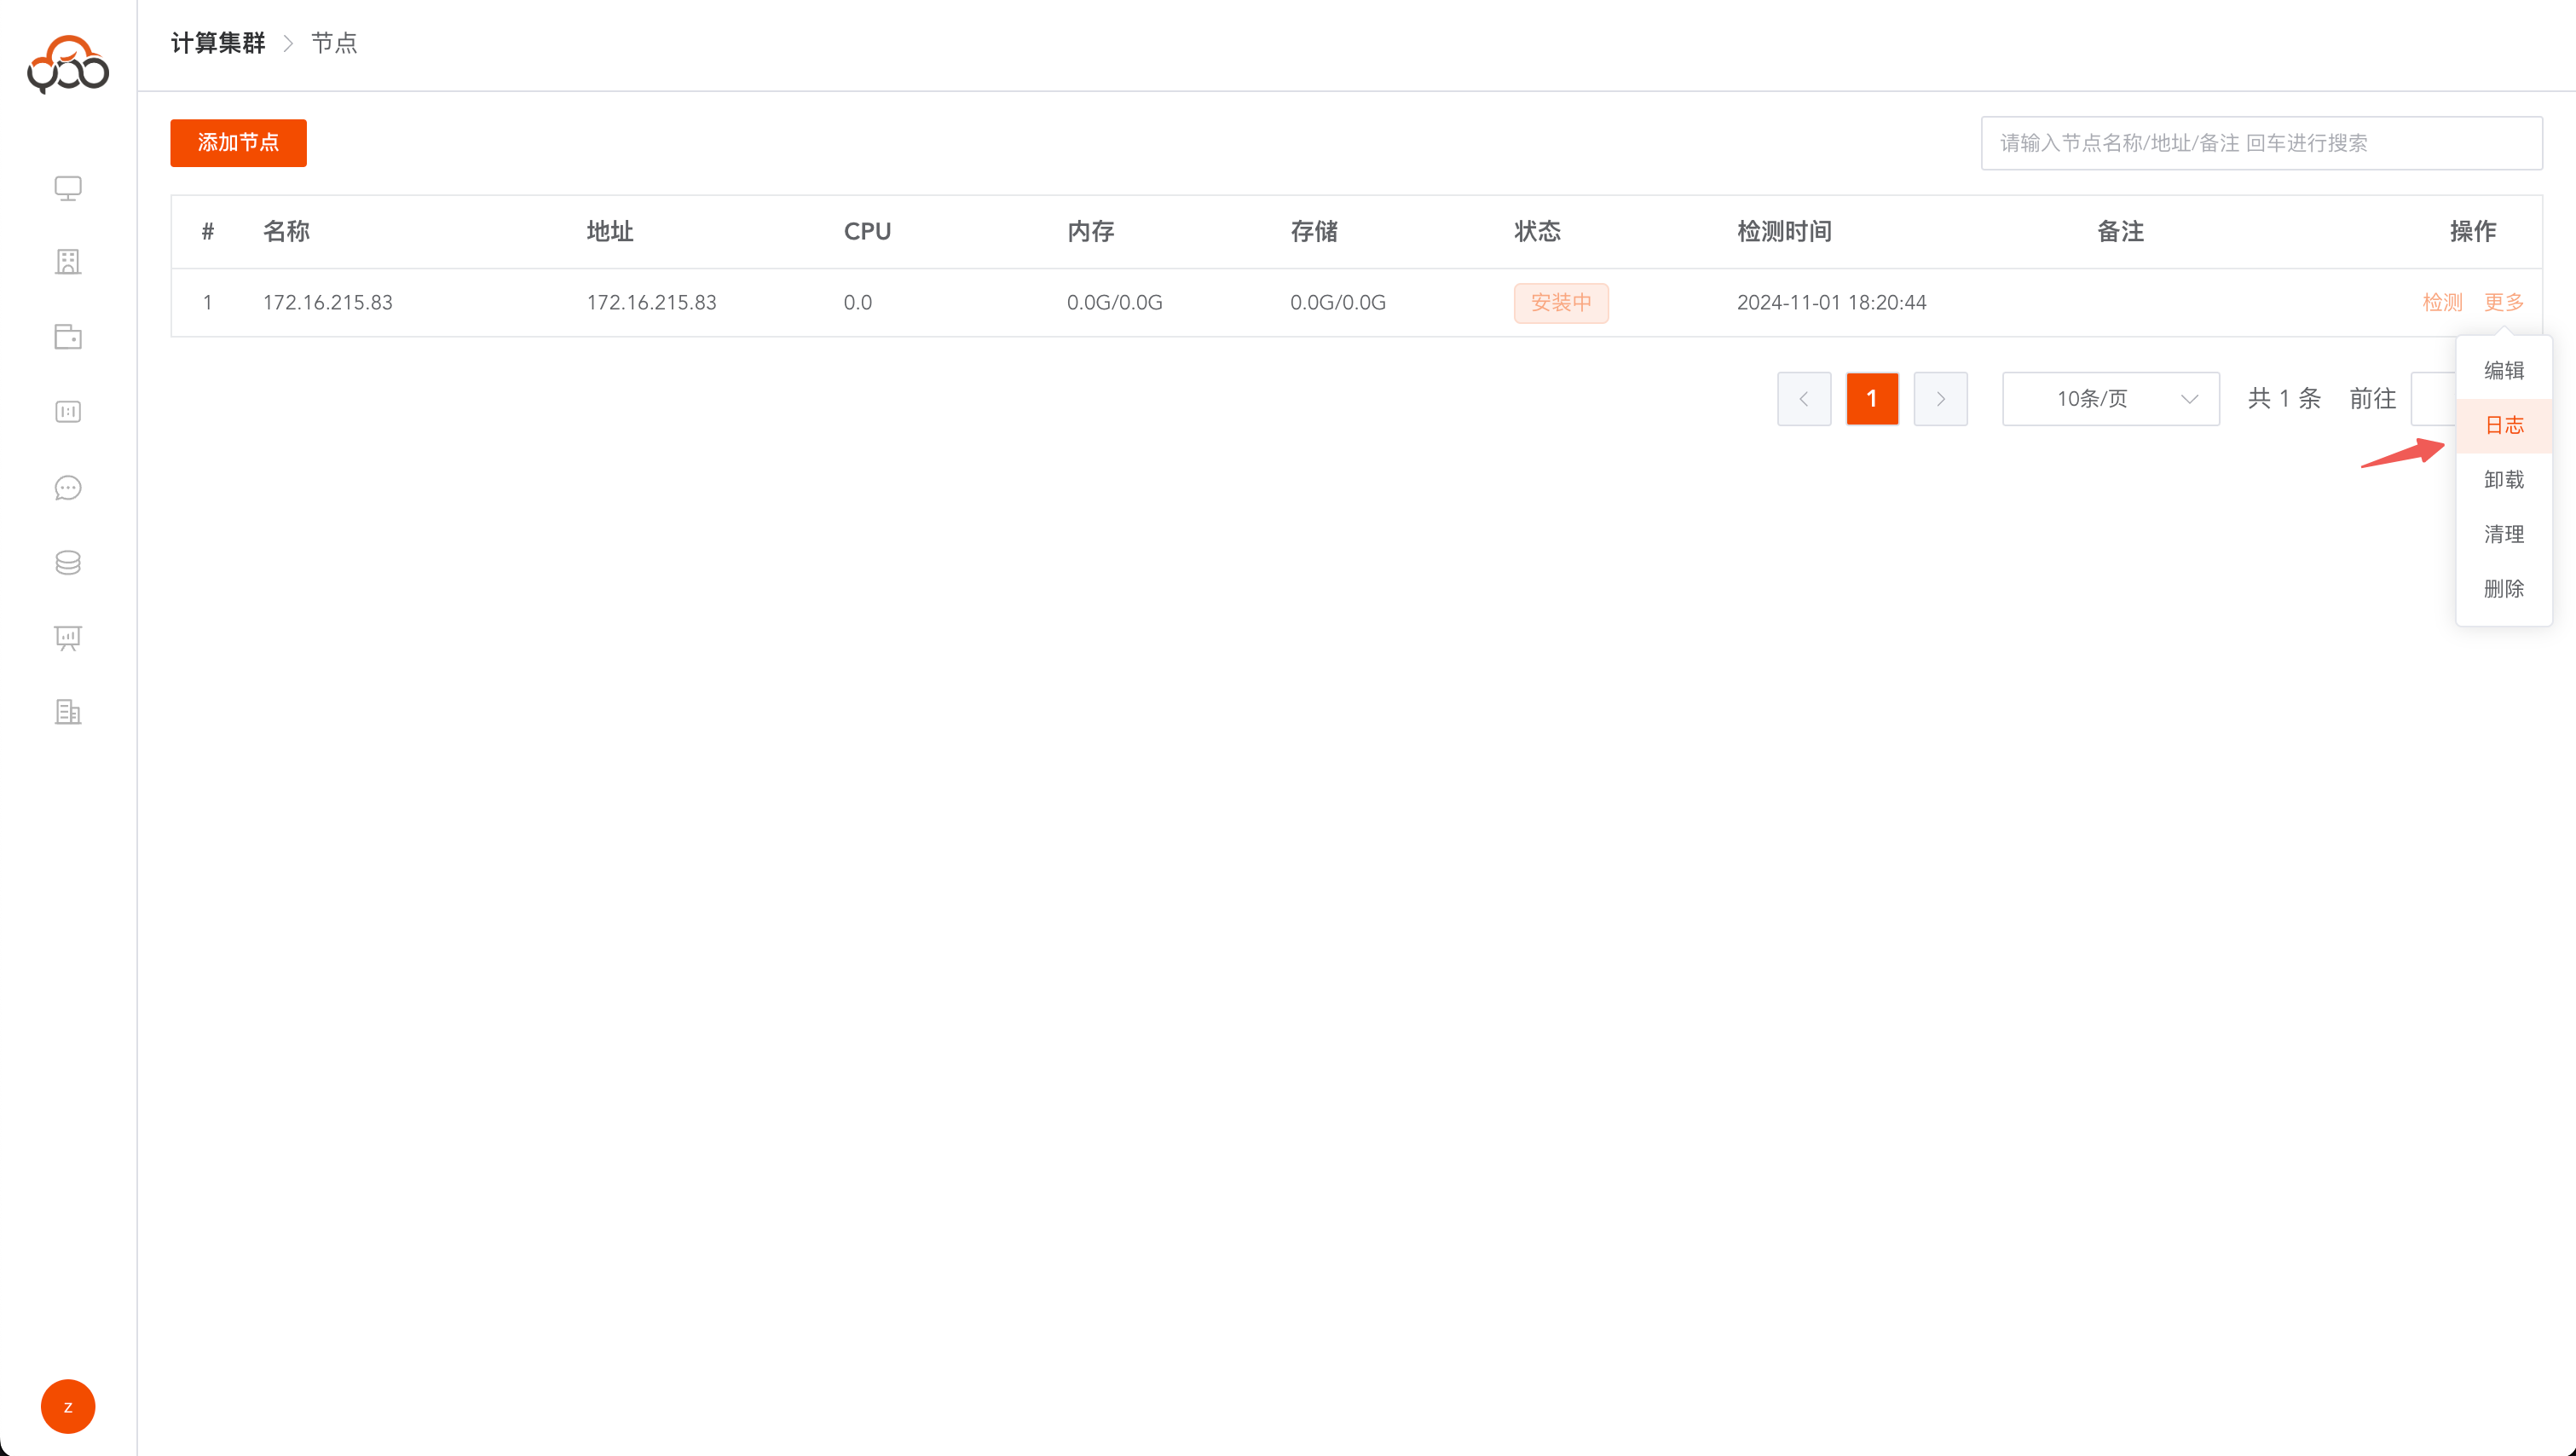
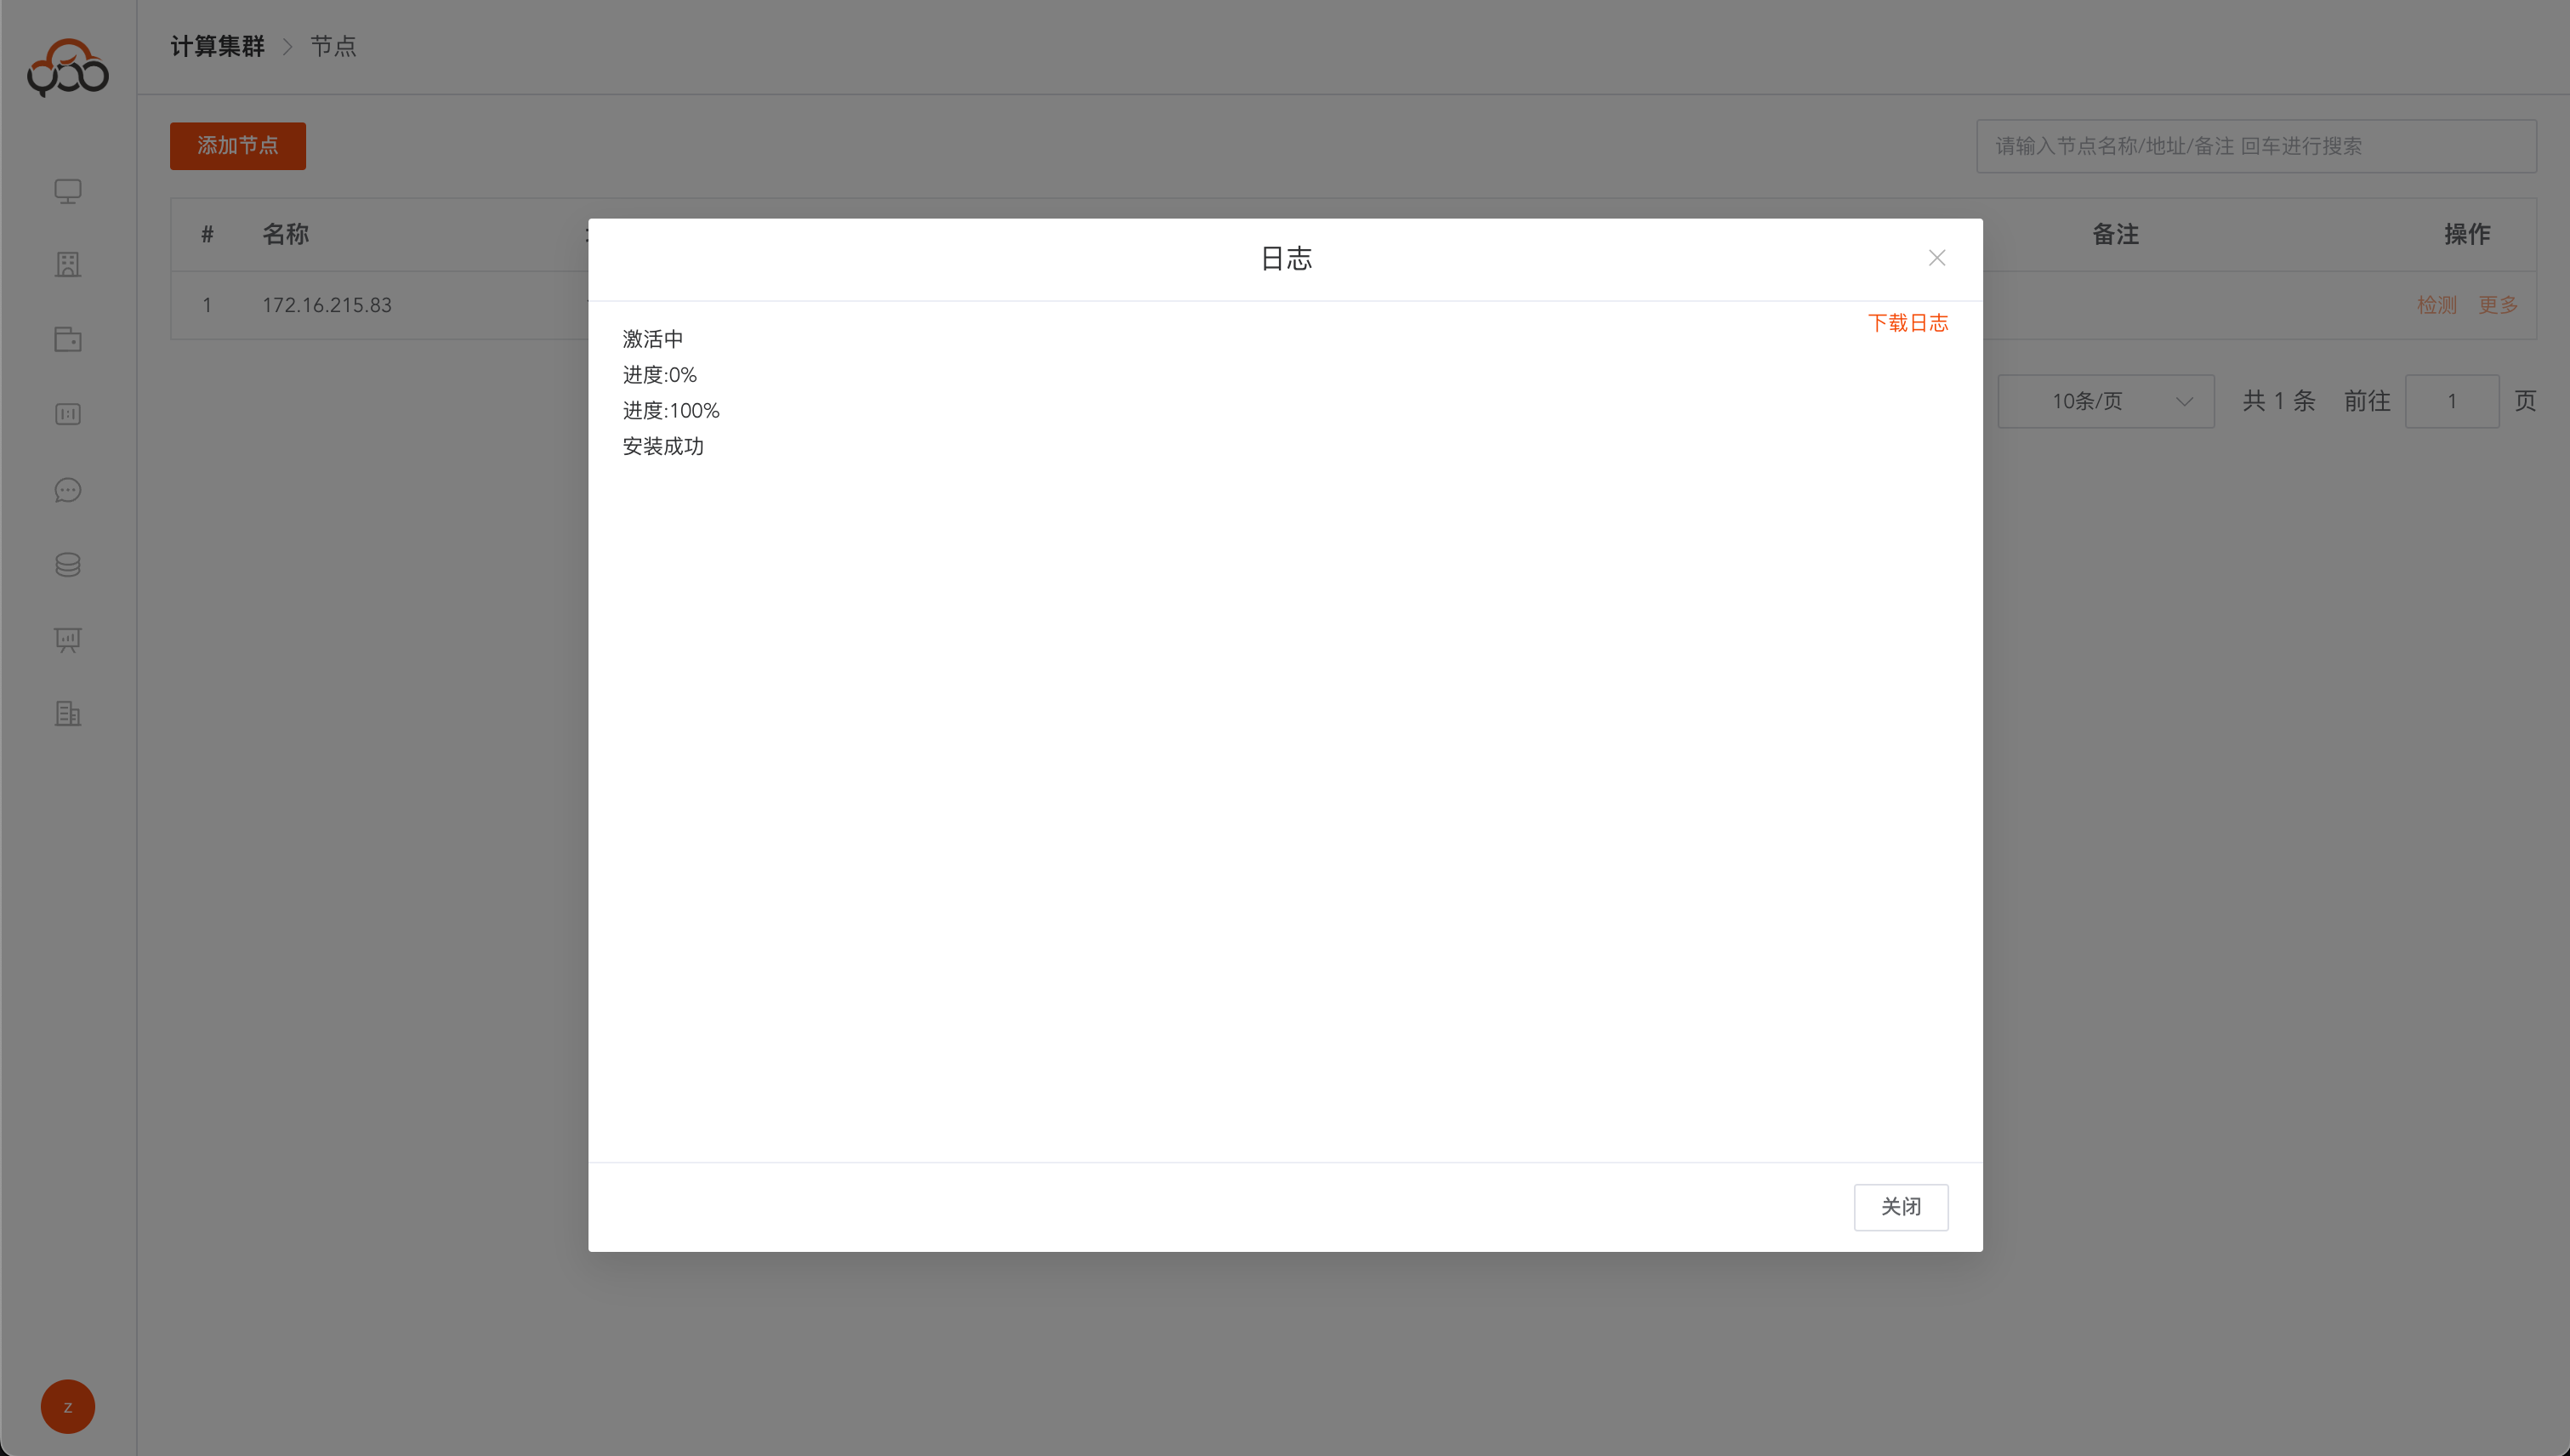
Click the cluster name to enter the cluster details and add server nodes.
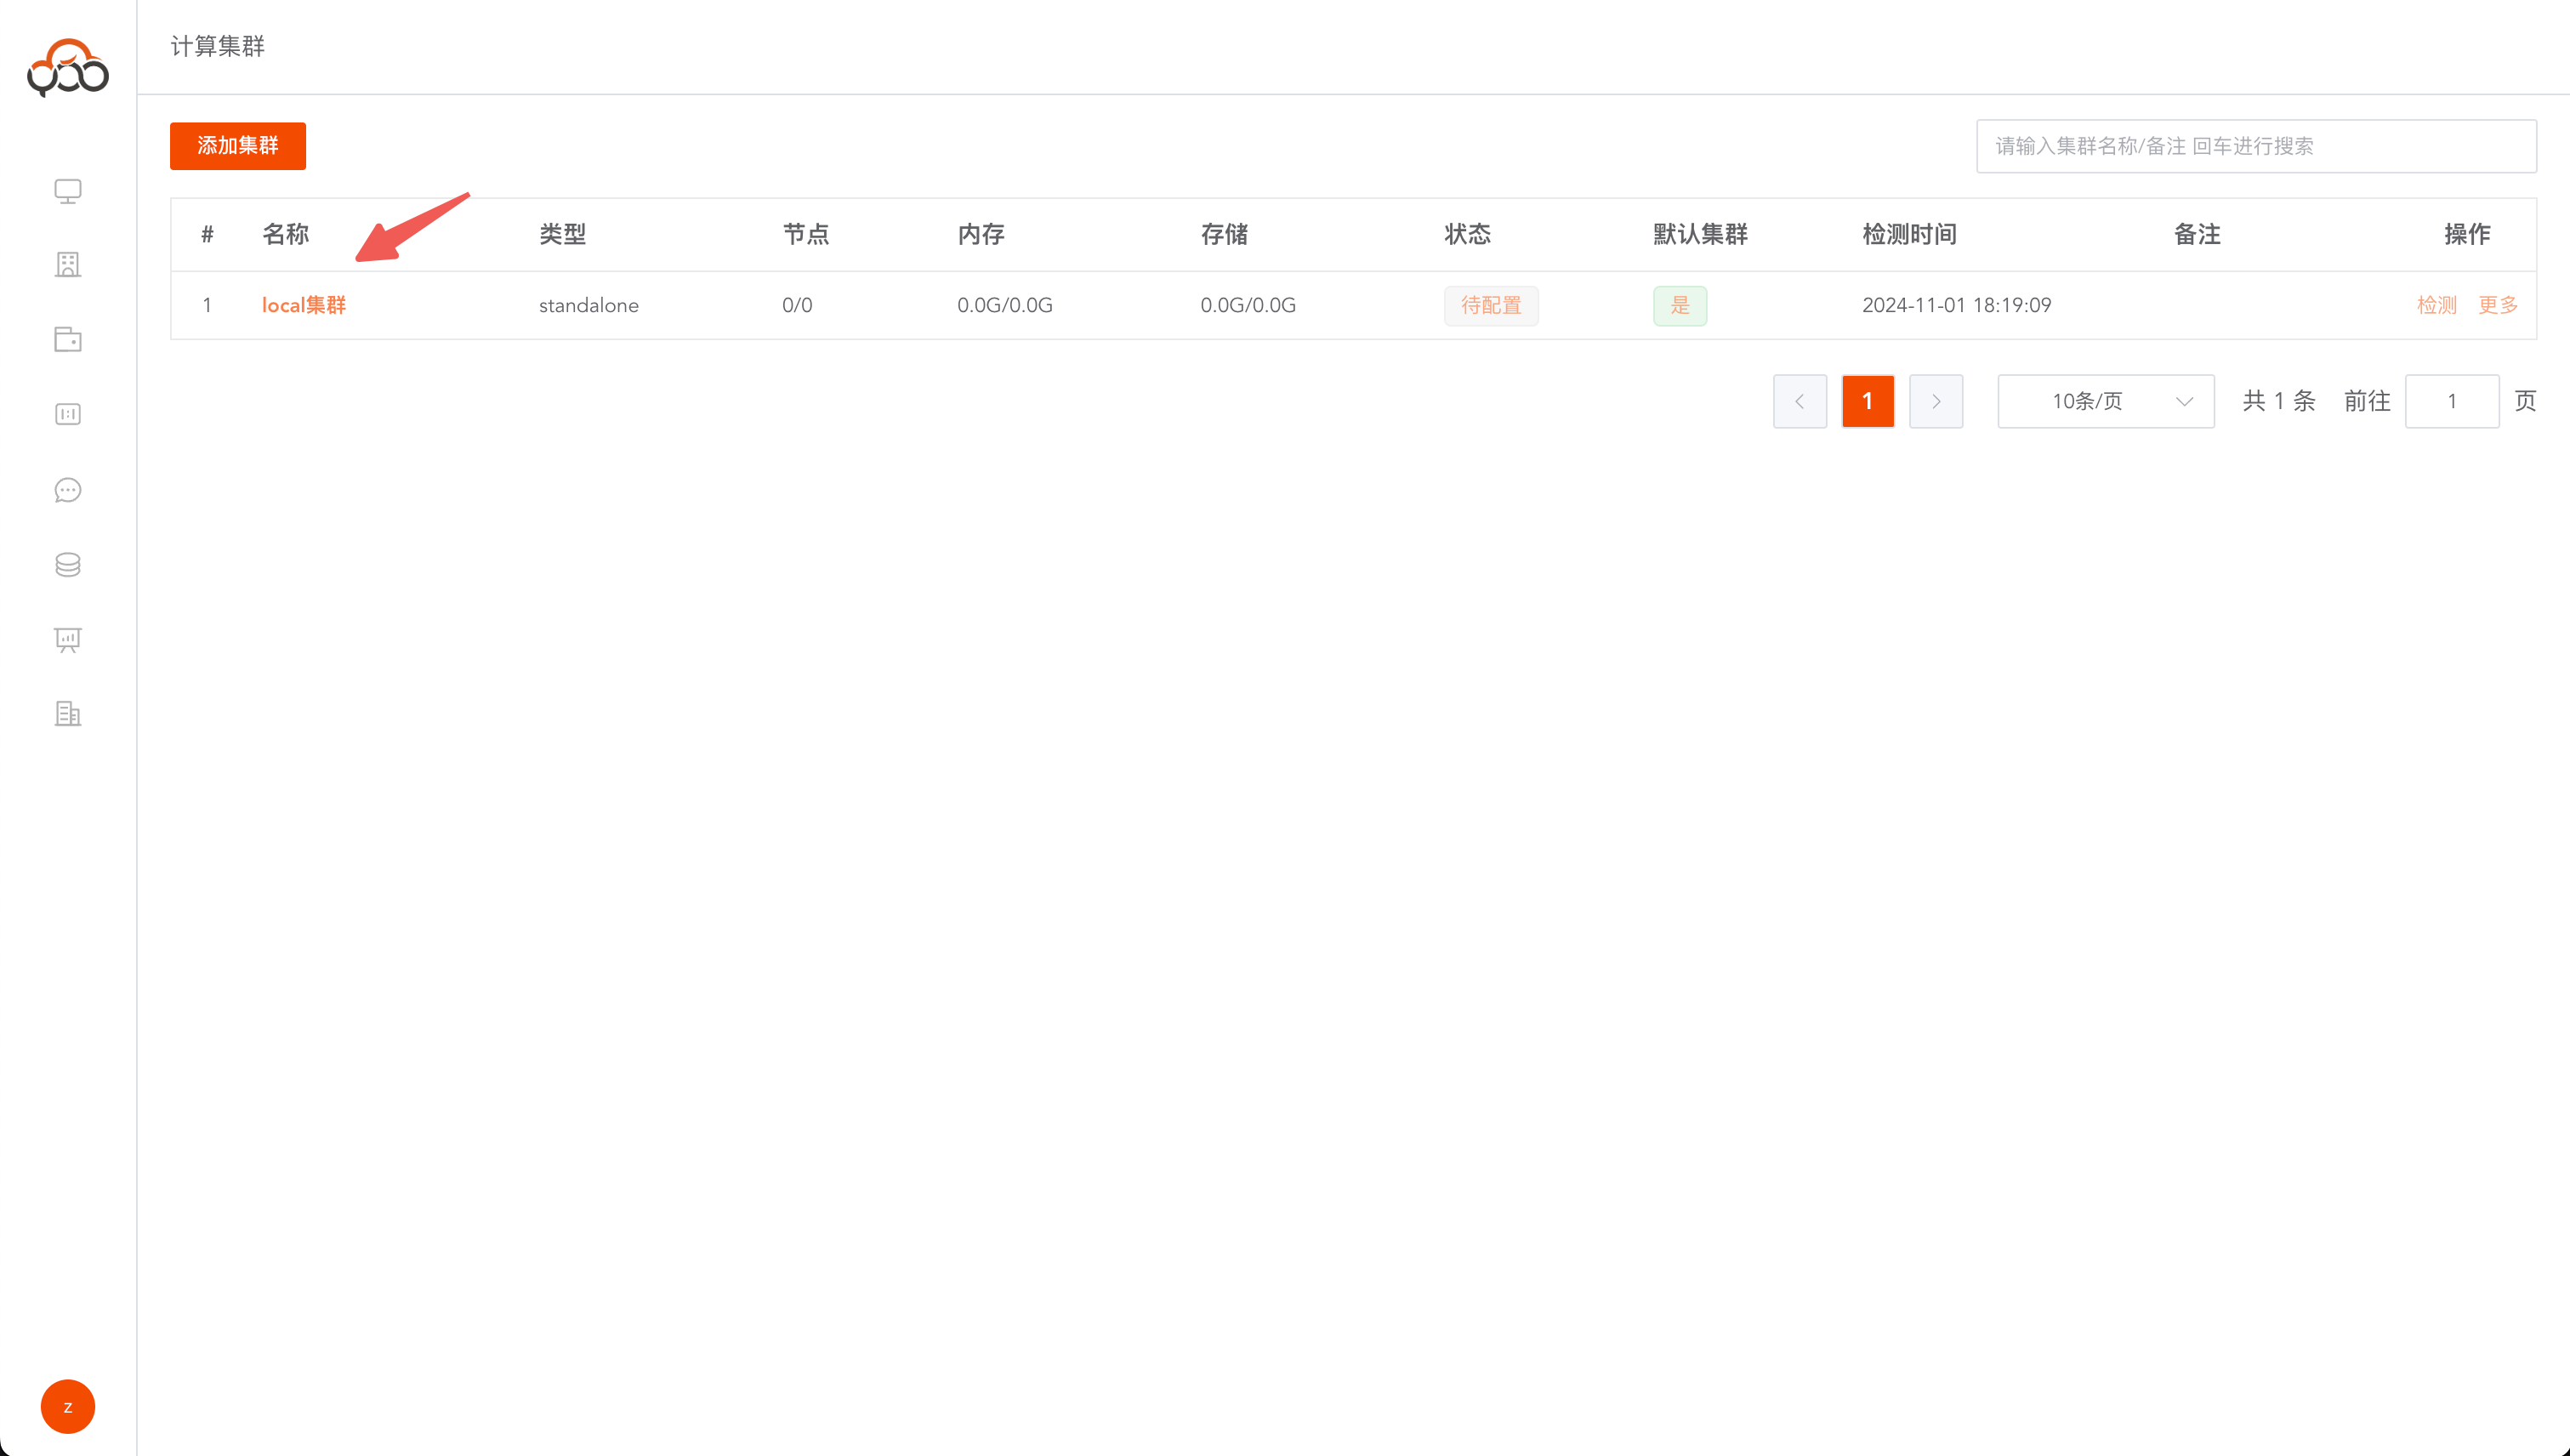
An example node configuration is as follows:
| Configuration items | Example value |
|---|---|
| Host | 172.19.73.181 |
| Username | root |
| Password | Zhiqingyun123.. |
| Install Spark | Check |
| Install Flink | Check |
It is recommended to use the server's internal IP when adding nodes to avoid public network fluctuations affecting component deployment and job running.
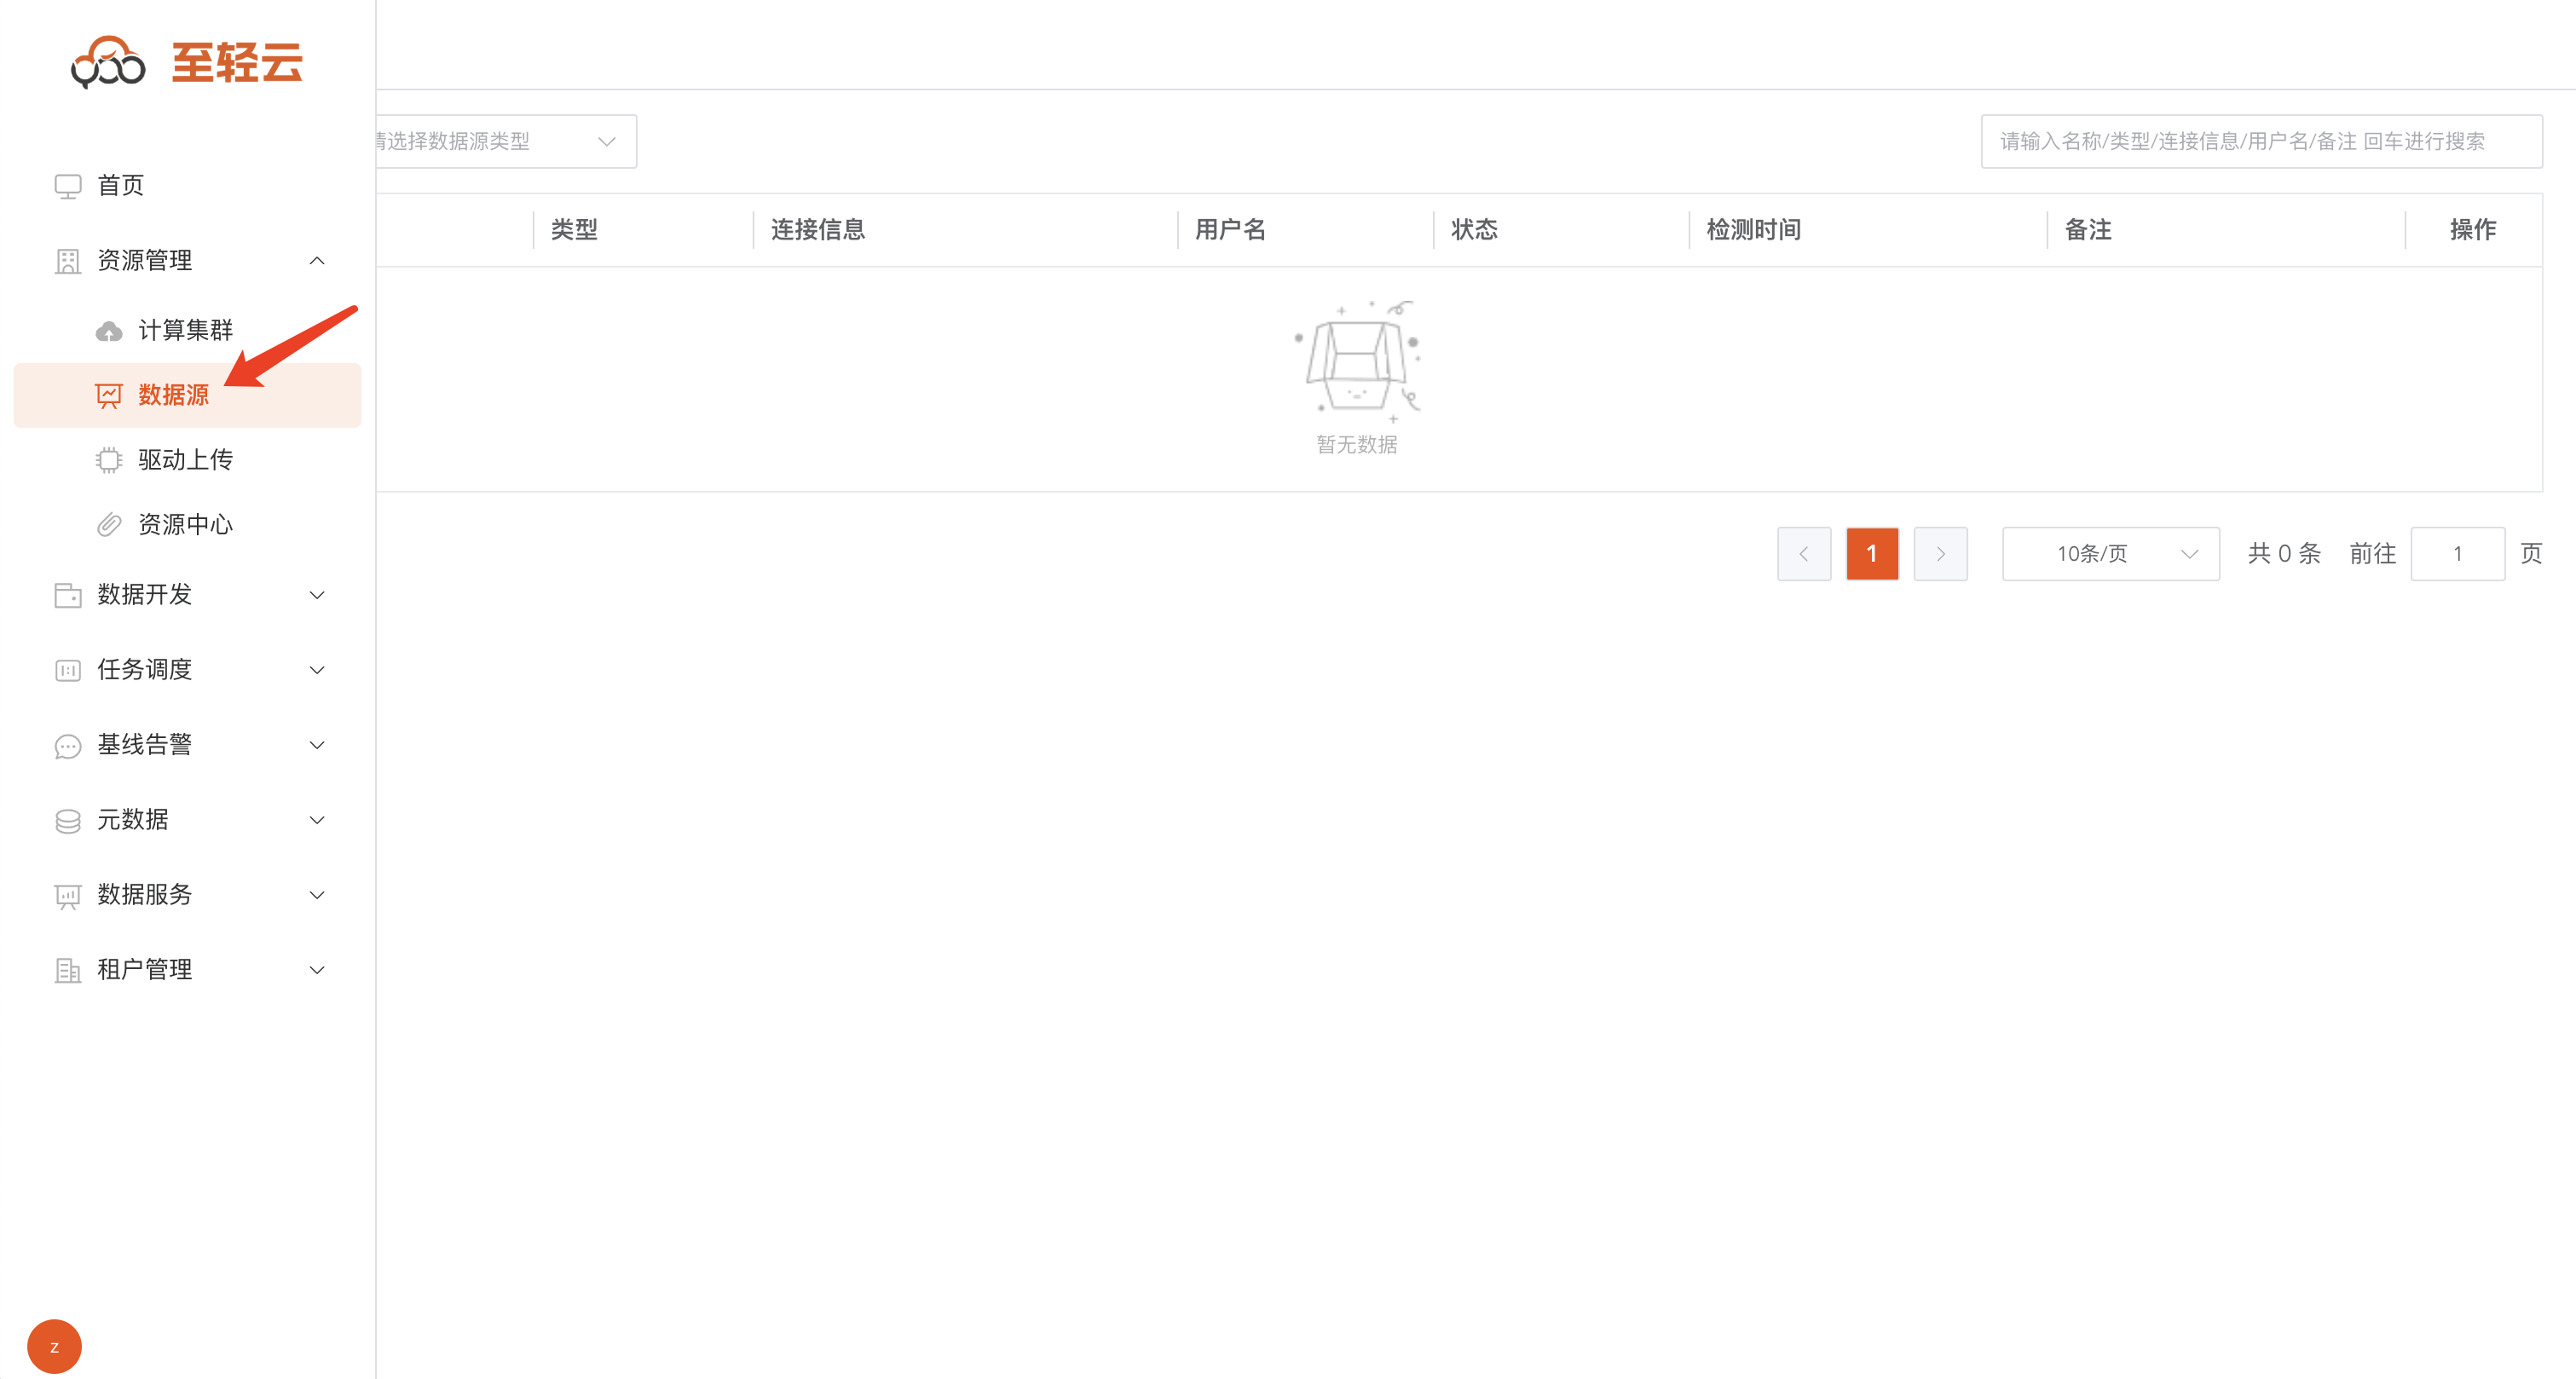
10. Add data source
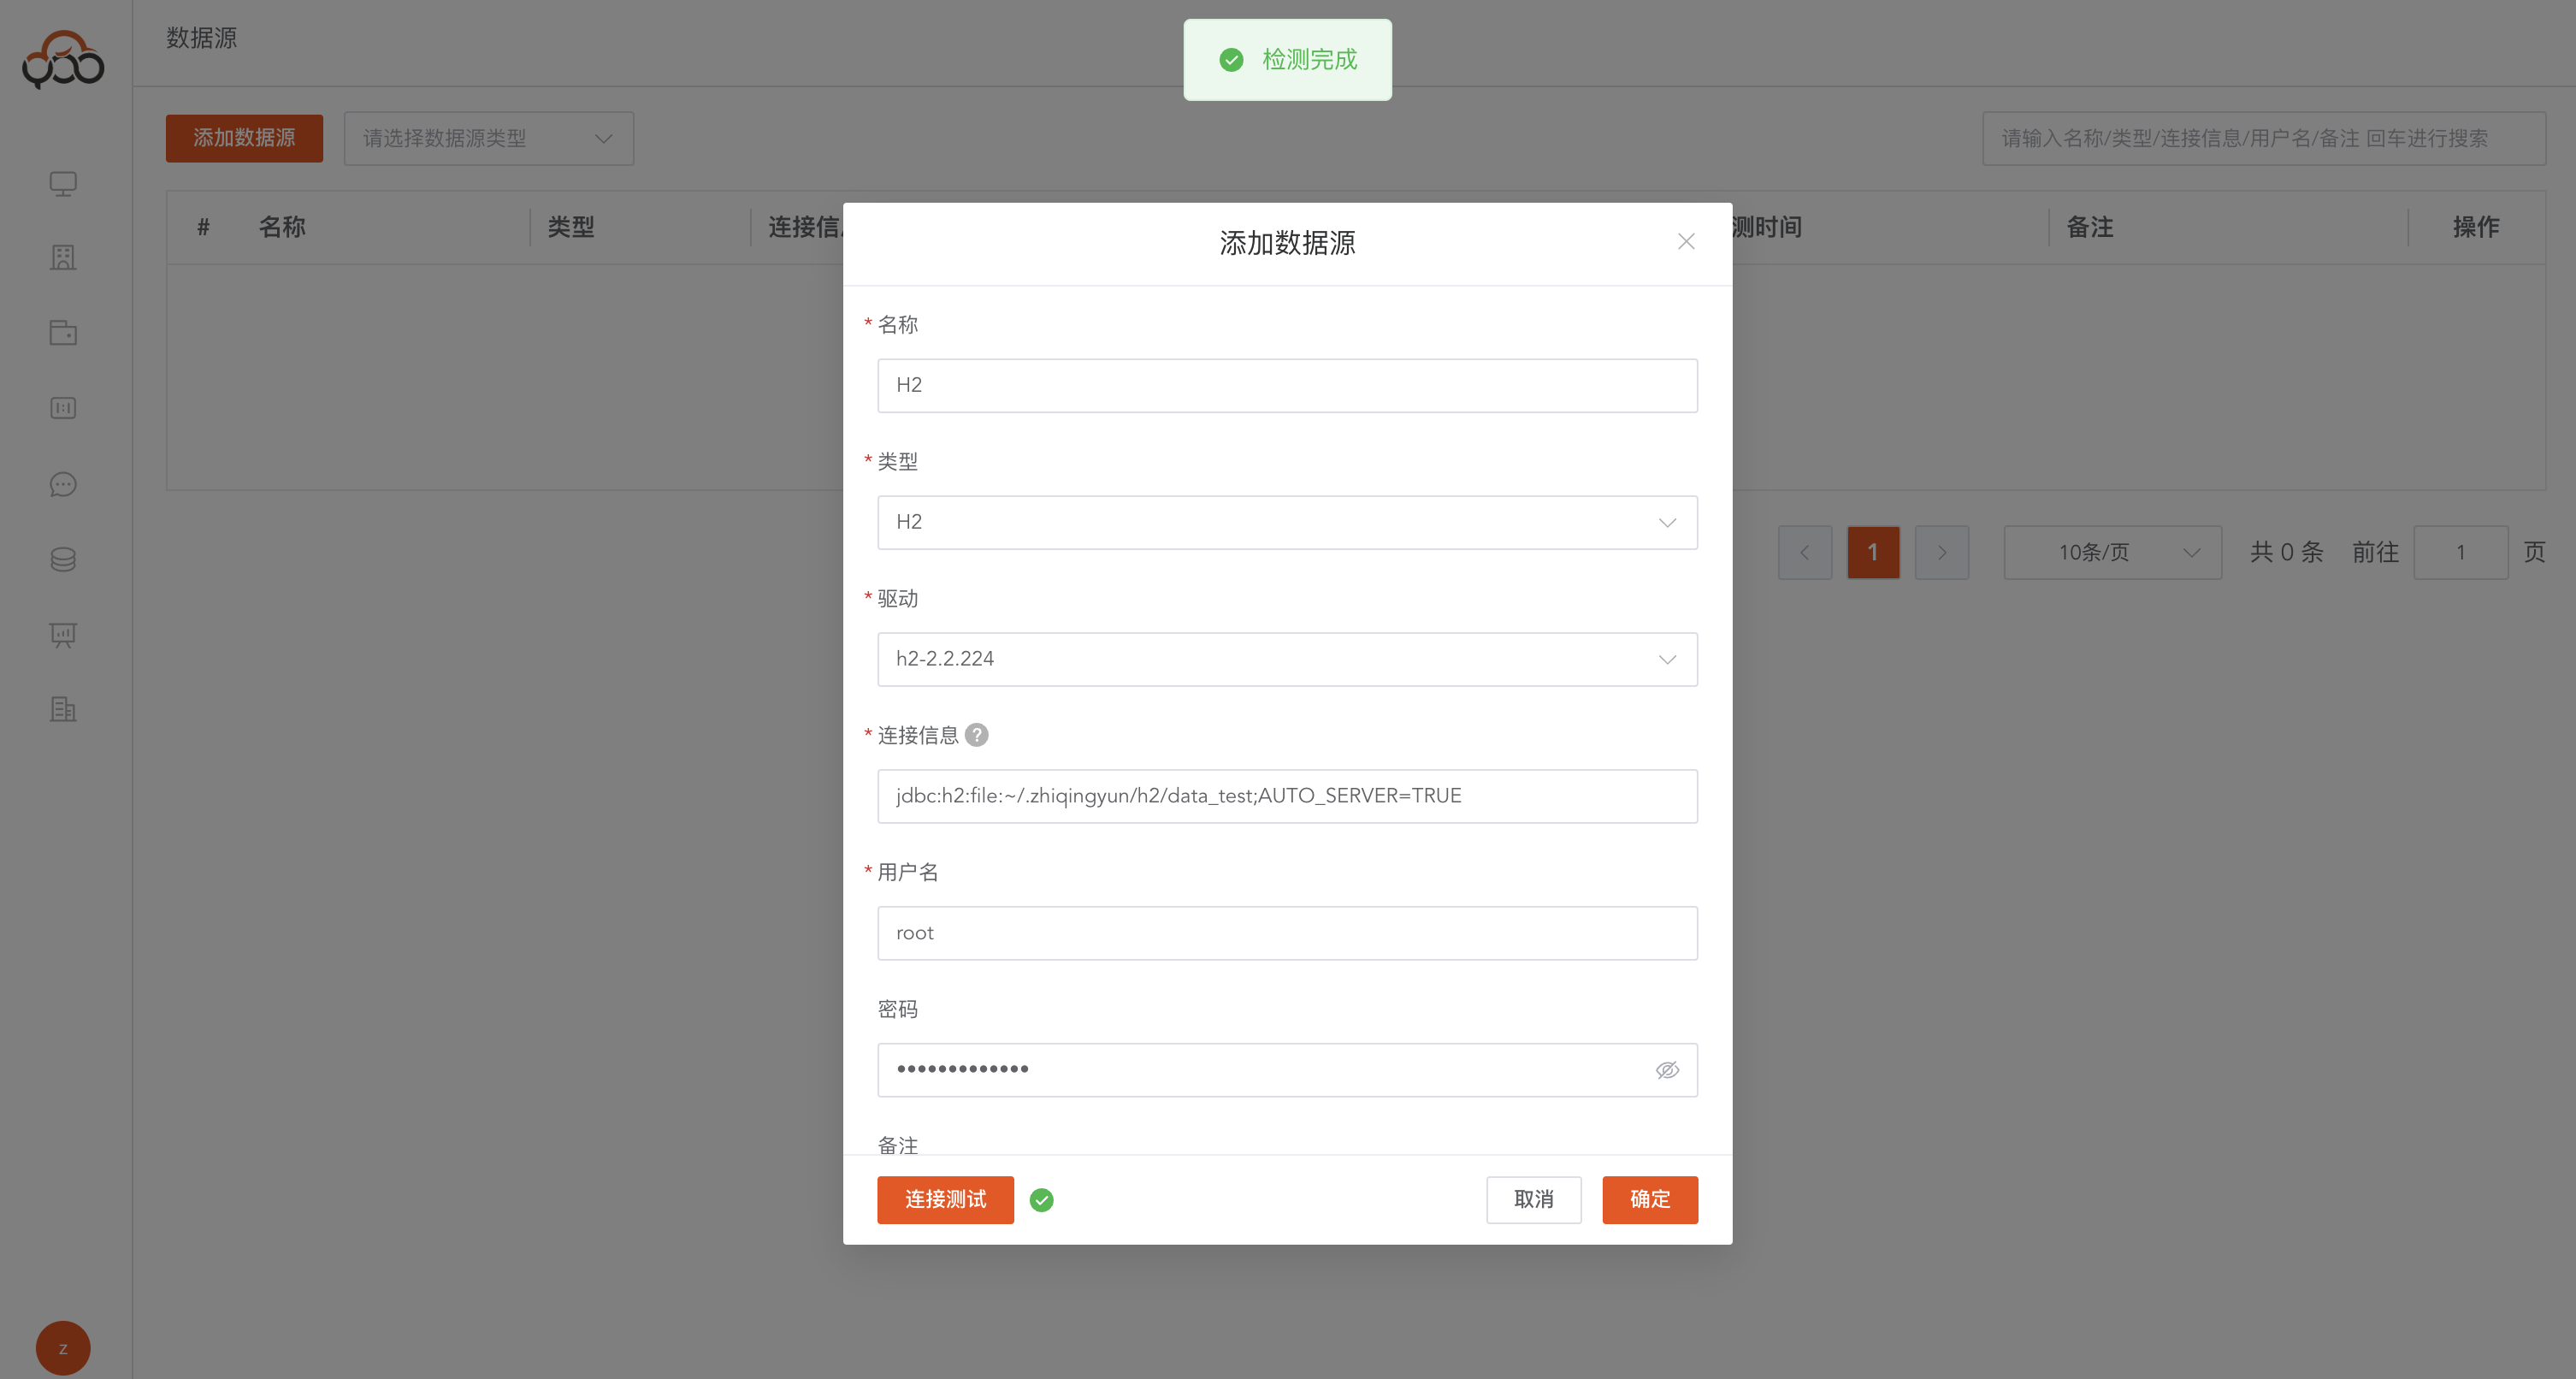
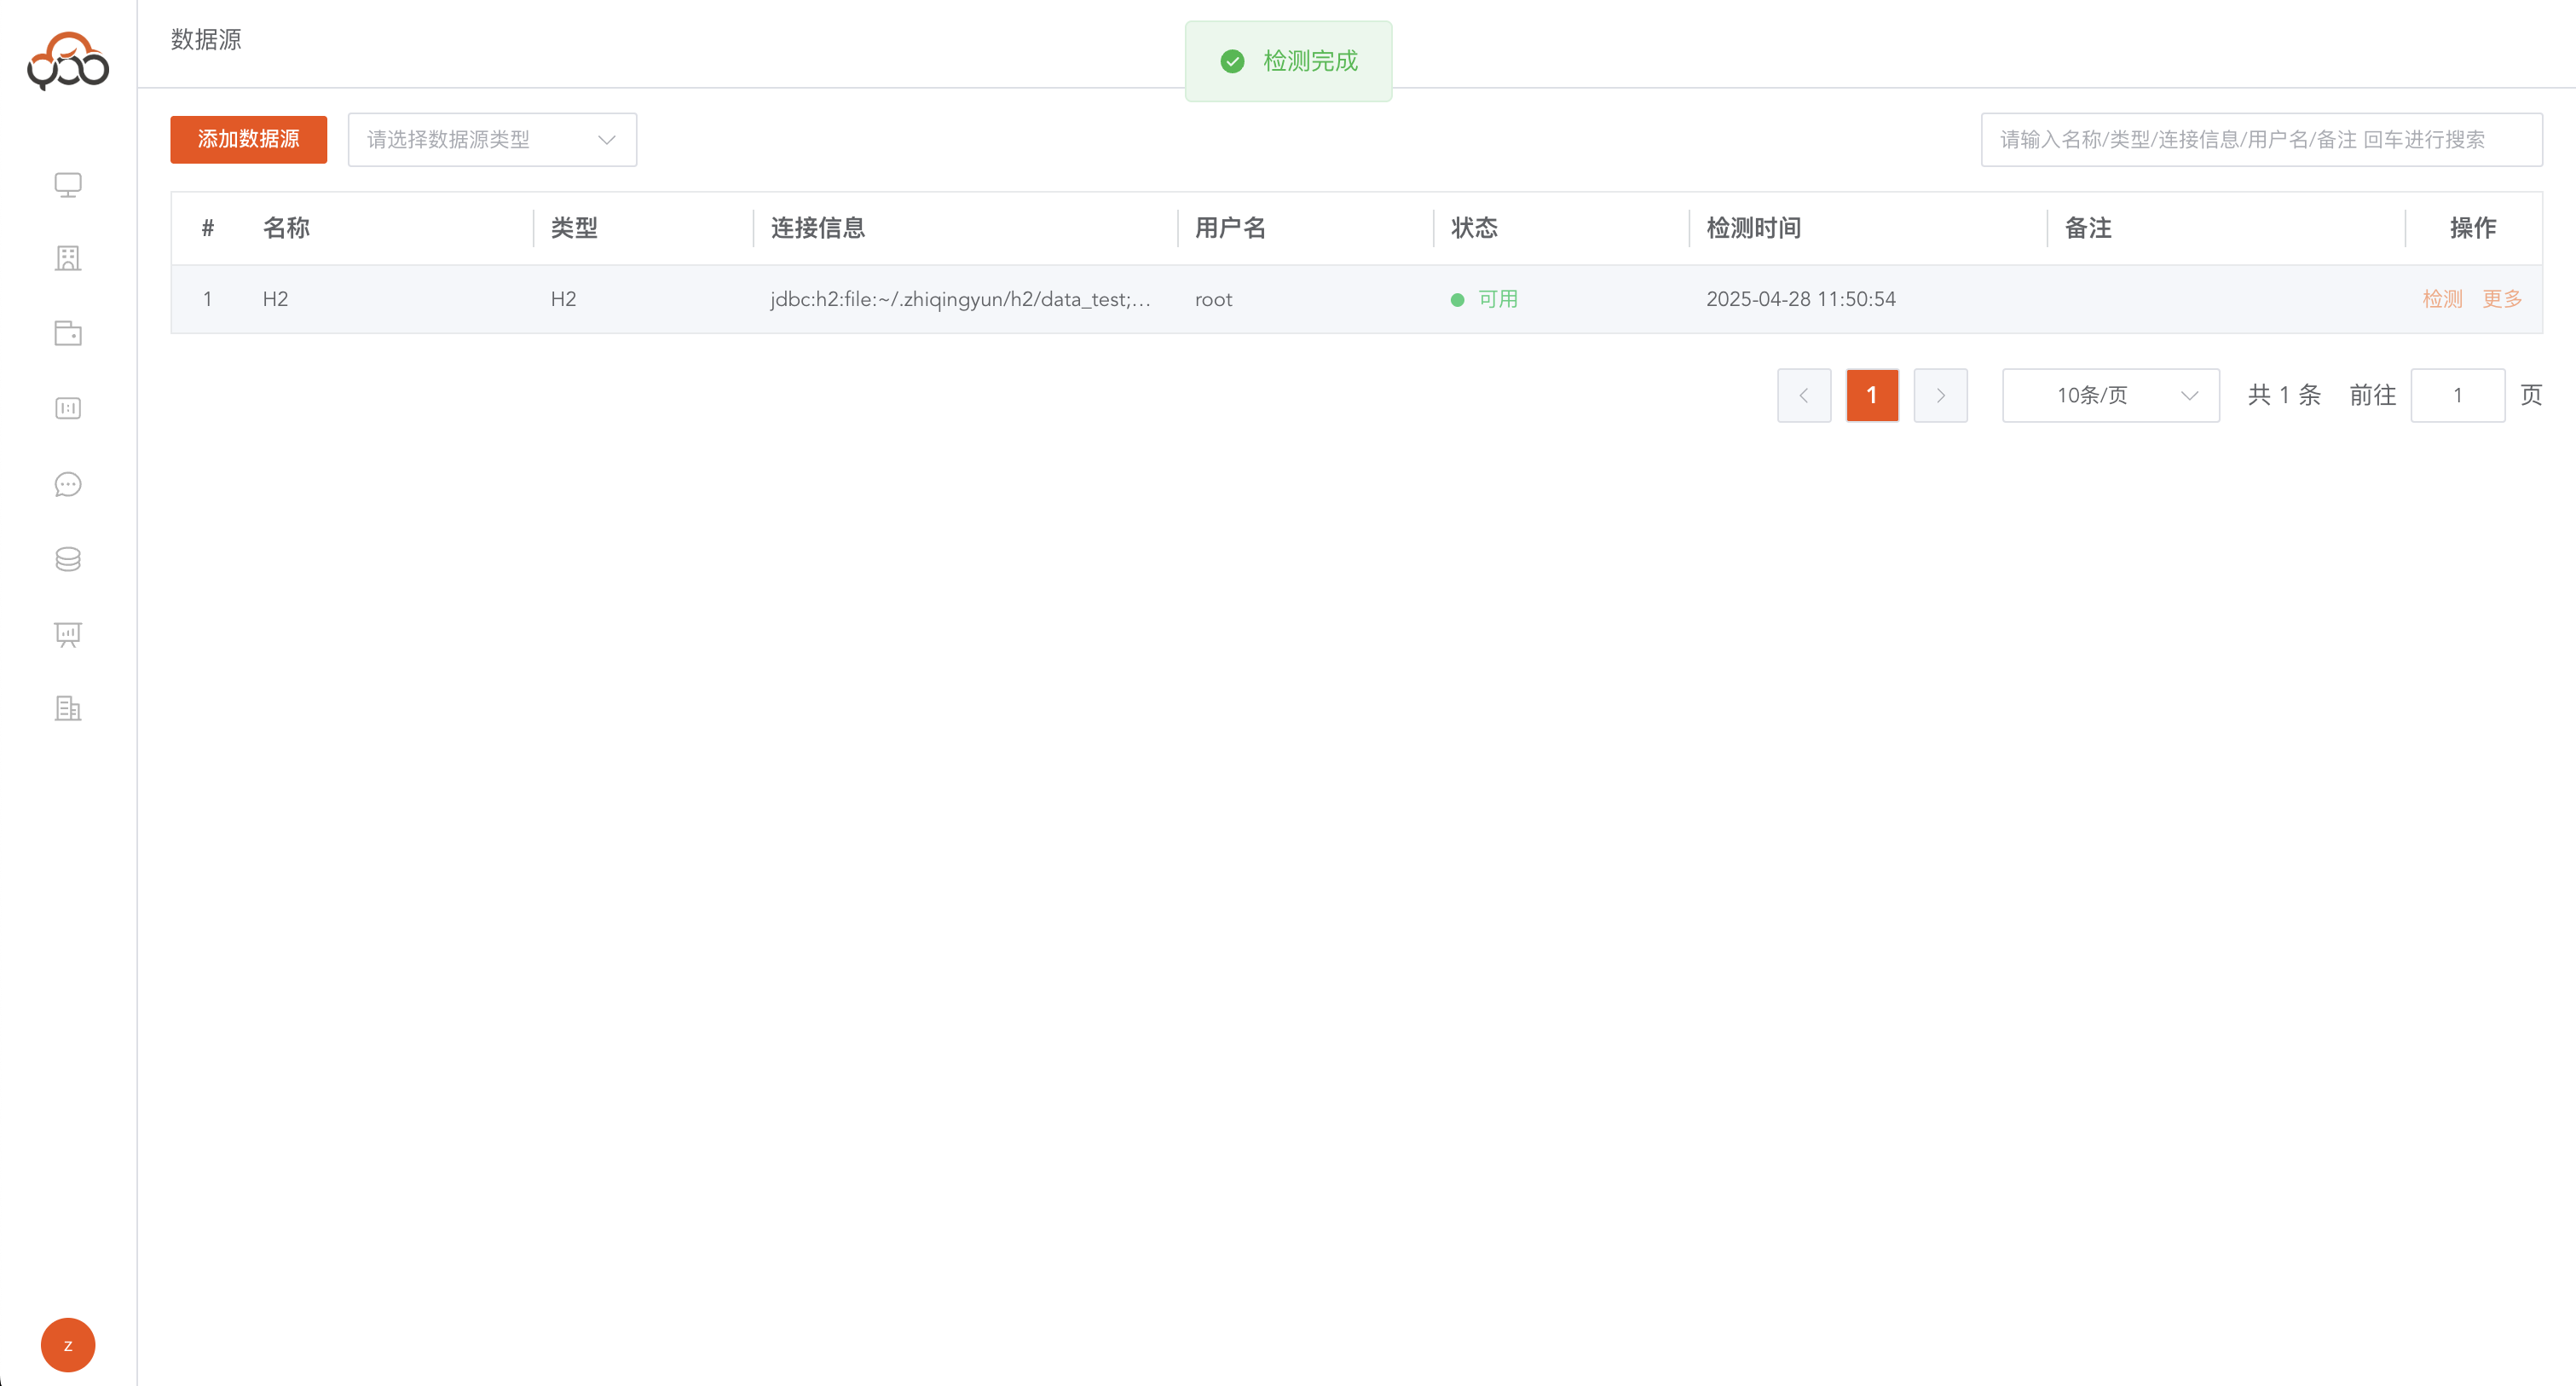
Create an H2 data source for subsequent job execution and data synchronization experience.
| Configuration items | Example value |
|---|---|
| Type | H2 |
| connection address | jdbc:h2:file:/var/lib/zhiqingyun/h2/data_test;AUTO_SERVER=TRUE |
| Username | root |
| Password | zhiqingyun123 |
11. Create a new Spark query job
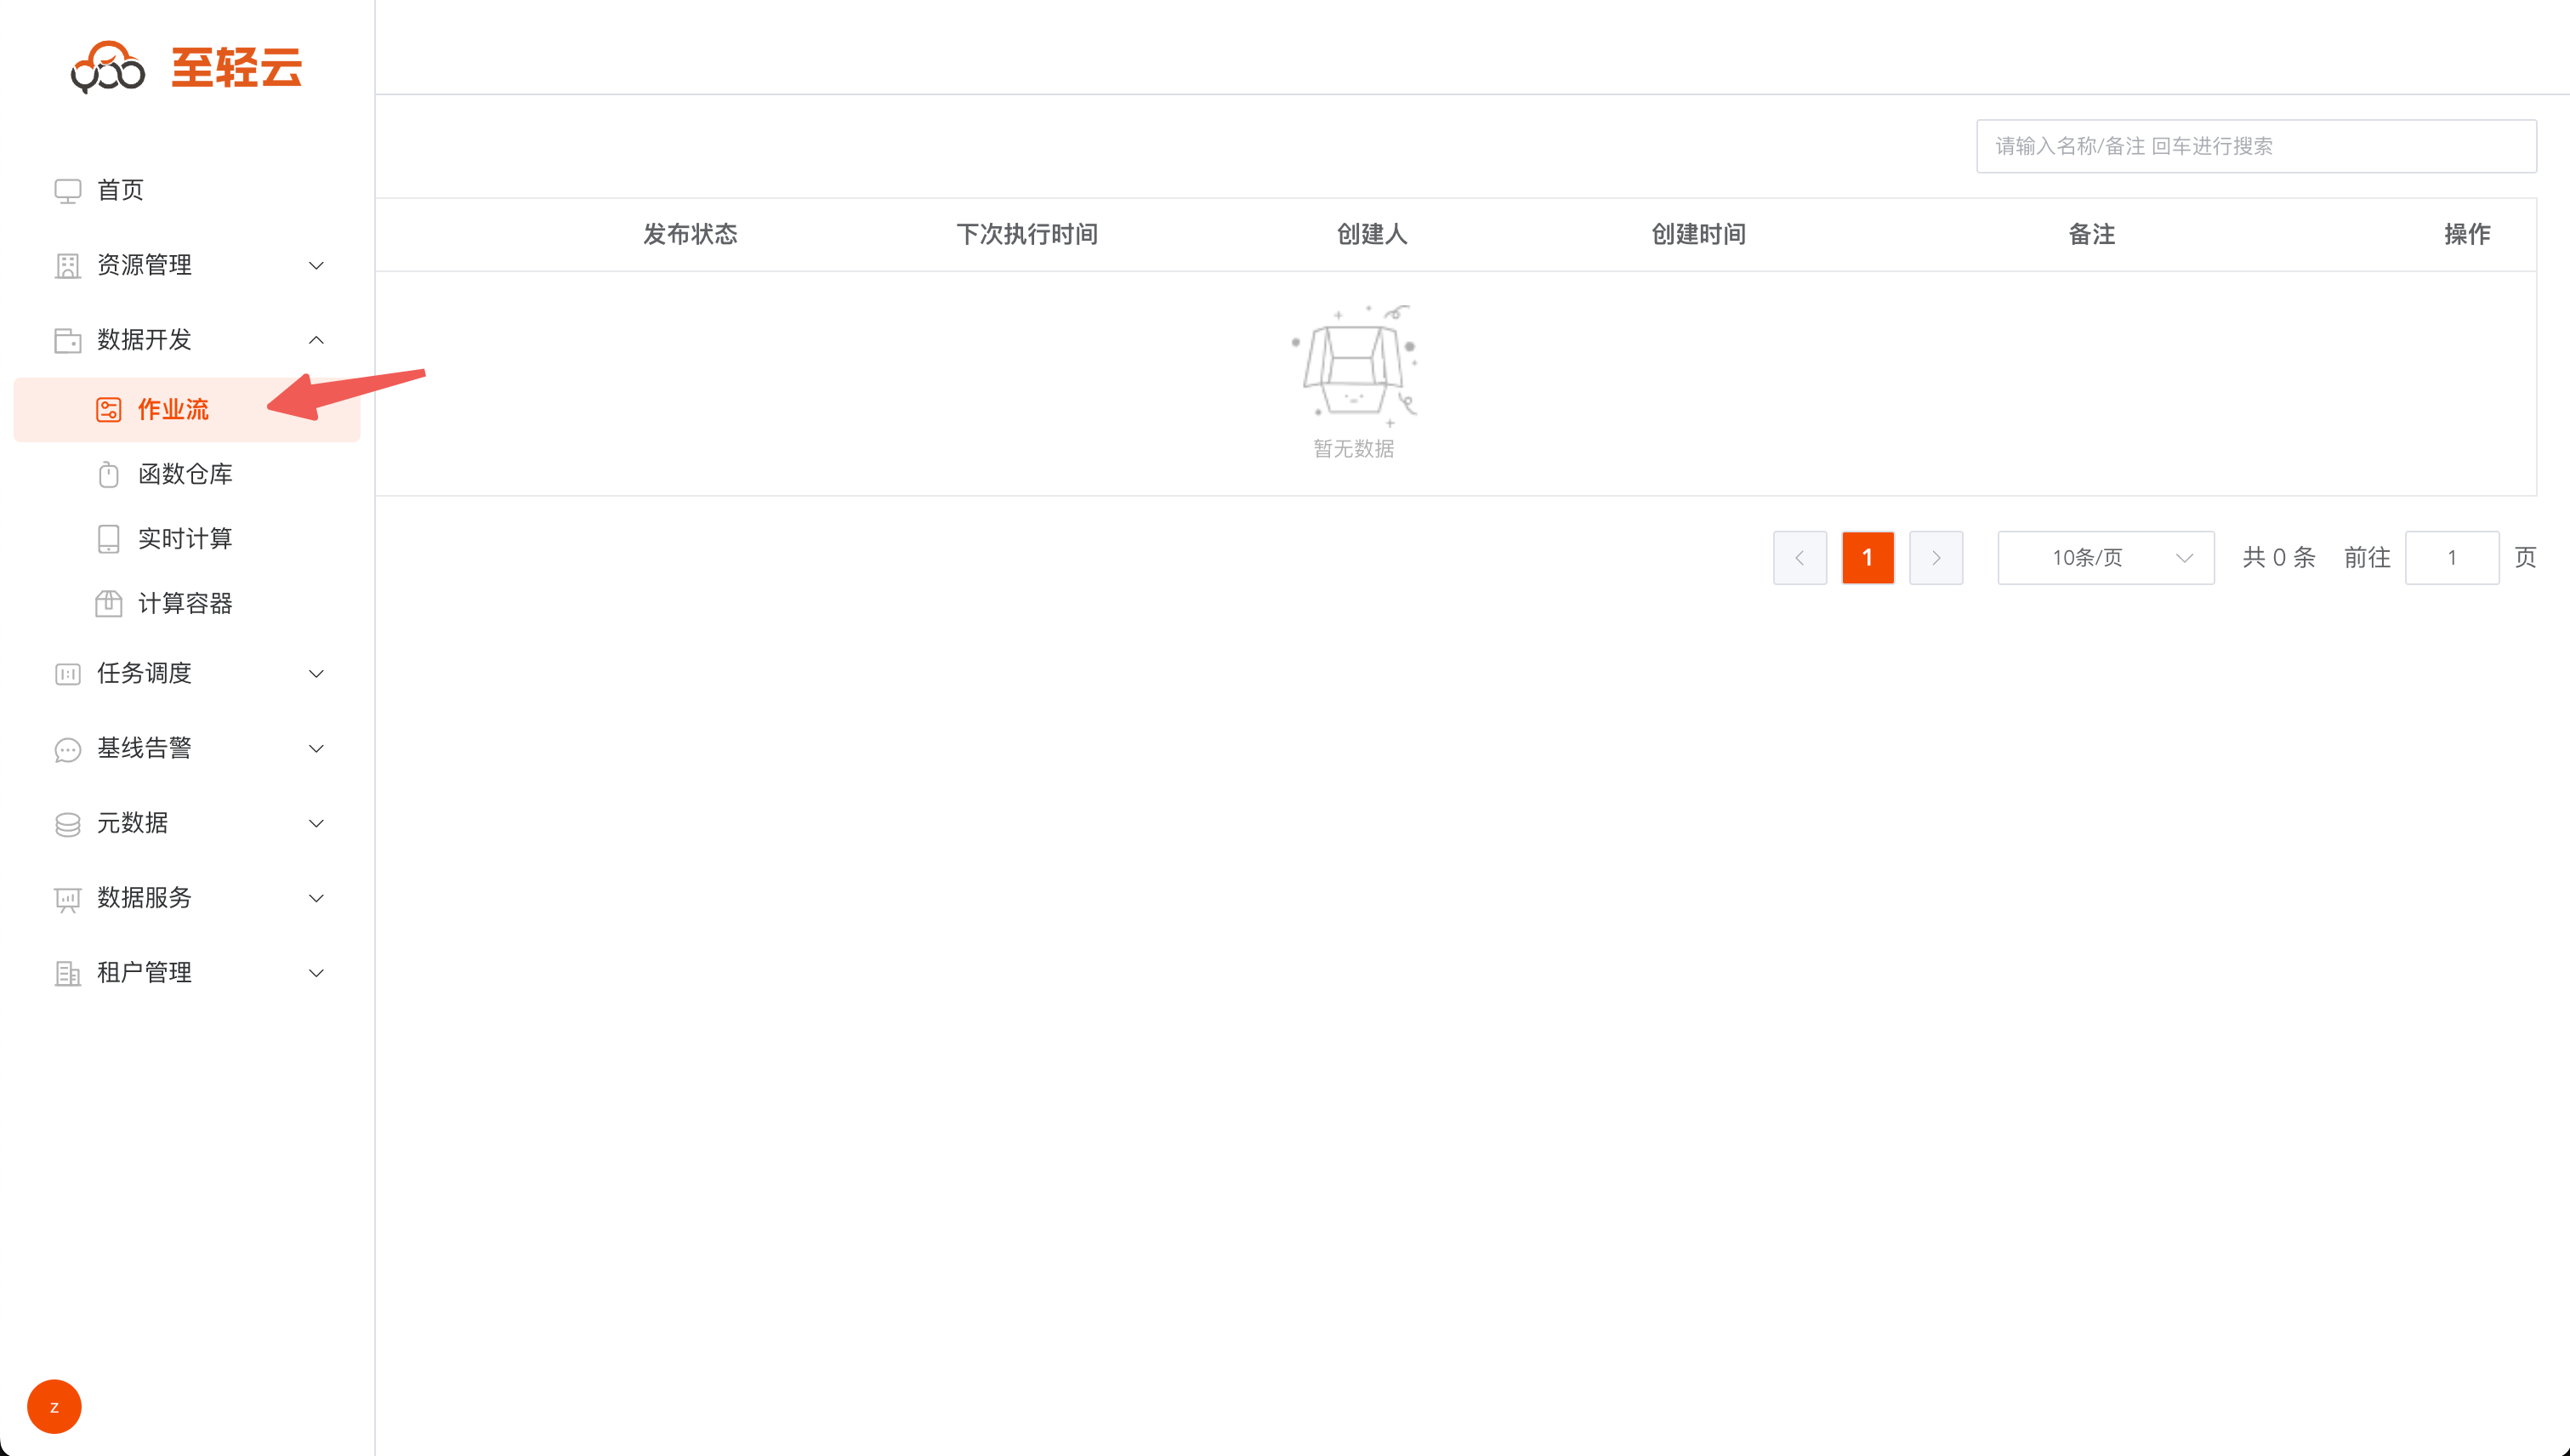
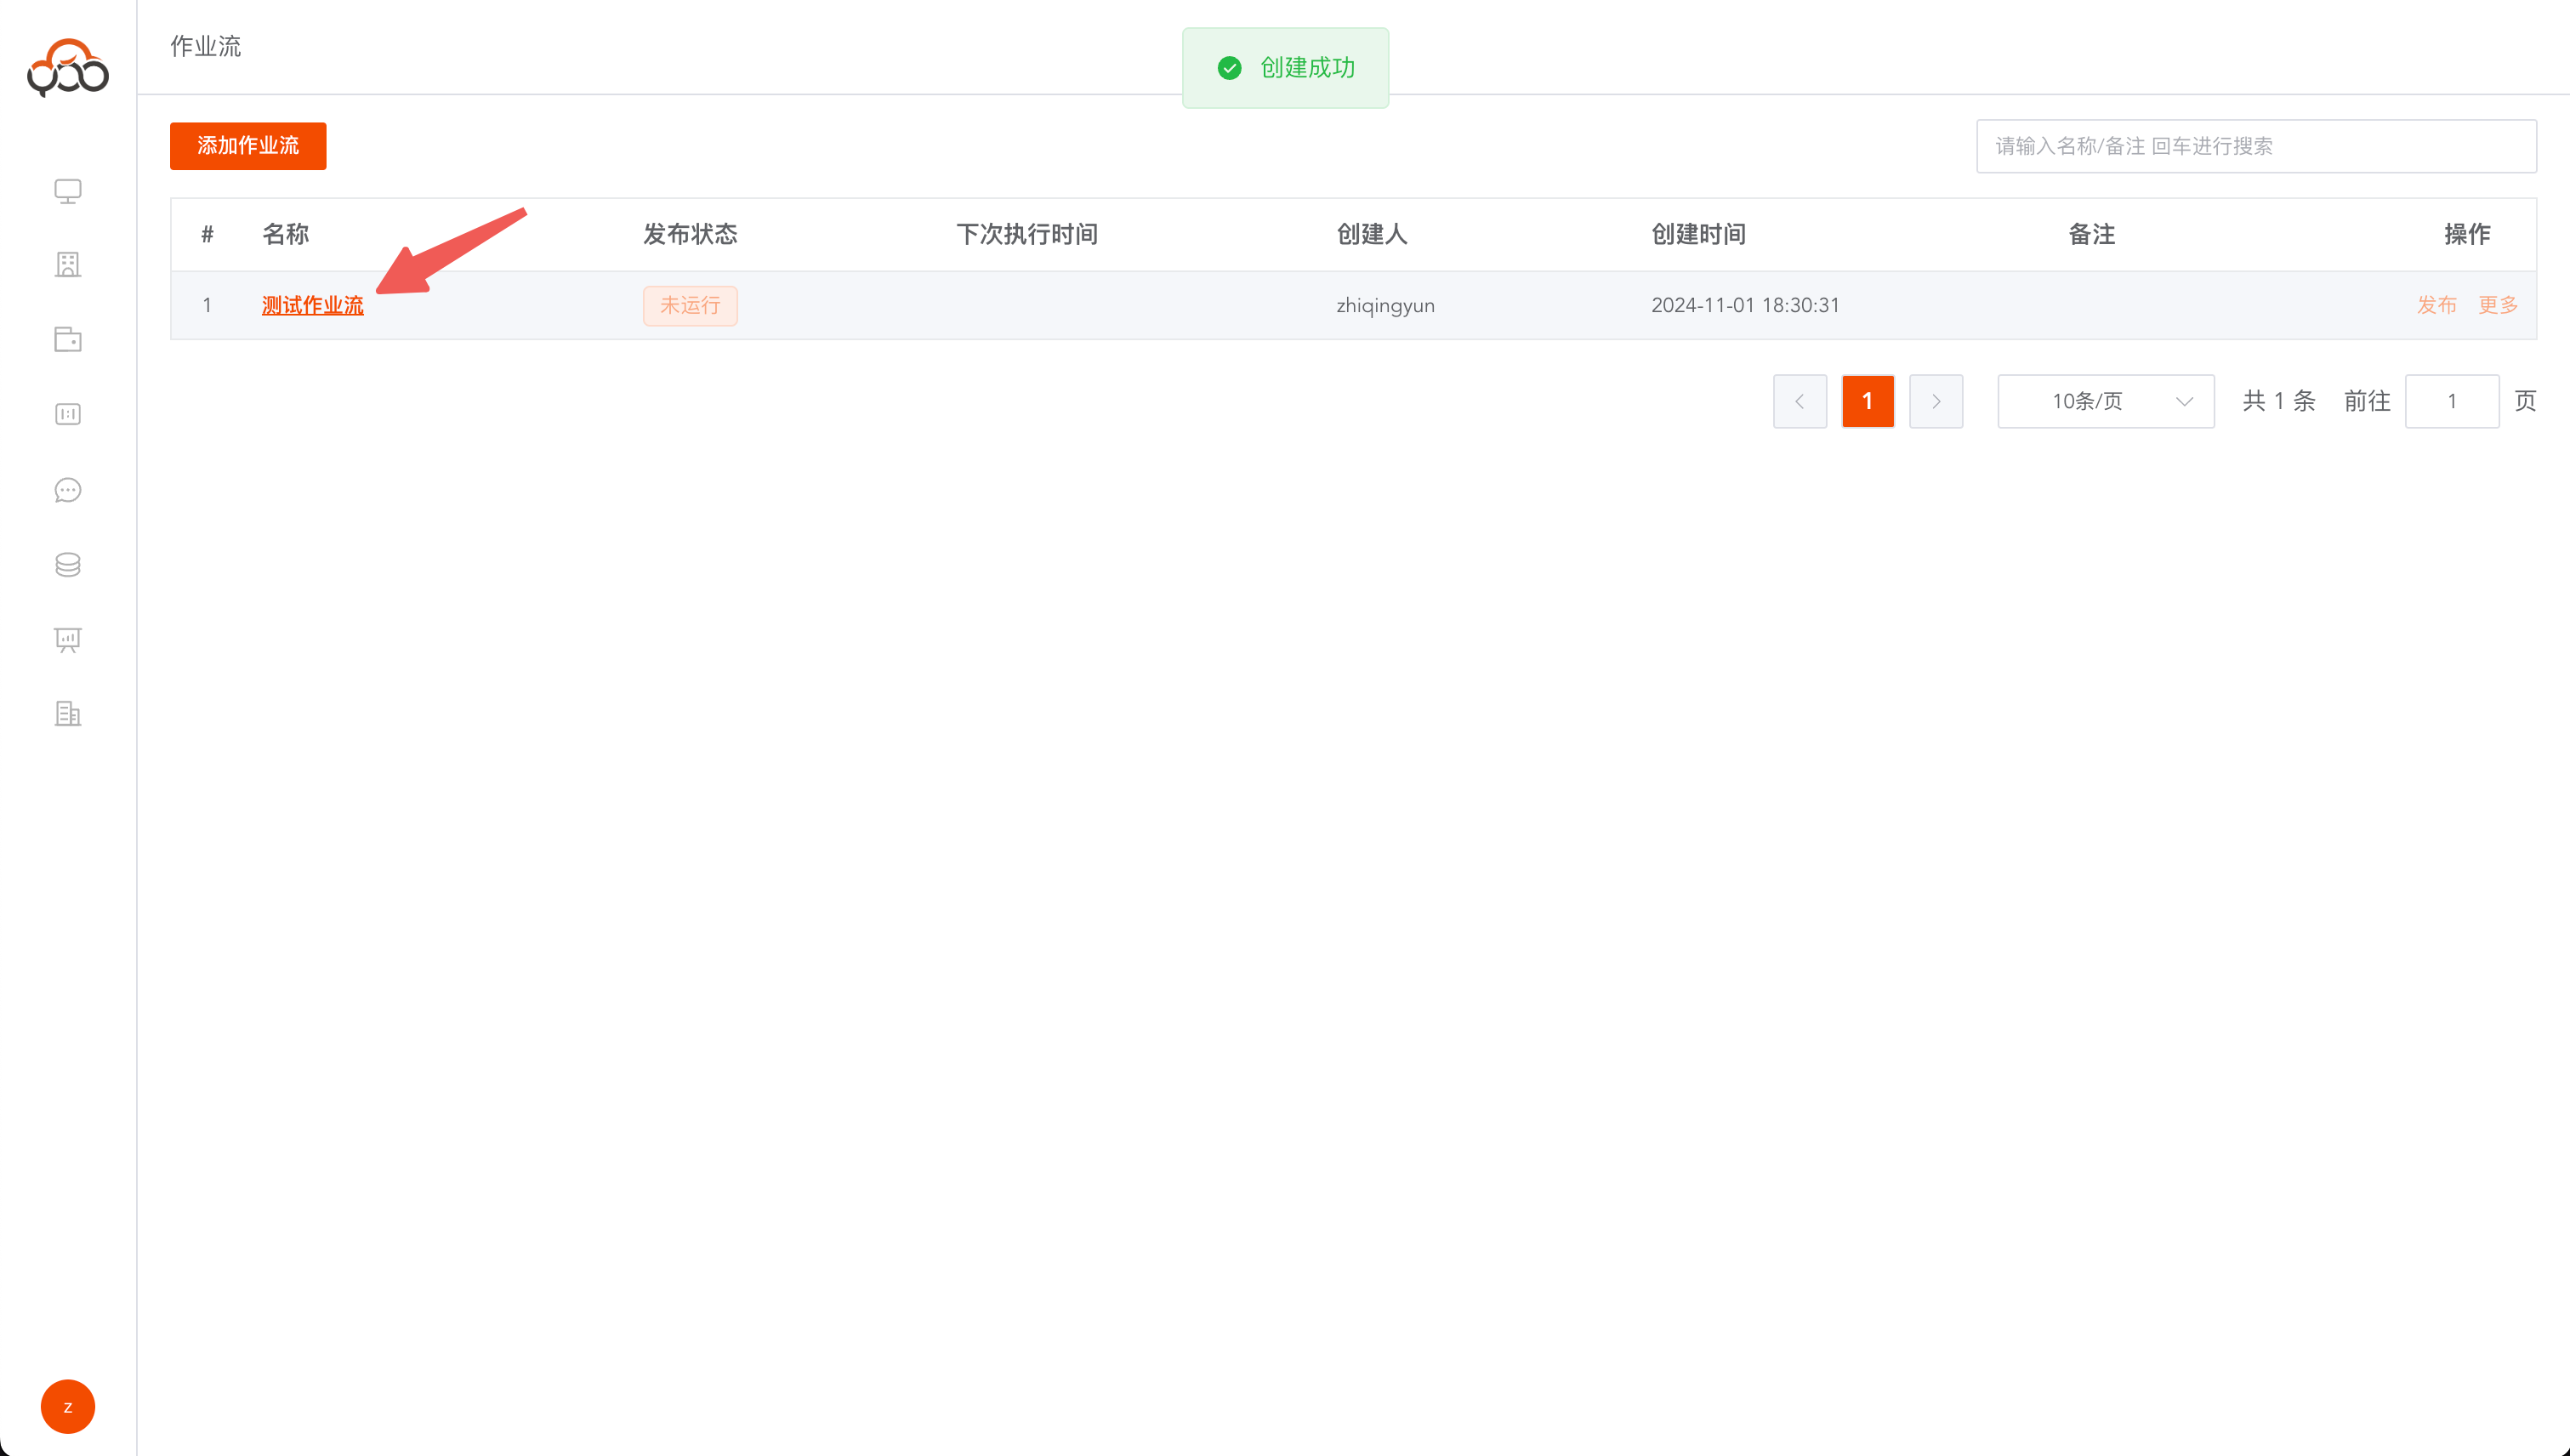
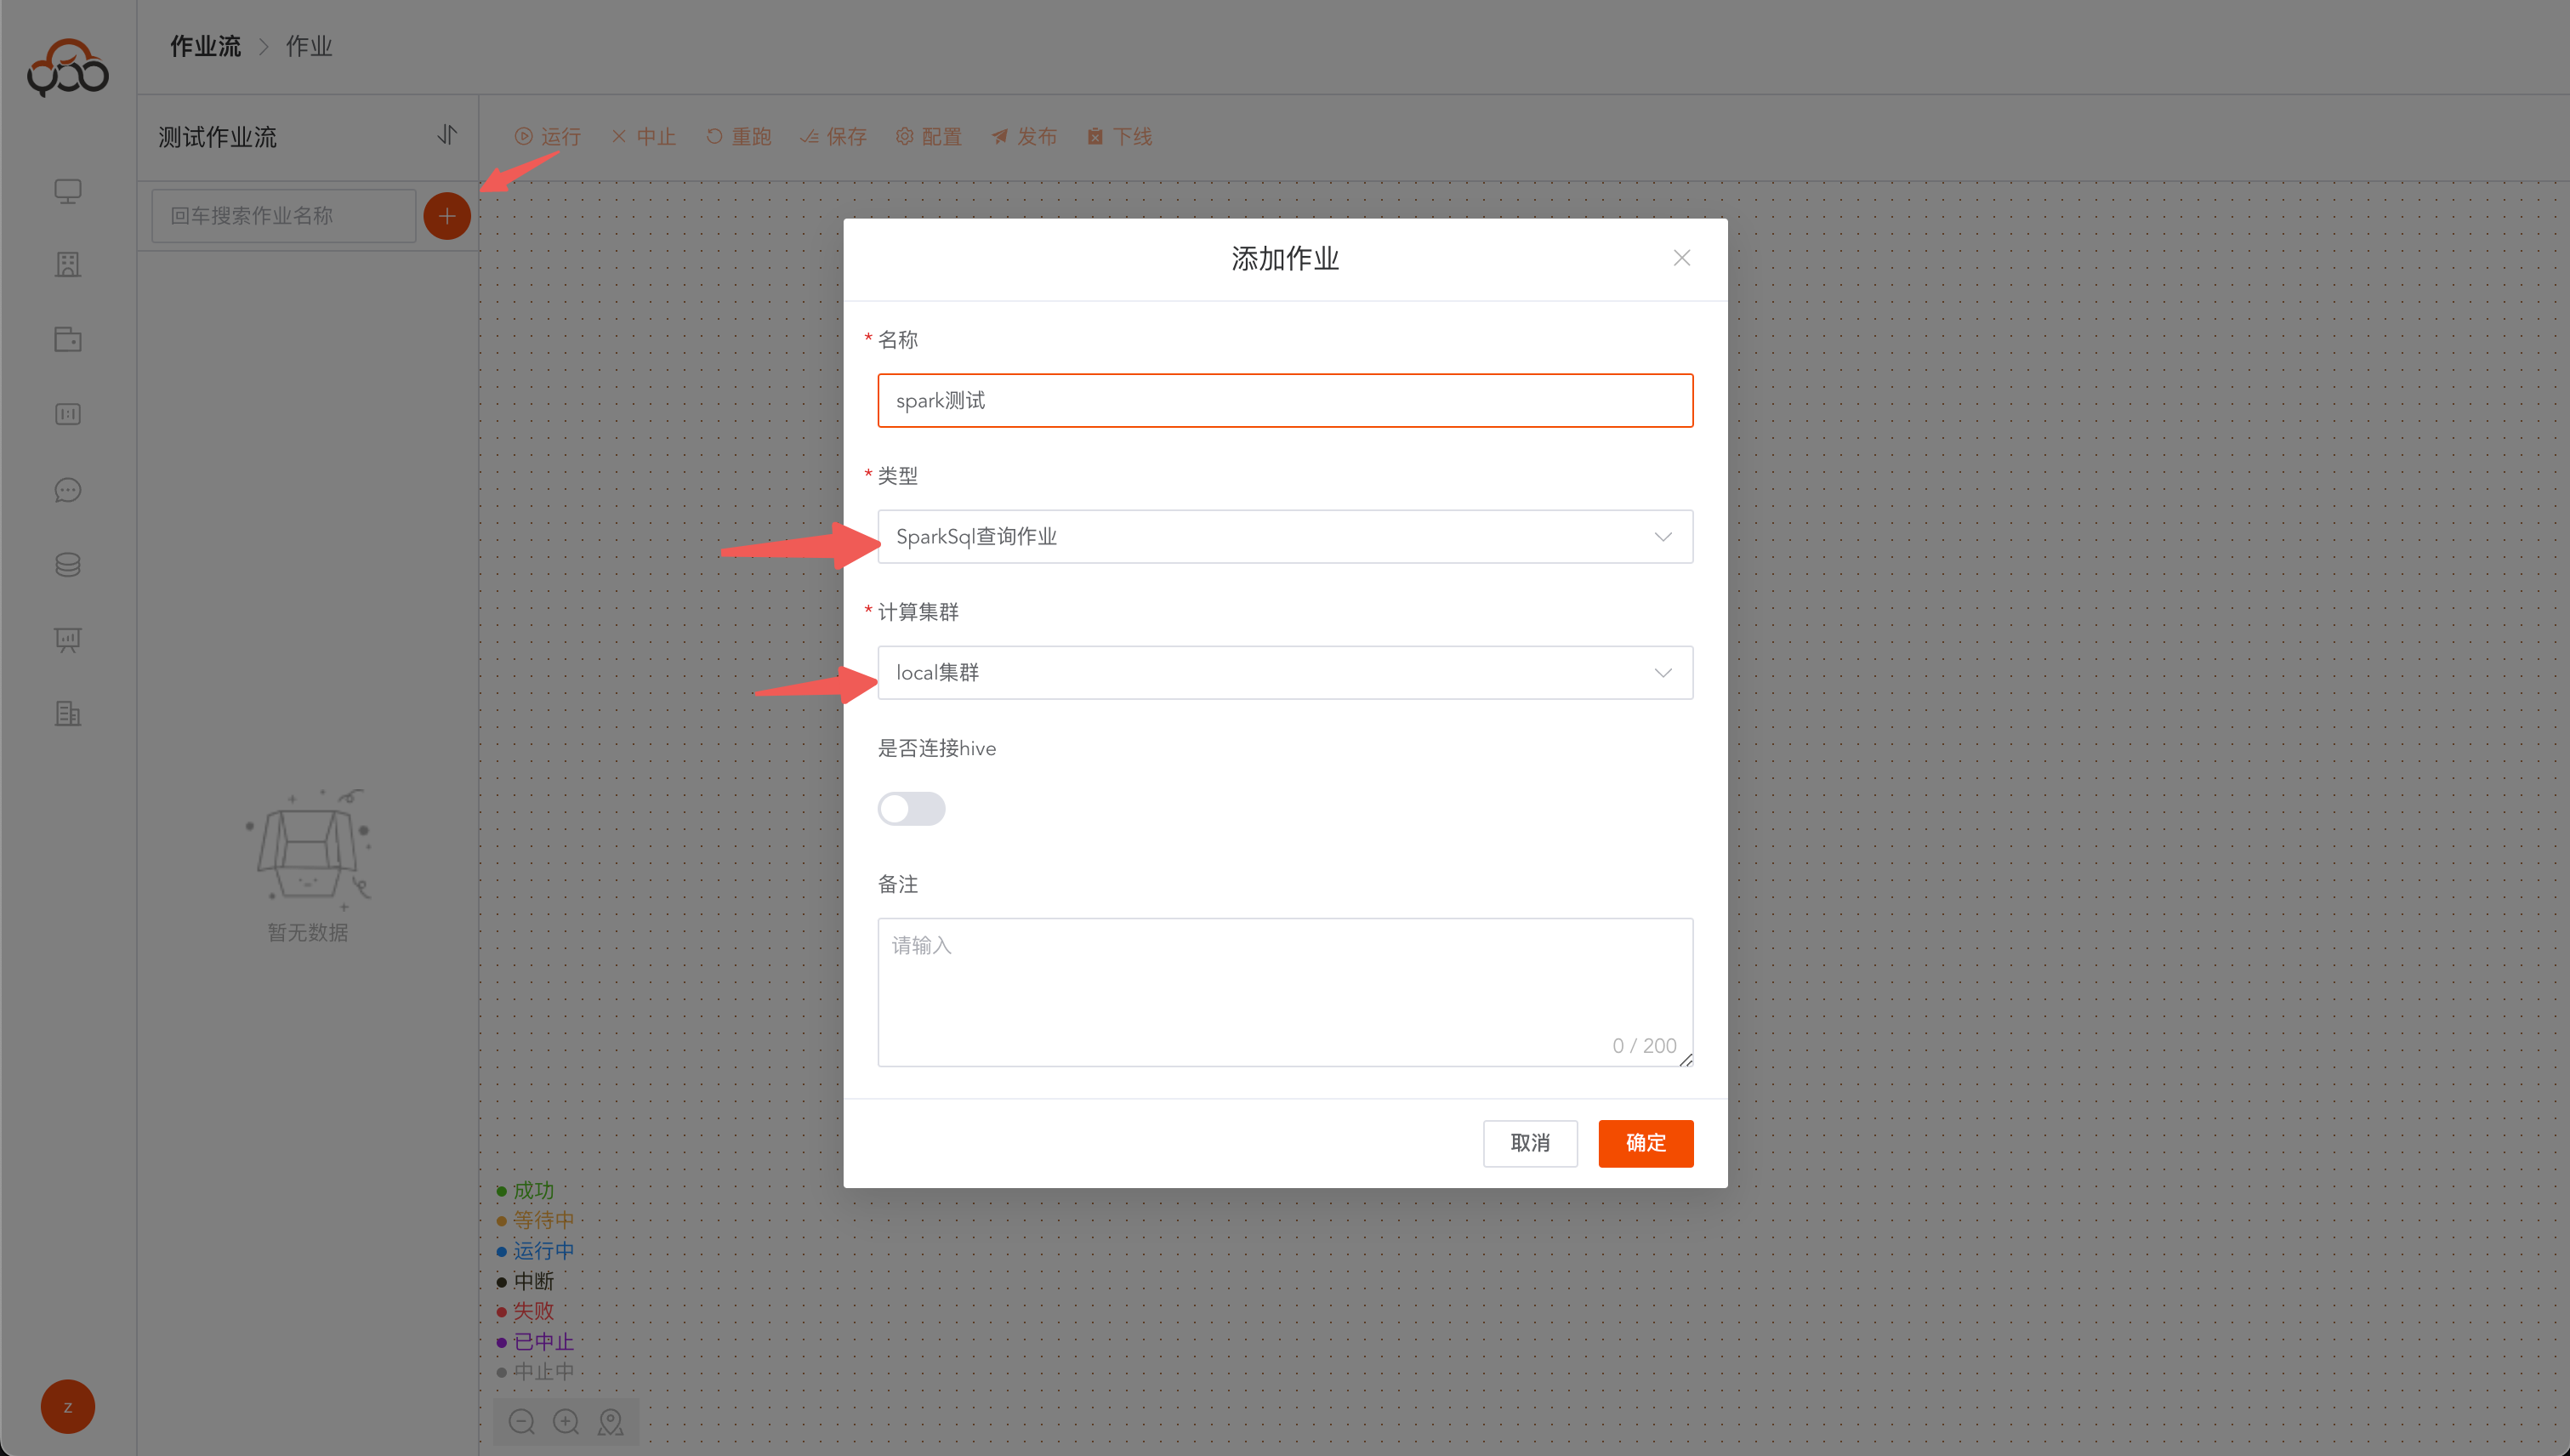
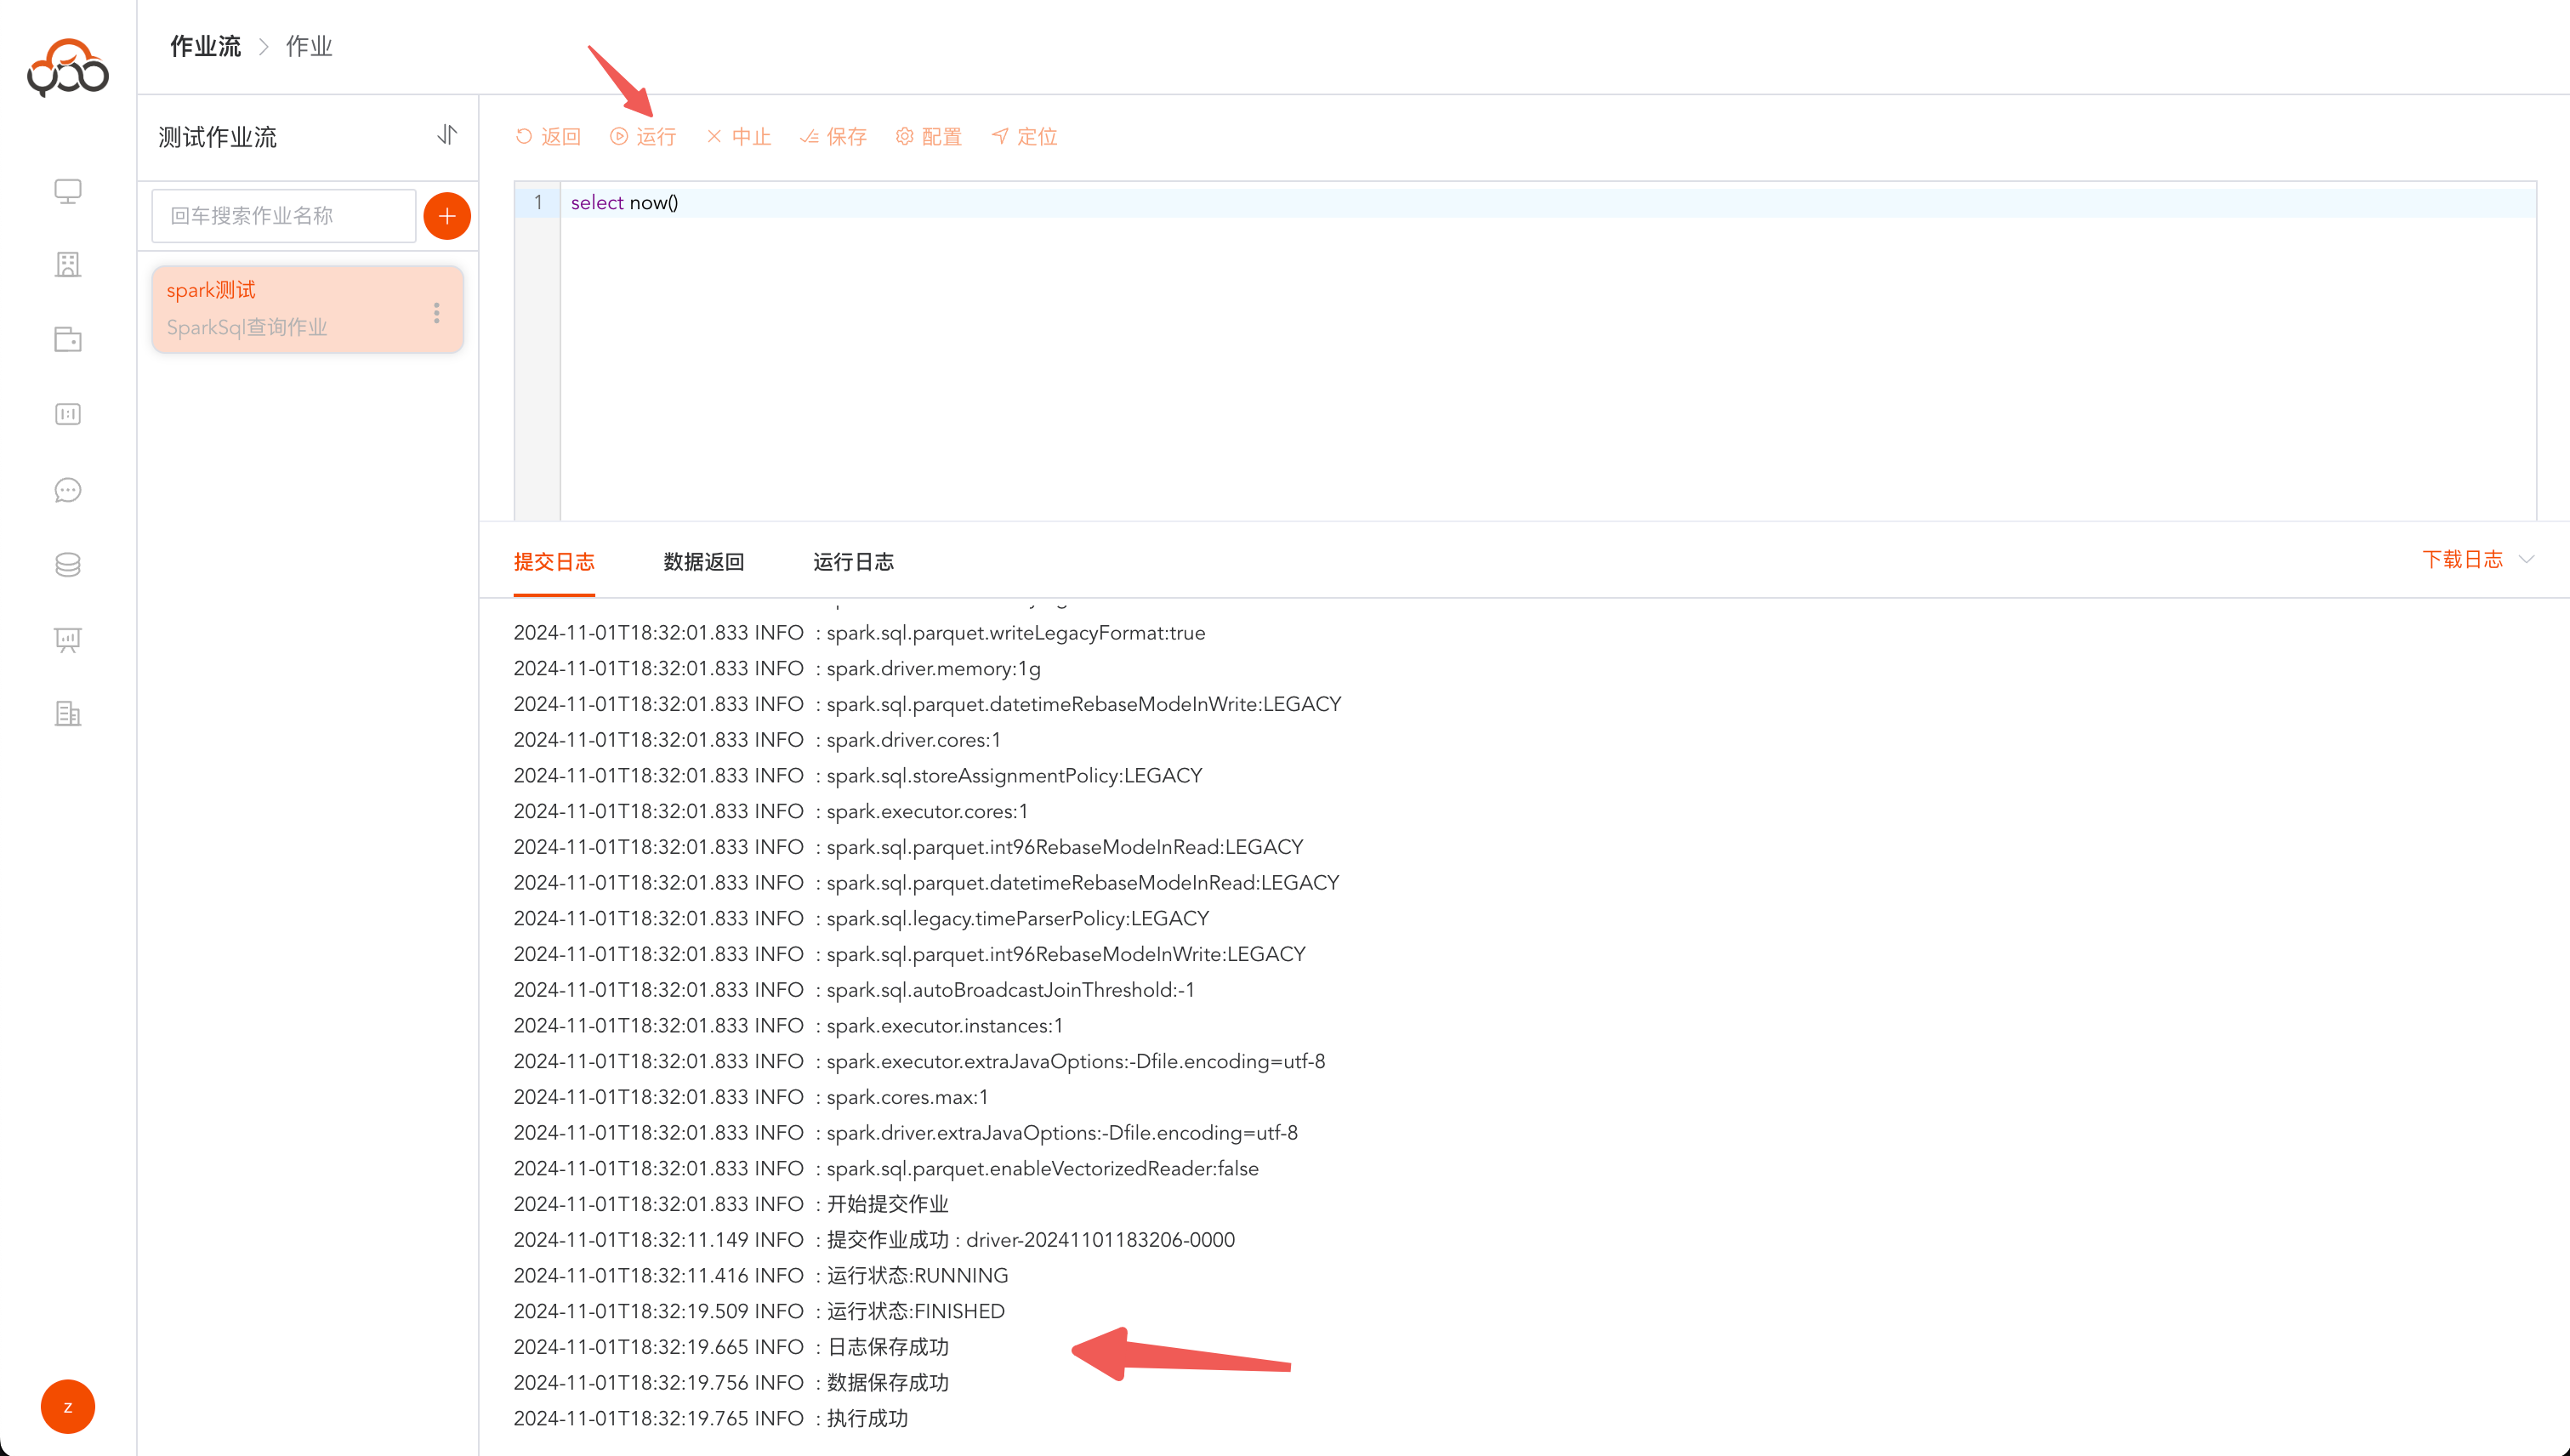
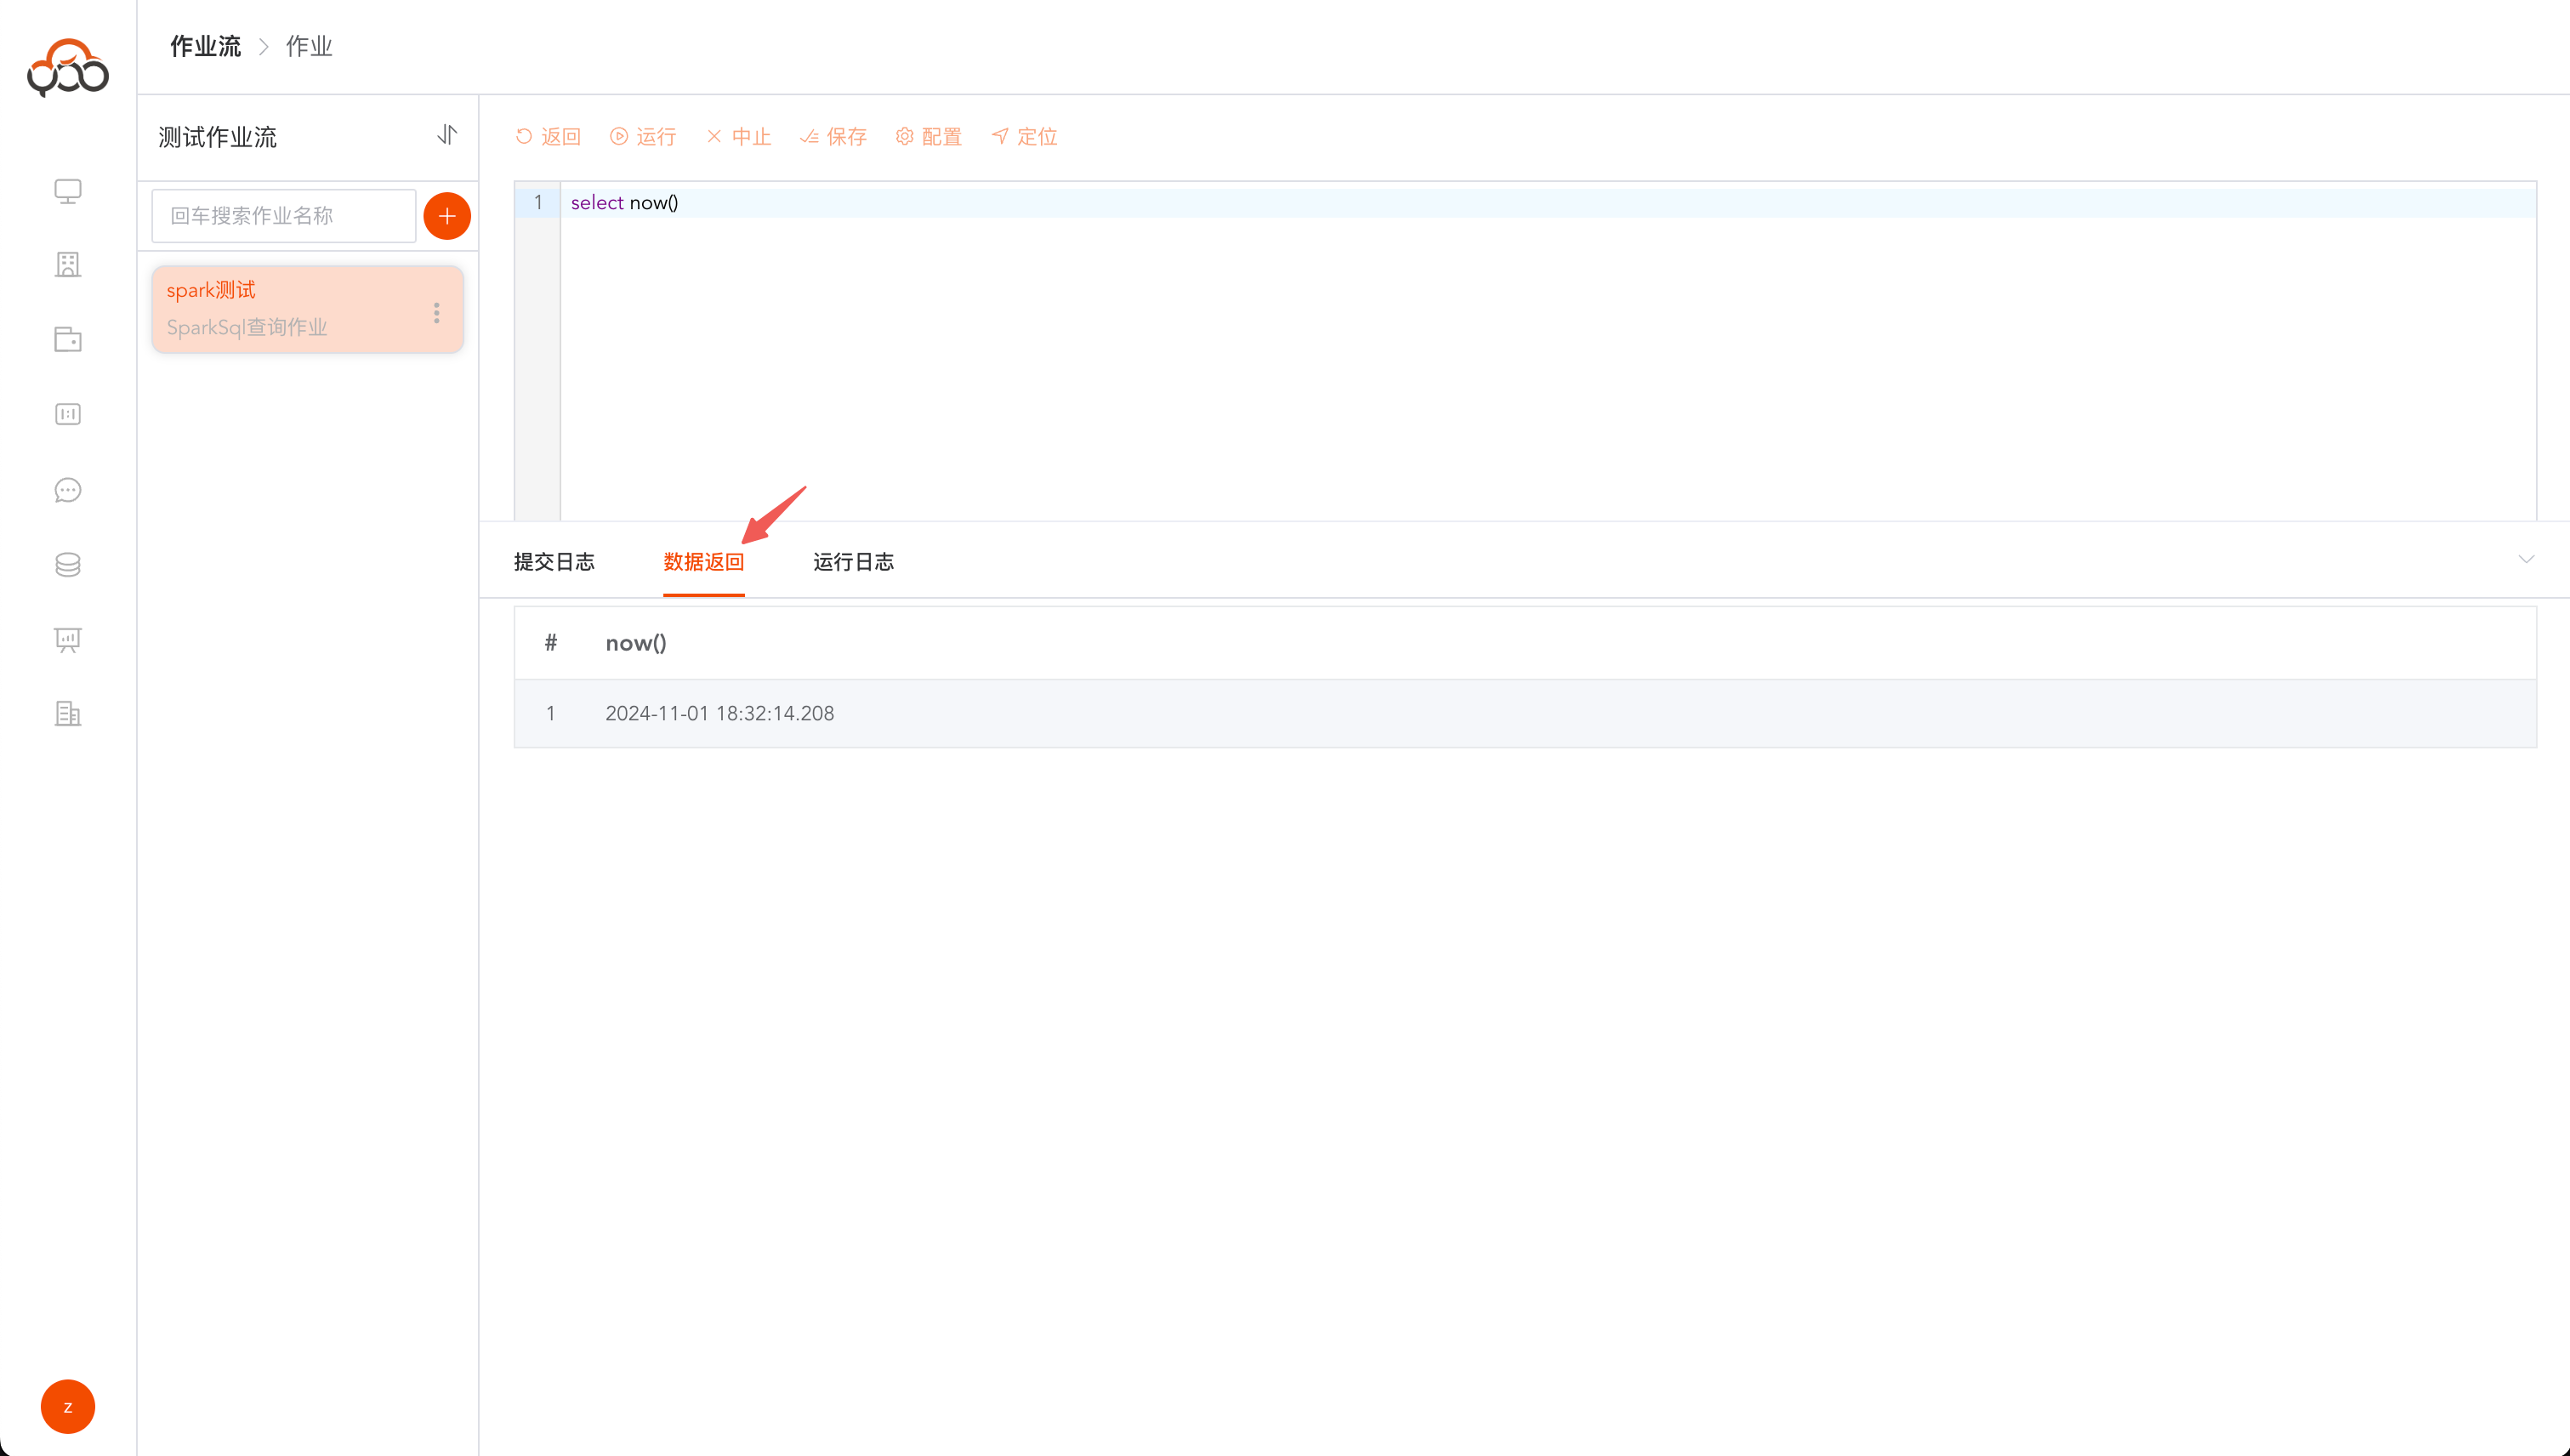
Create a Spark query job in job management, select the added computing cluster and execute sample SQL to verify the Spark job submission and running capabilities.
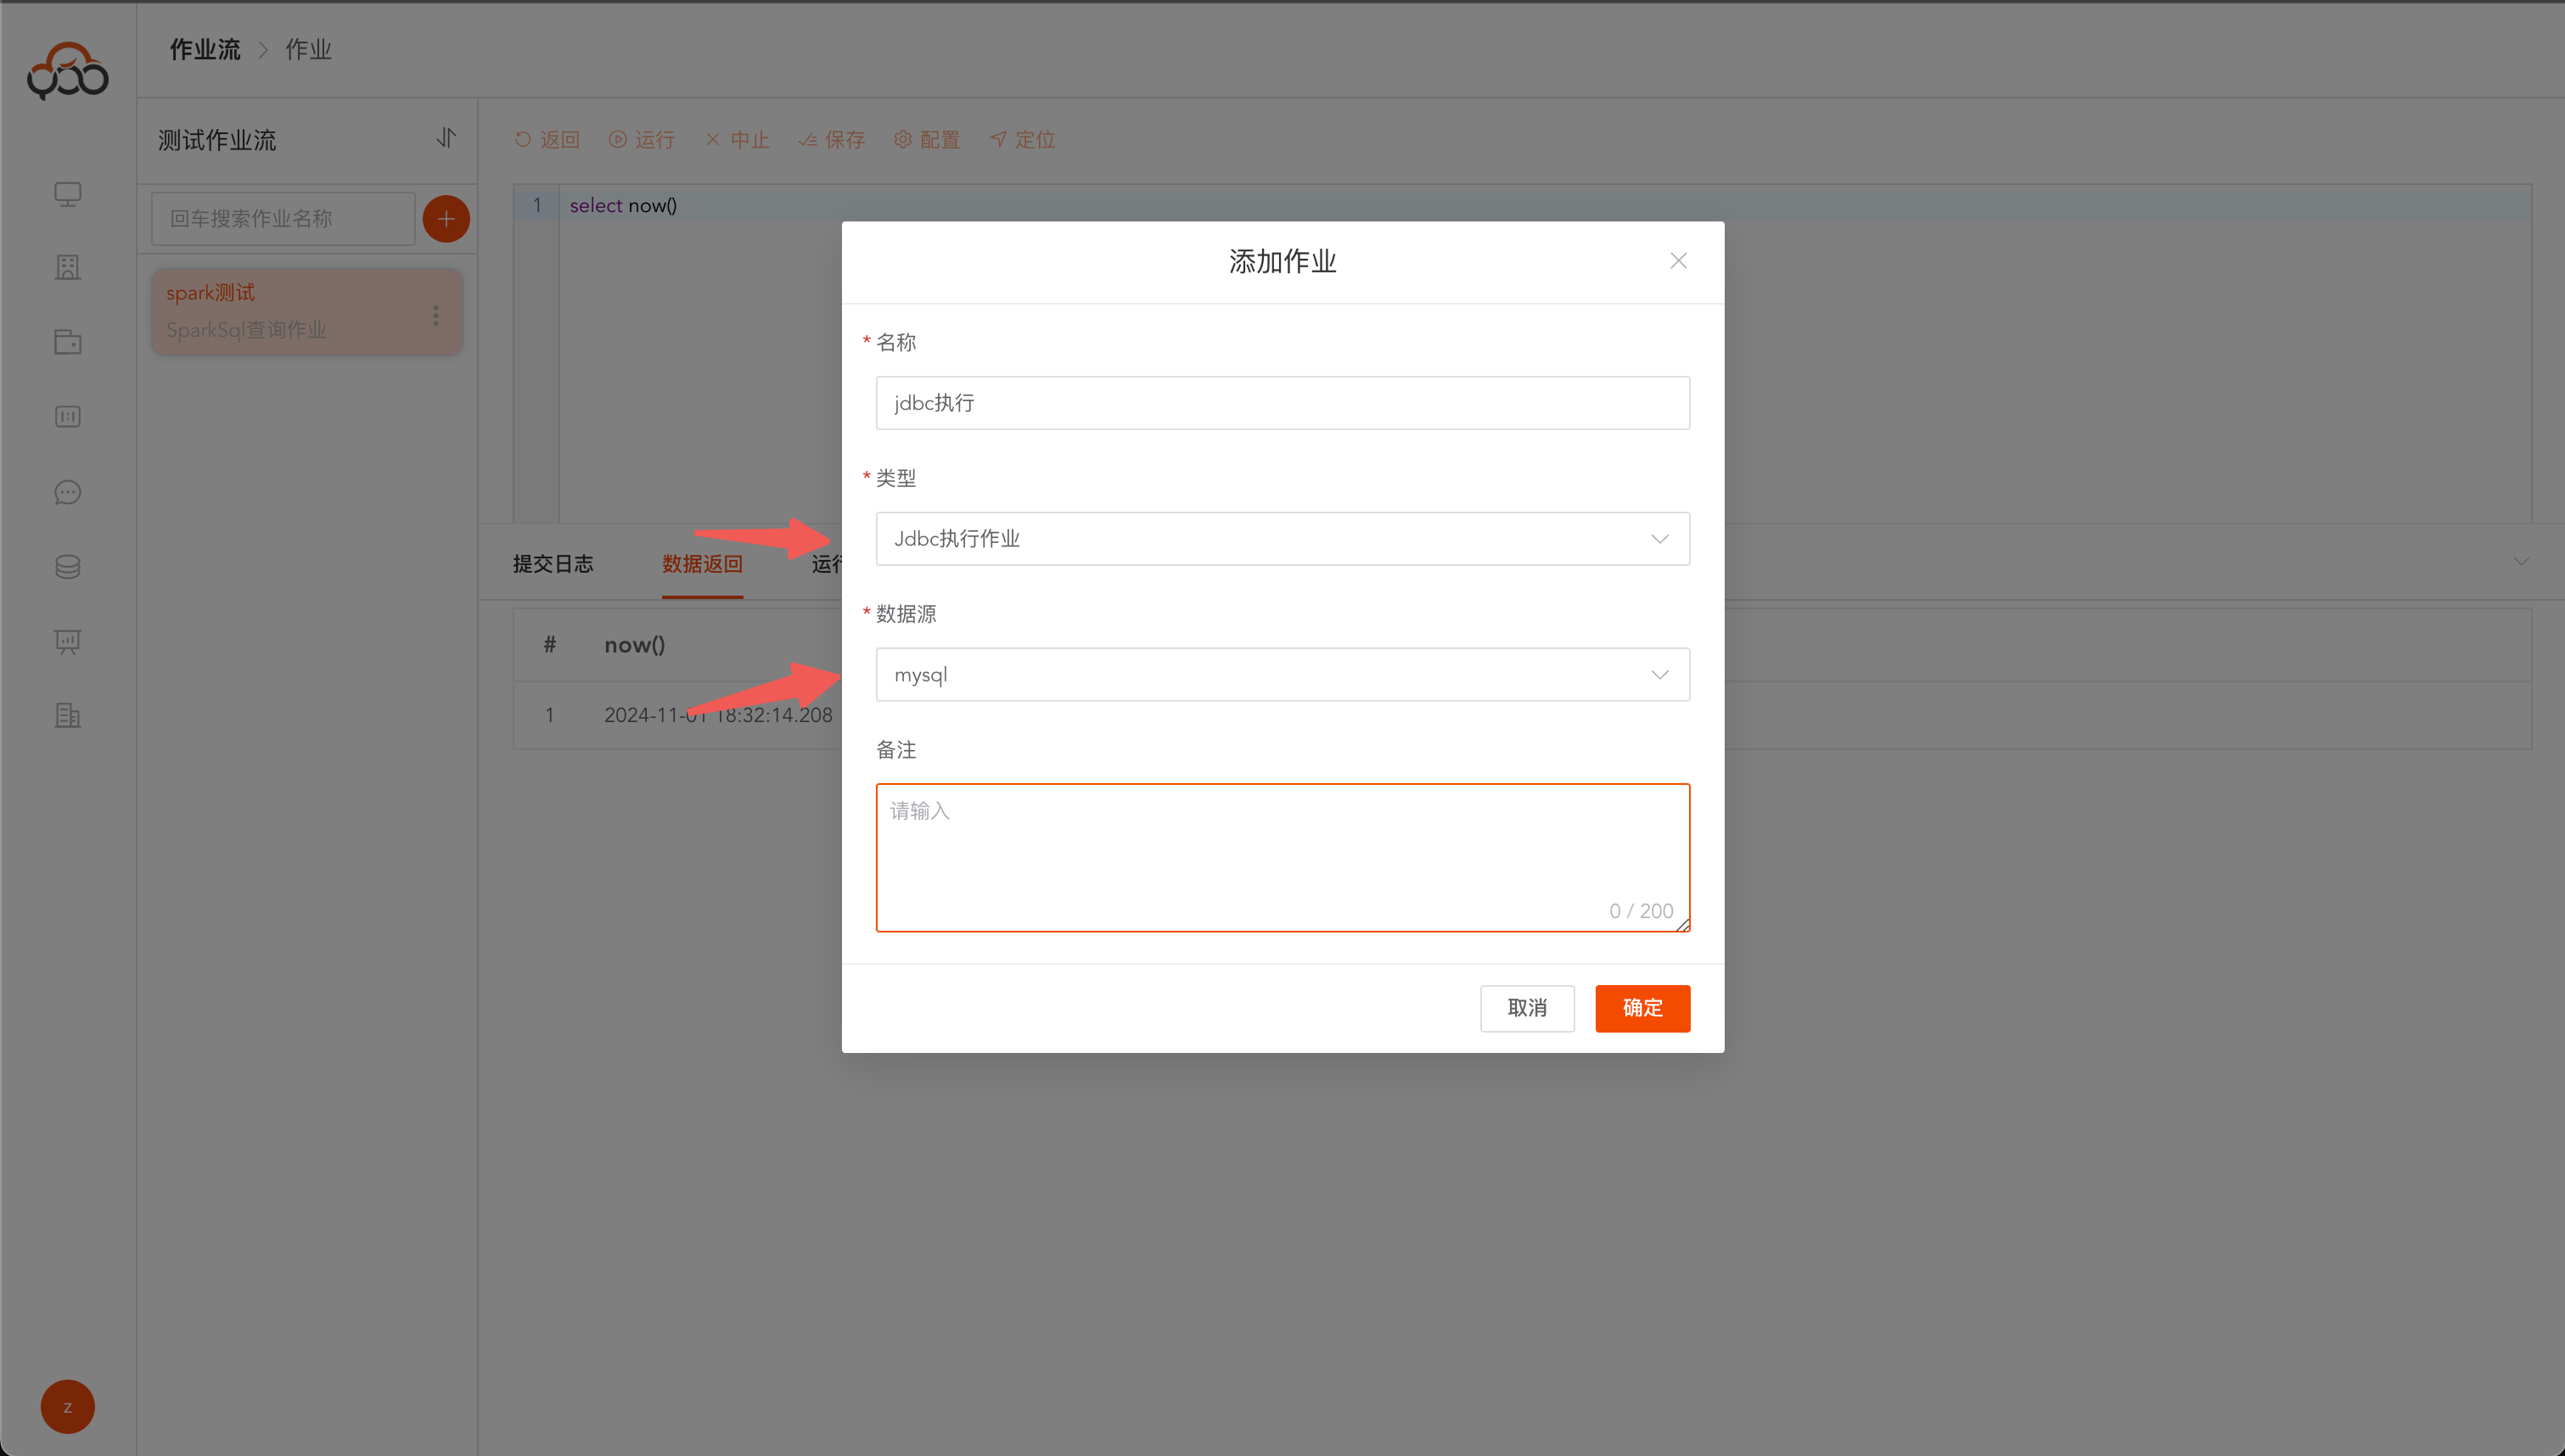
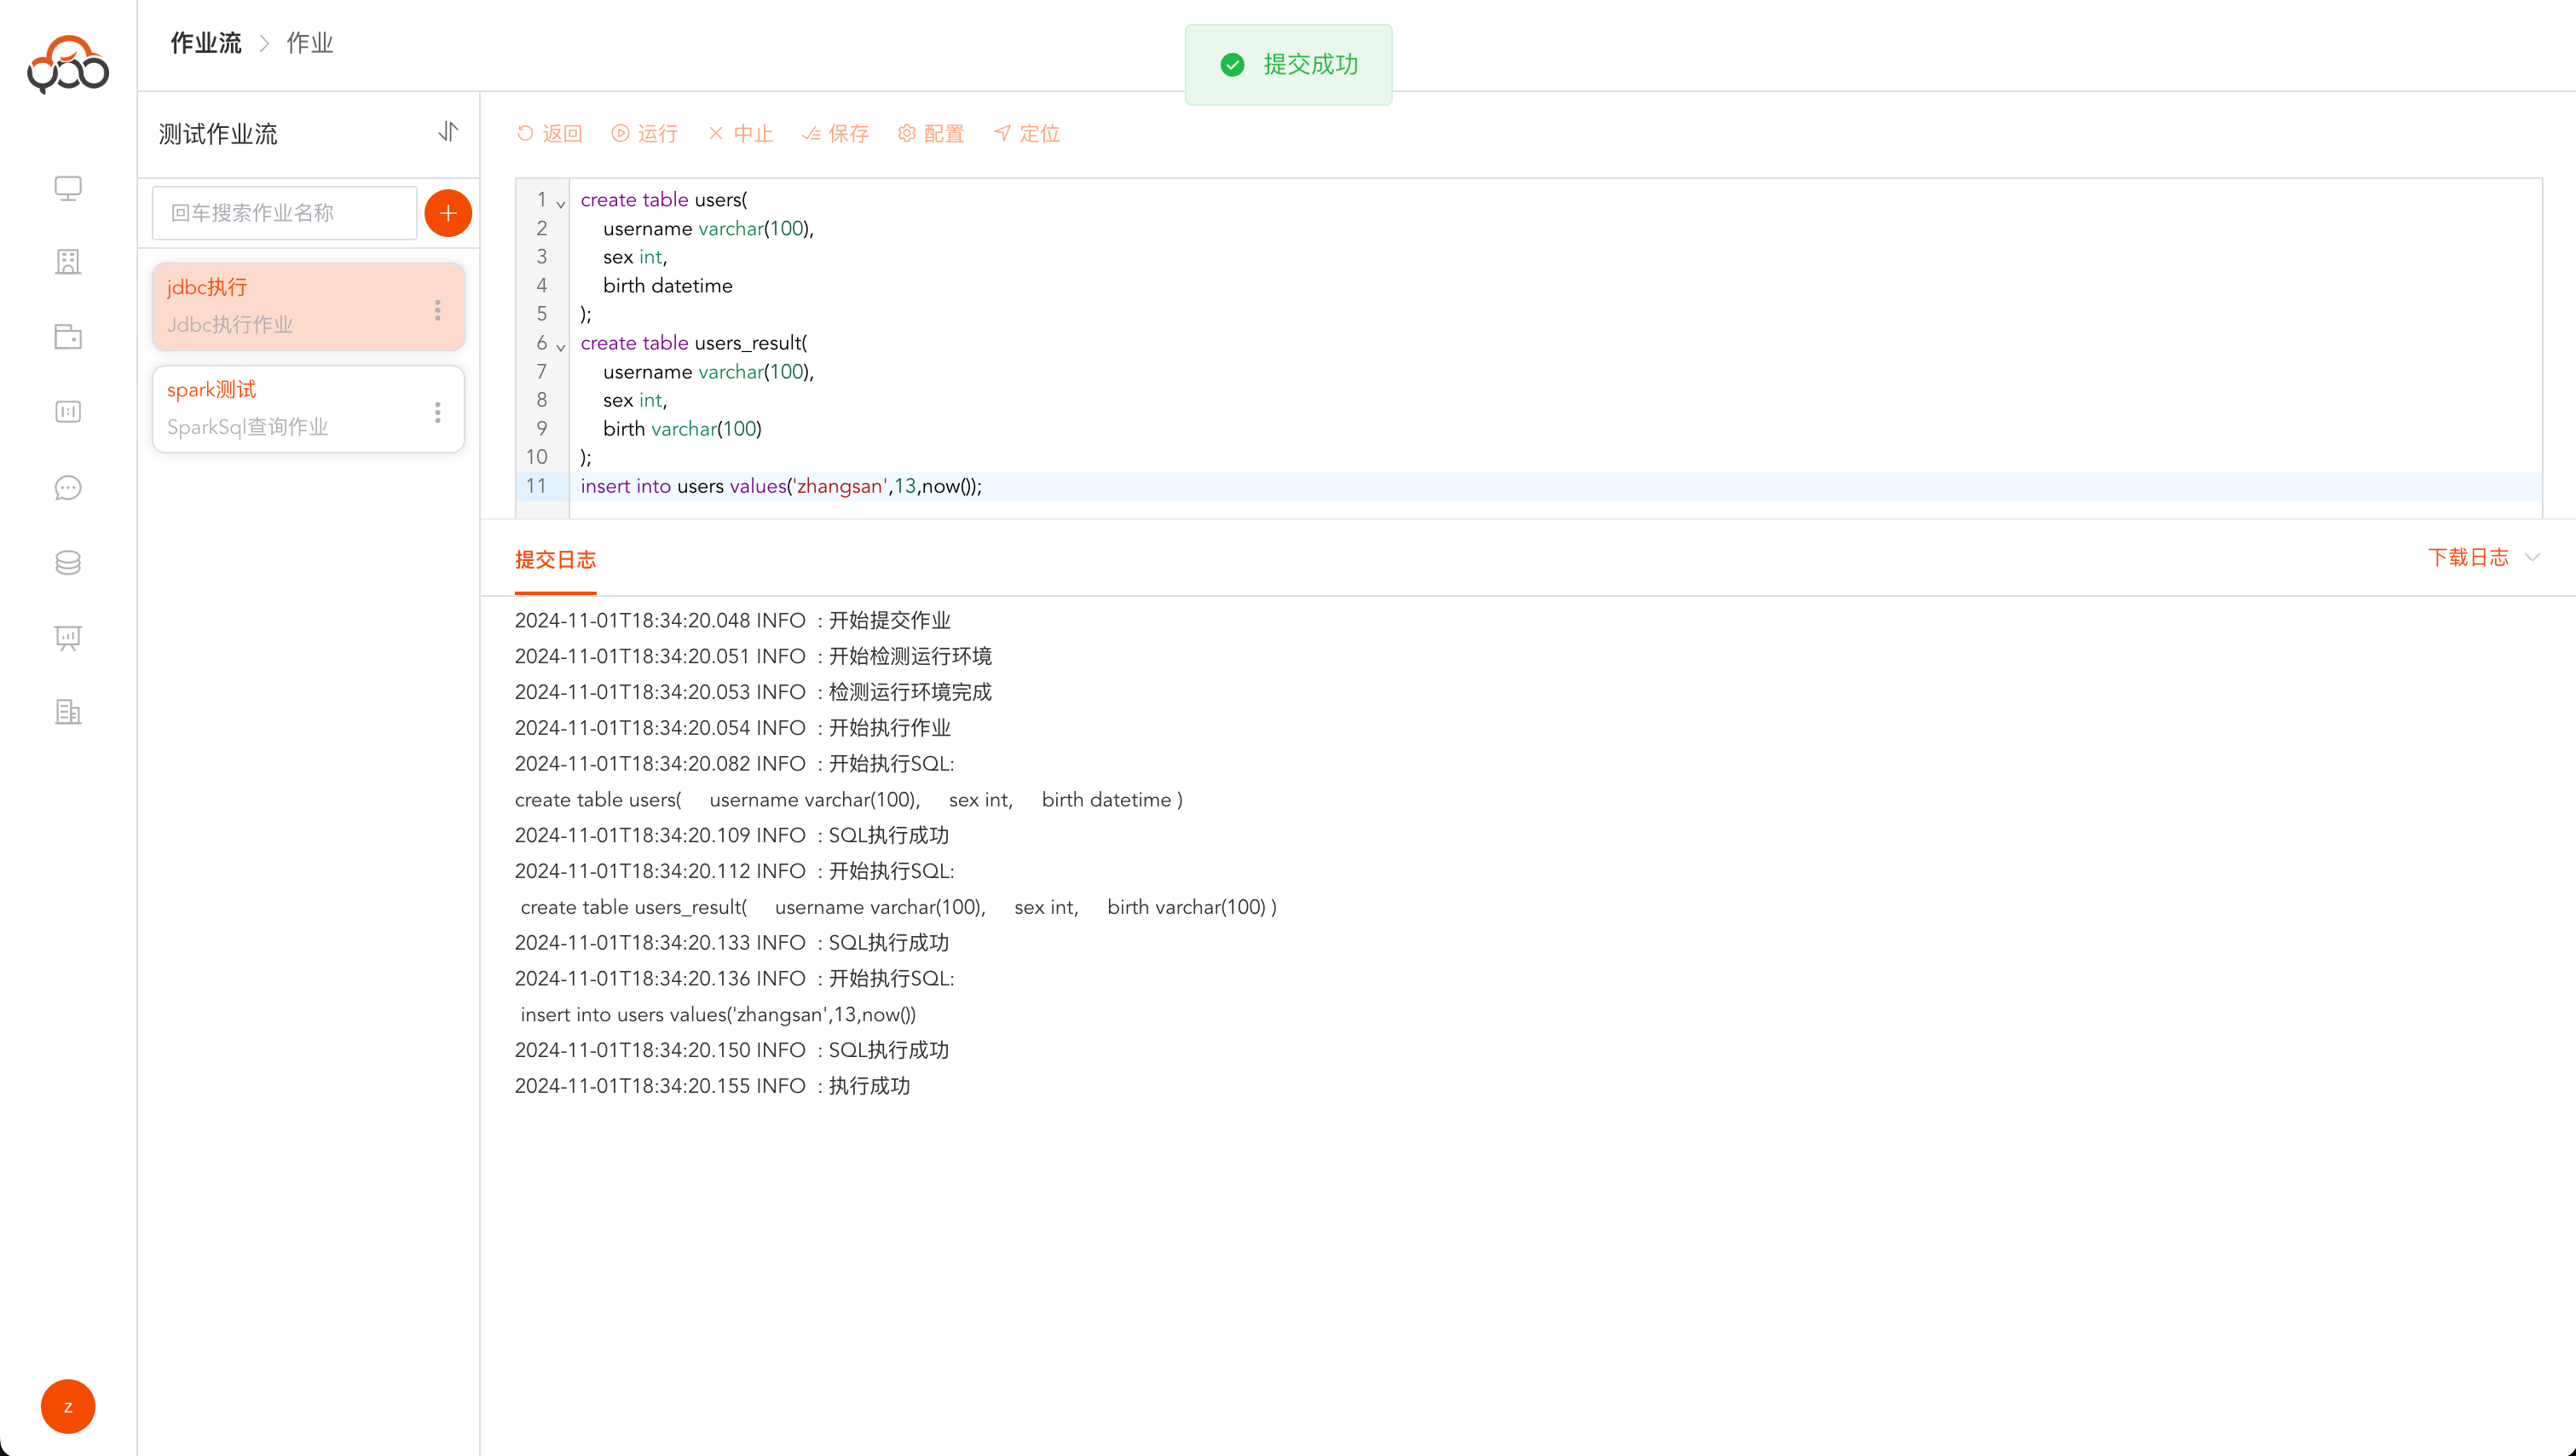
12. Create a new JDBC execution job
Create a JDBC execution job, select the H2 data source, and initialize the original and result tables required for the experience.
-- 原始表
create table users(
    username varchar(100),
    sex int,
    birth datetime
);

-- 结果表
create table users_result(
    username varchar(100),
    sex int,
    birth varchar(100)
);

-- 原始表中插入一条数据
insert into users values('张三',13,now());
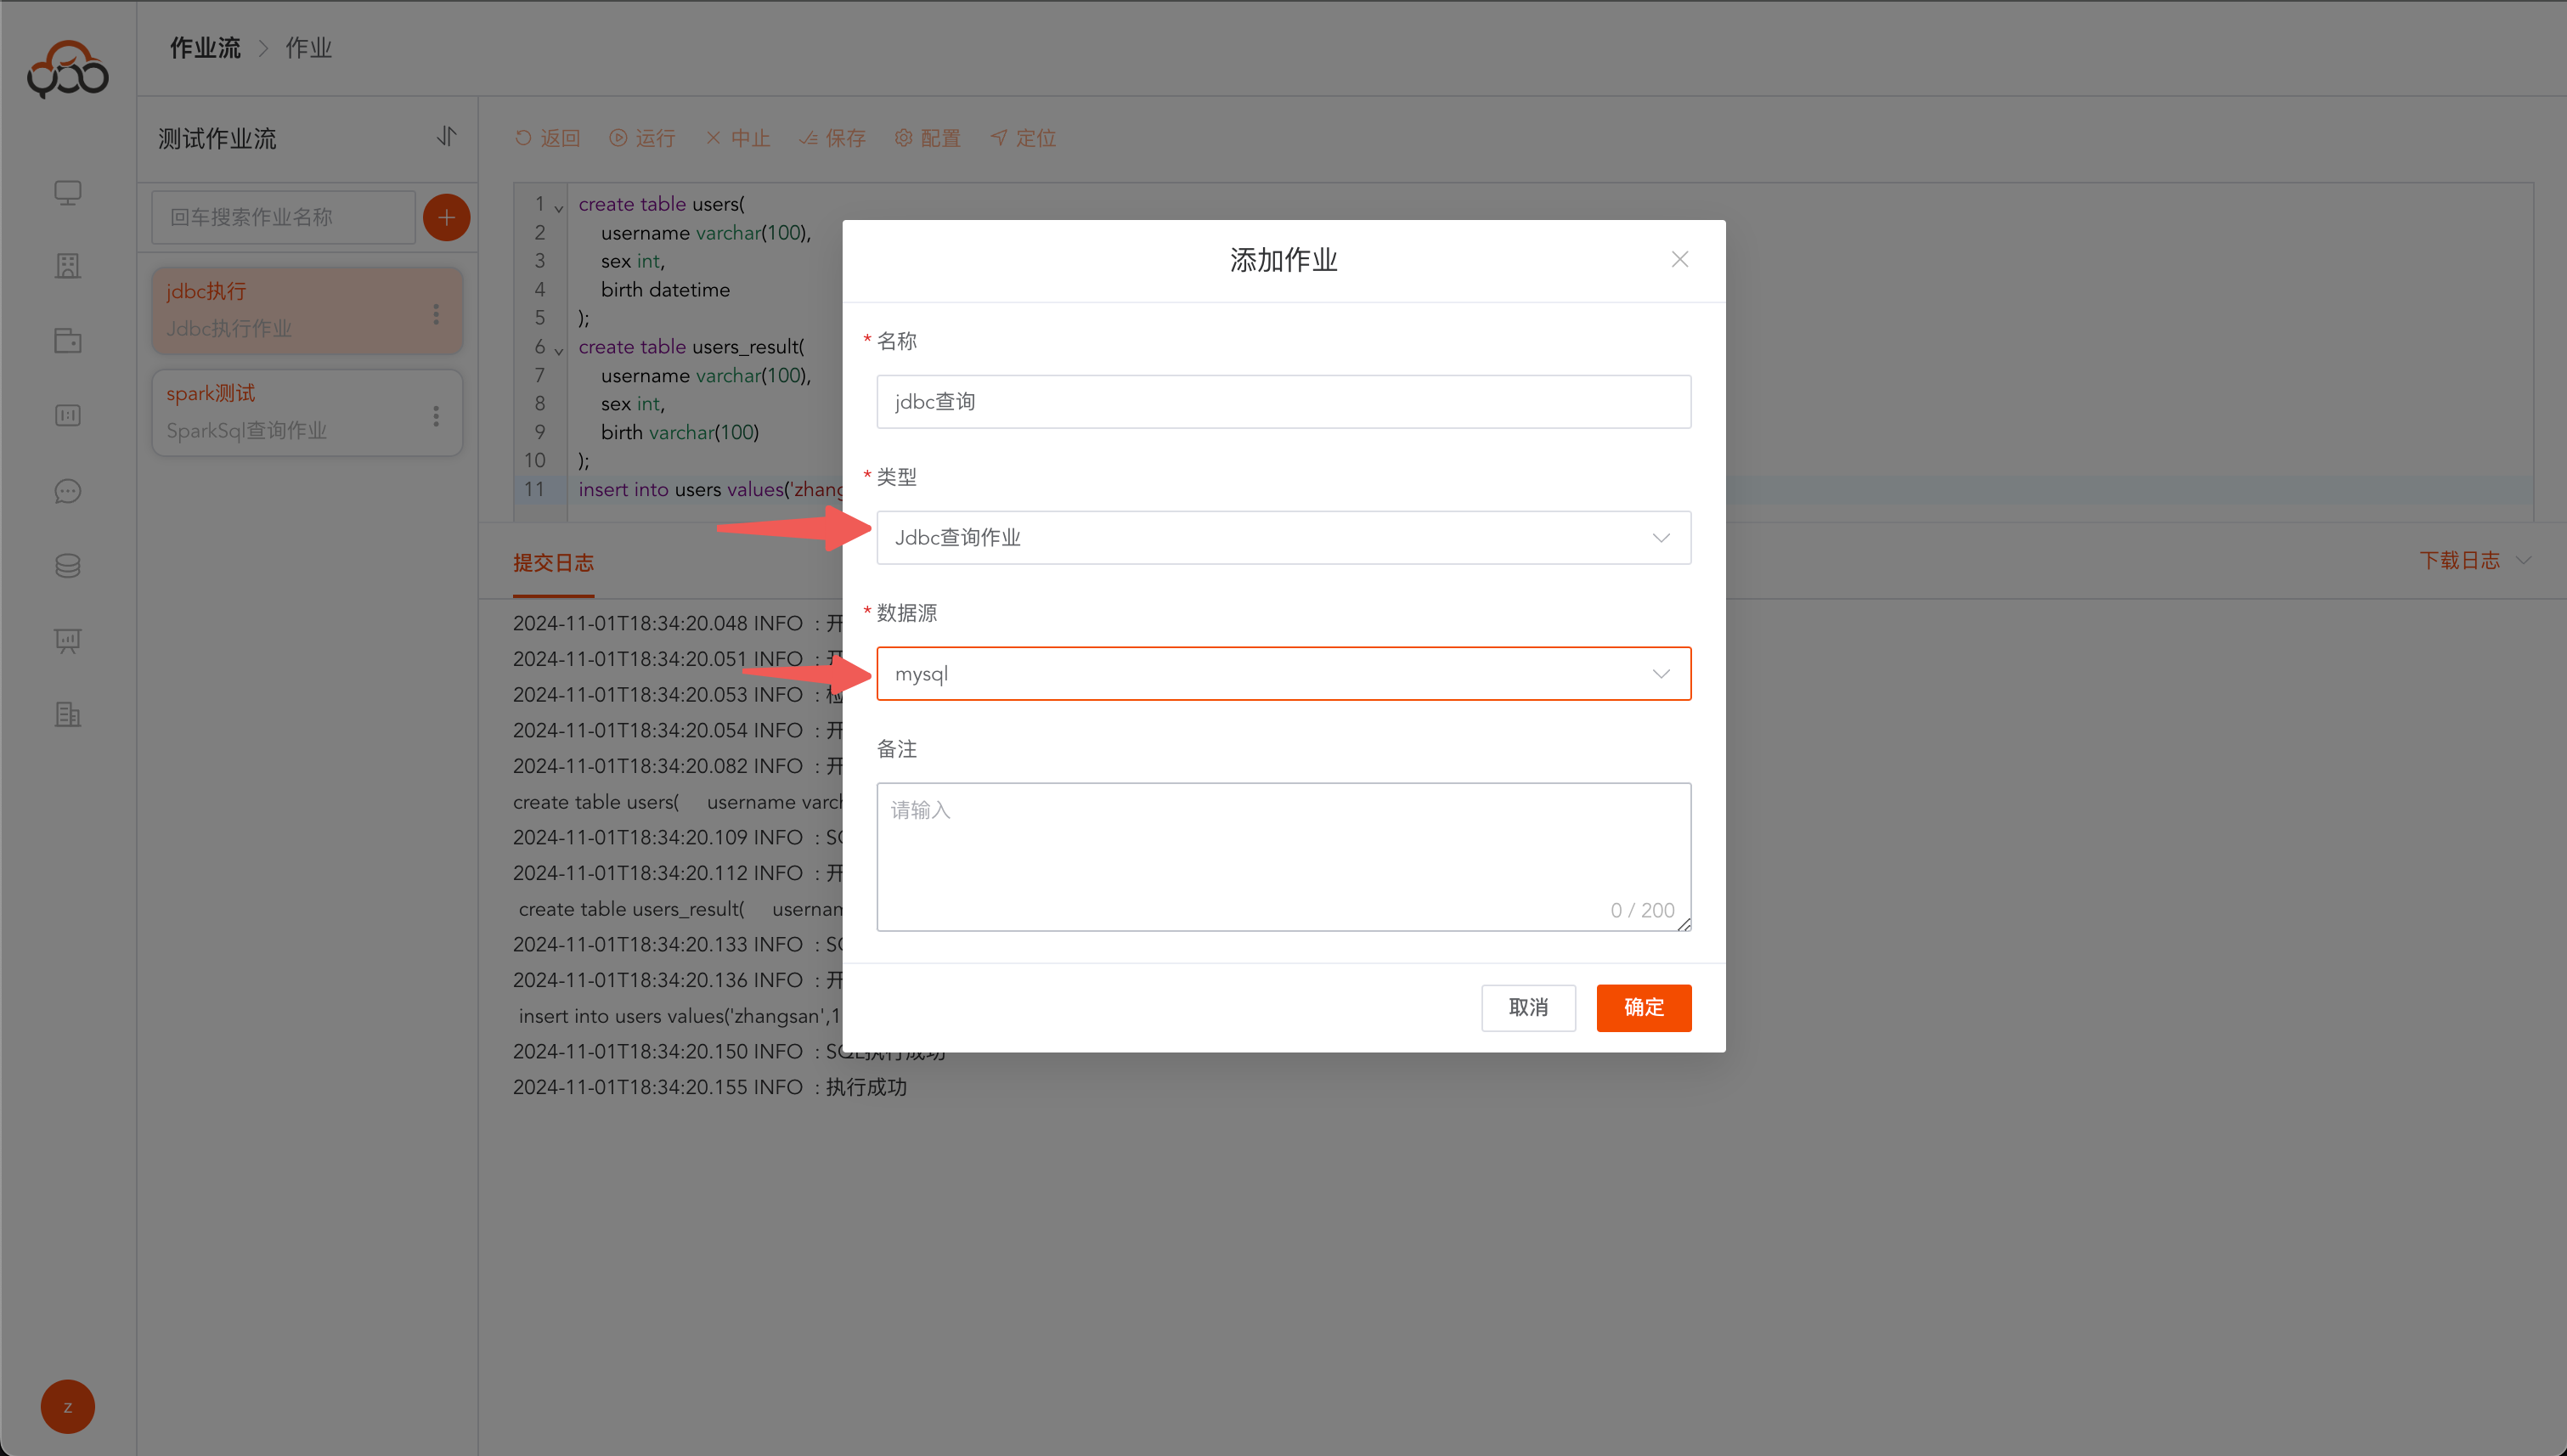
13. Create a new JDBC query job
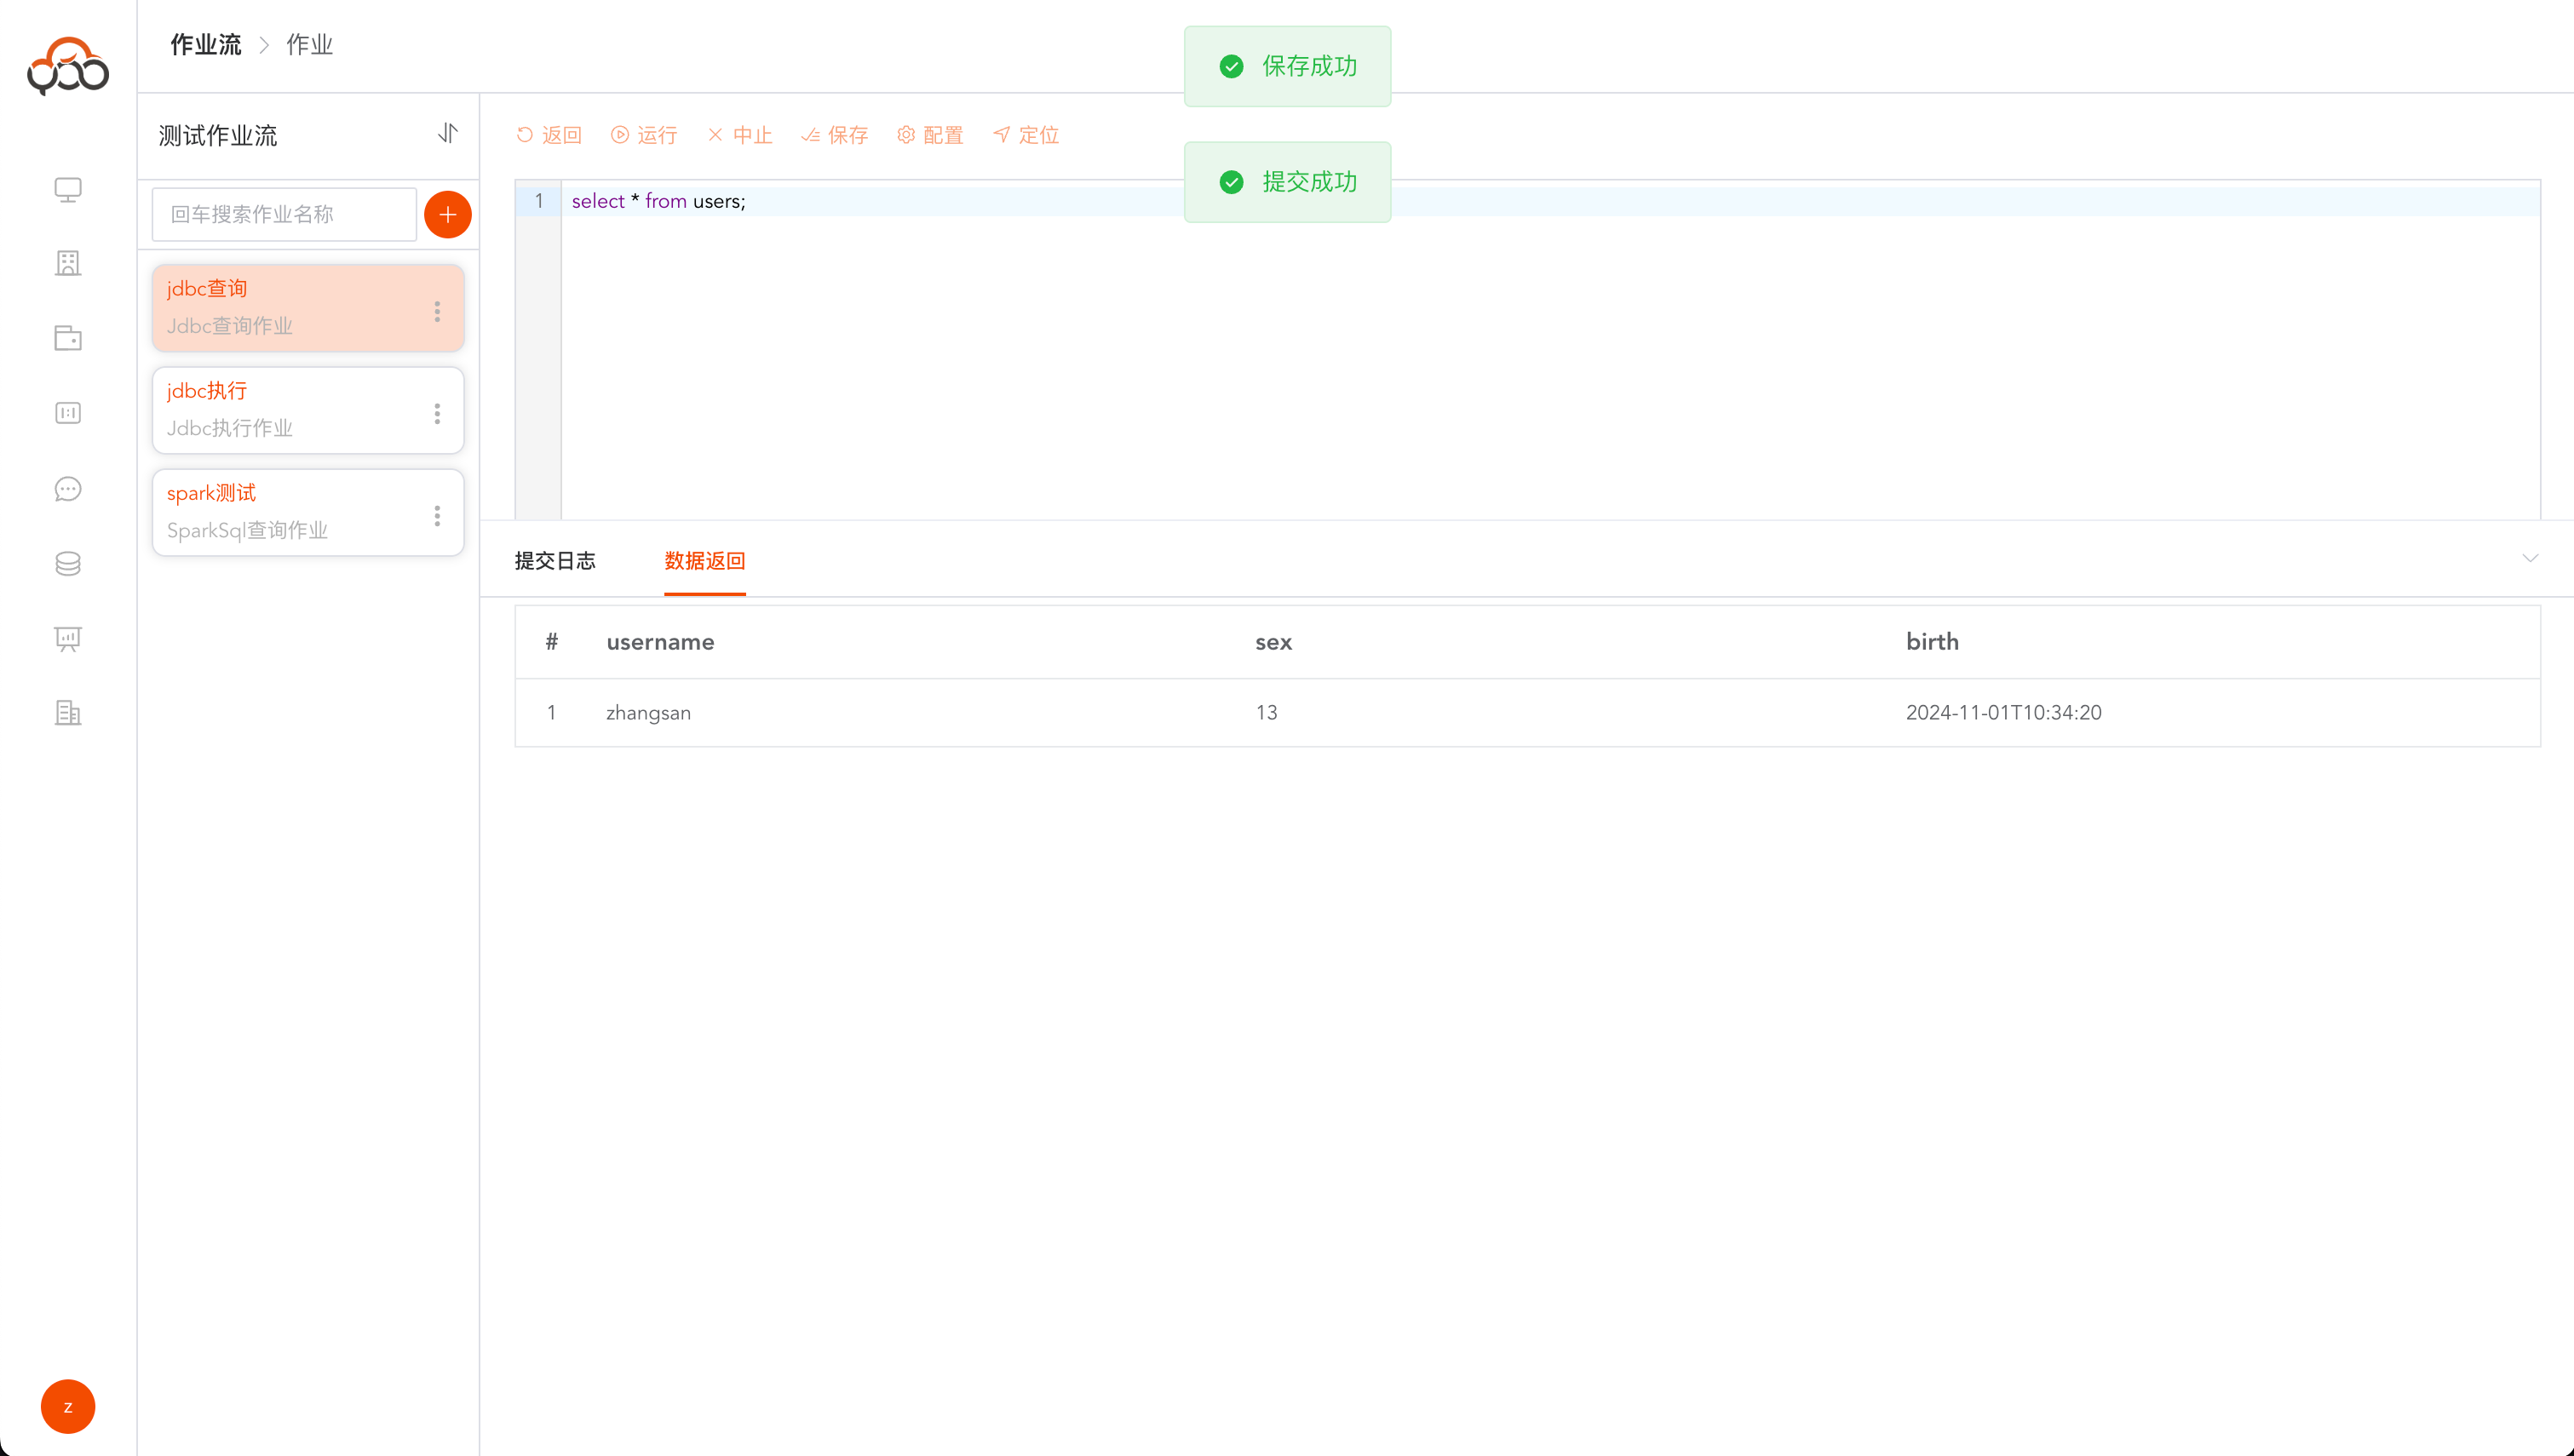
Create JDBC query jobs, query original table data, and verify data source connections and query capabilities.
select * from users;
14. Create a new data synchronization job
Create a data synchronization job to synchronize original table data to the result table.
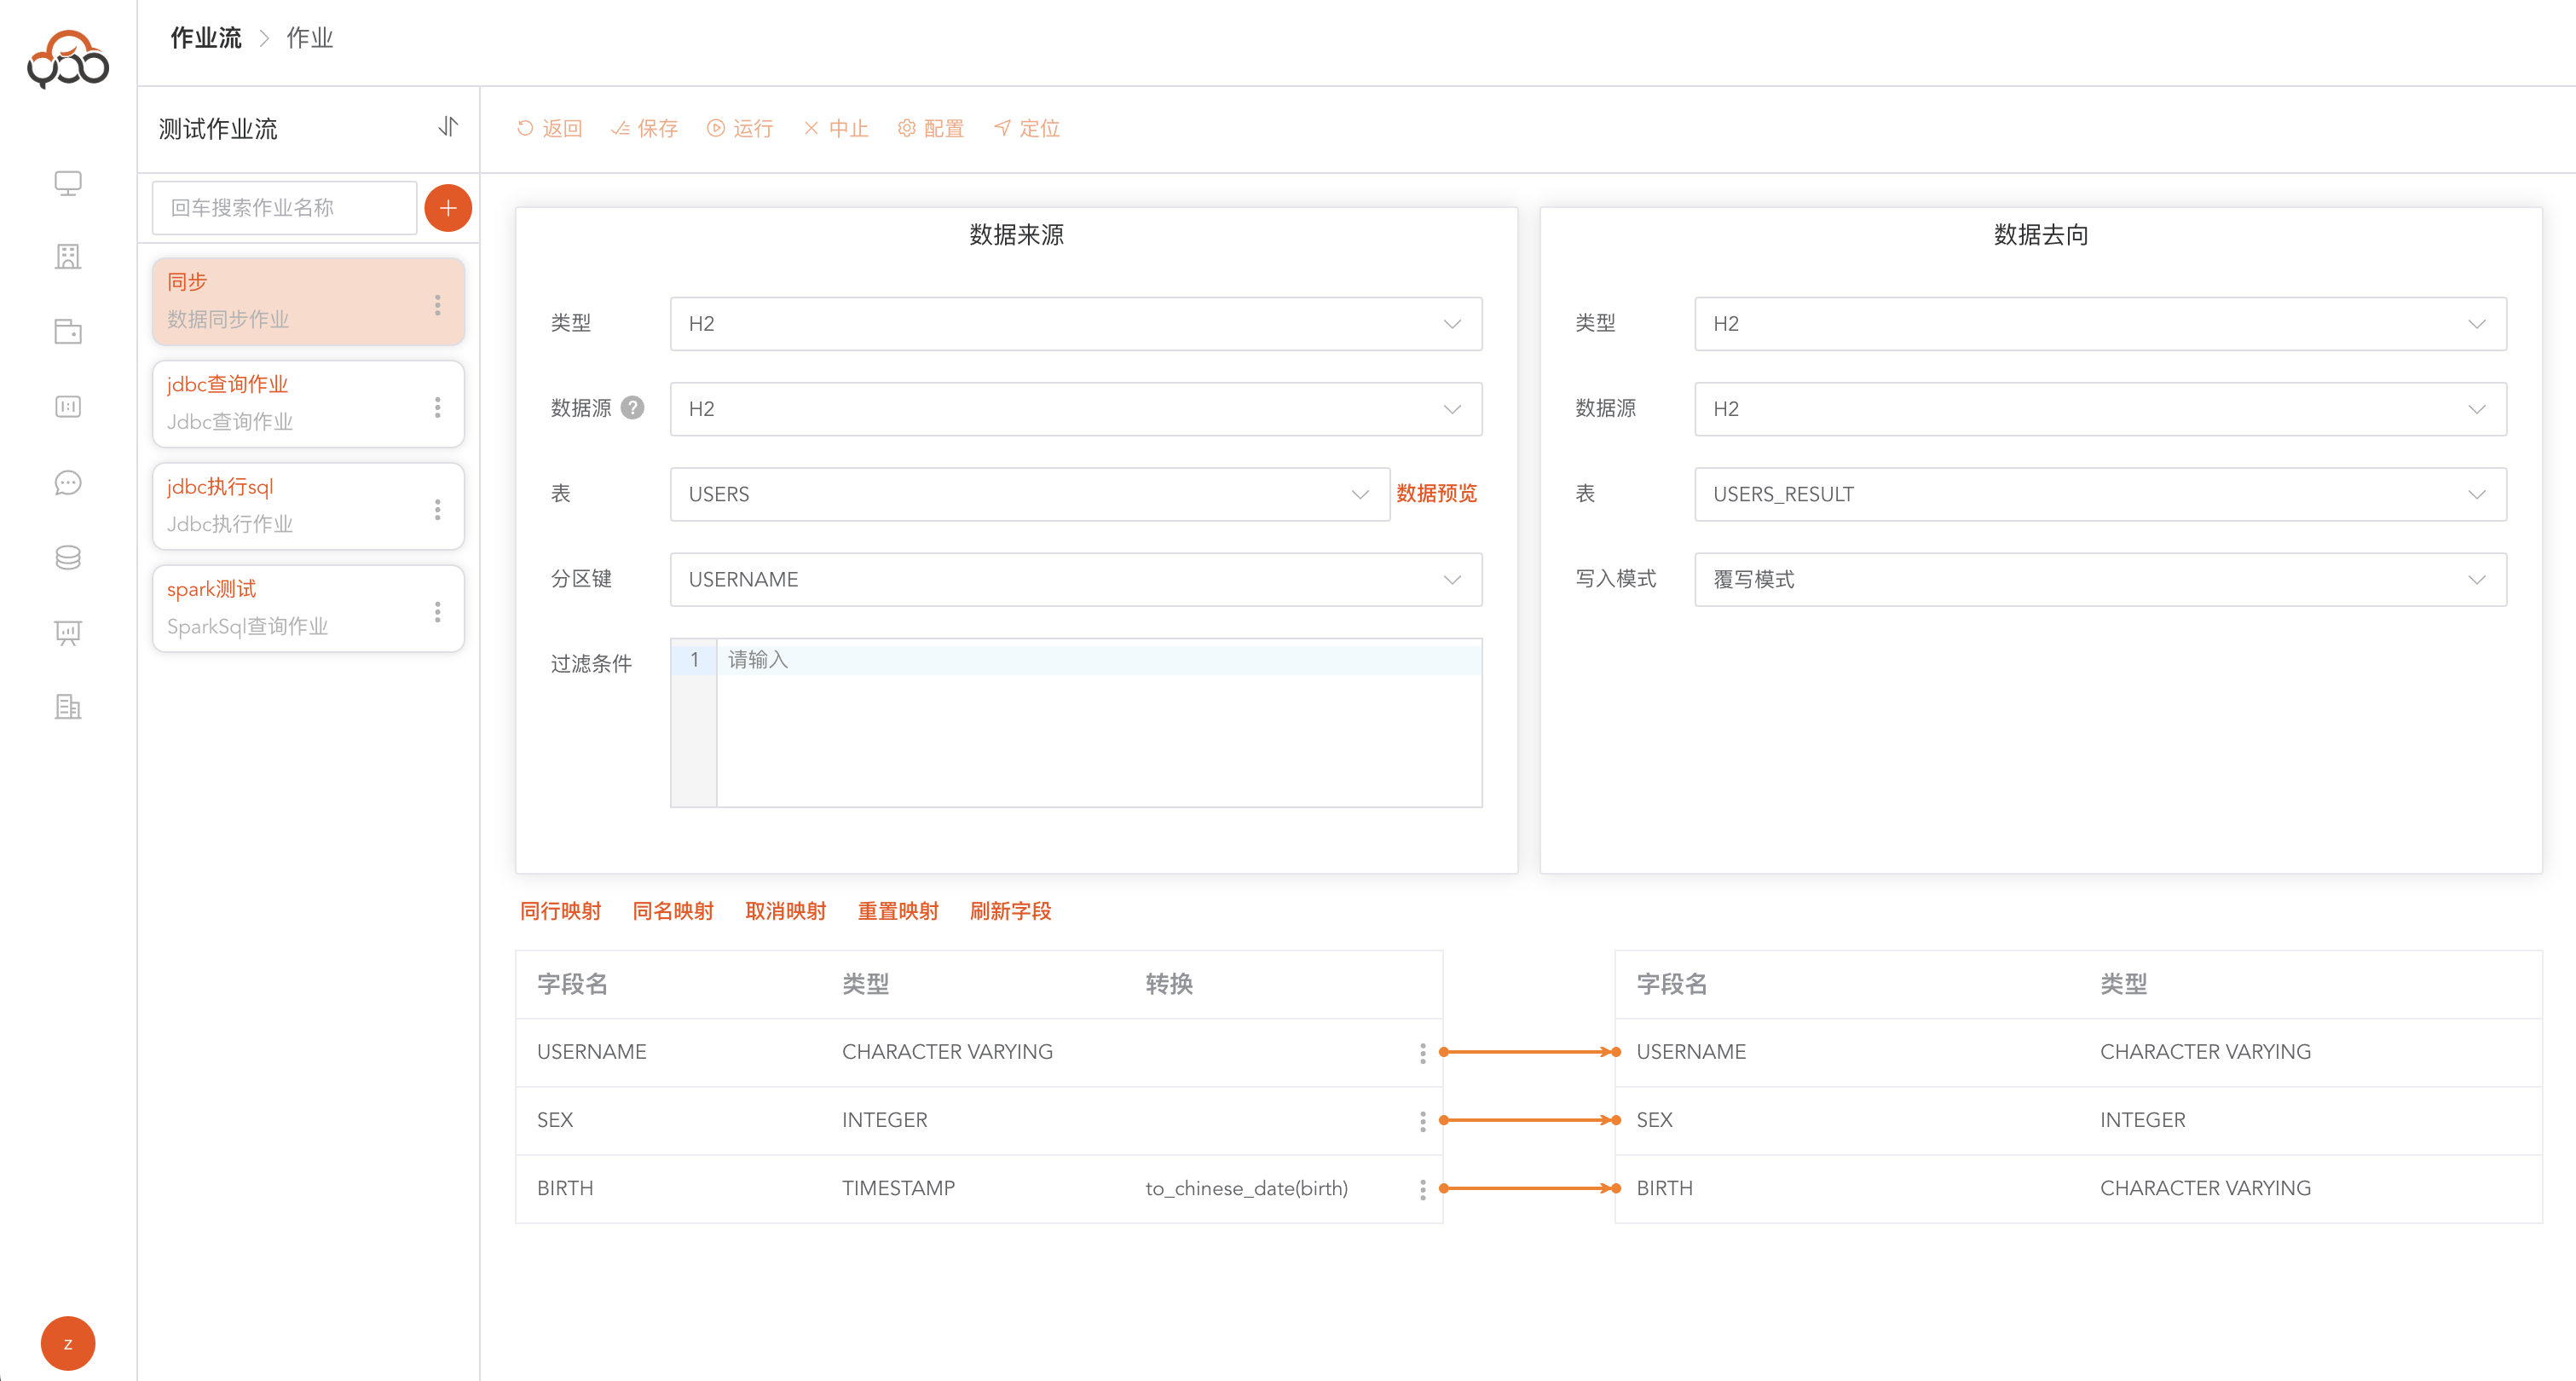
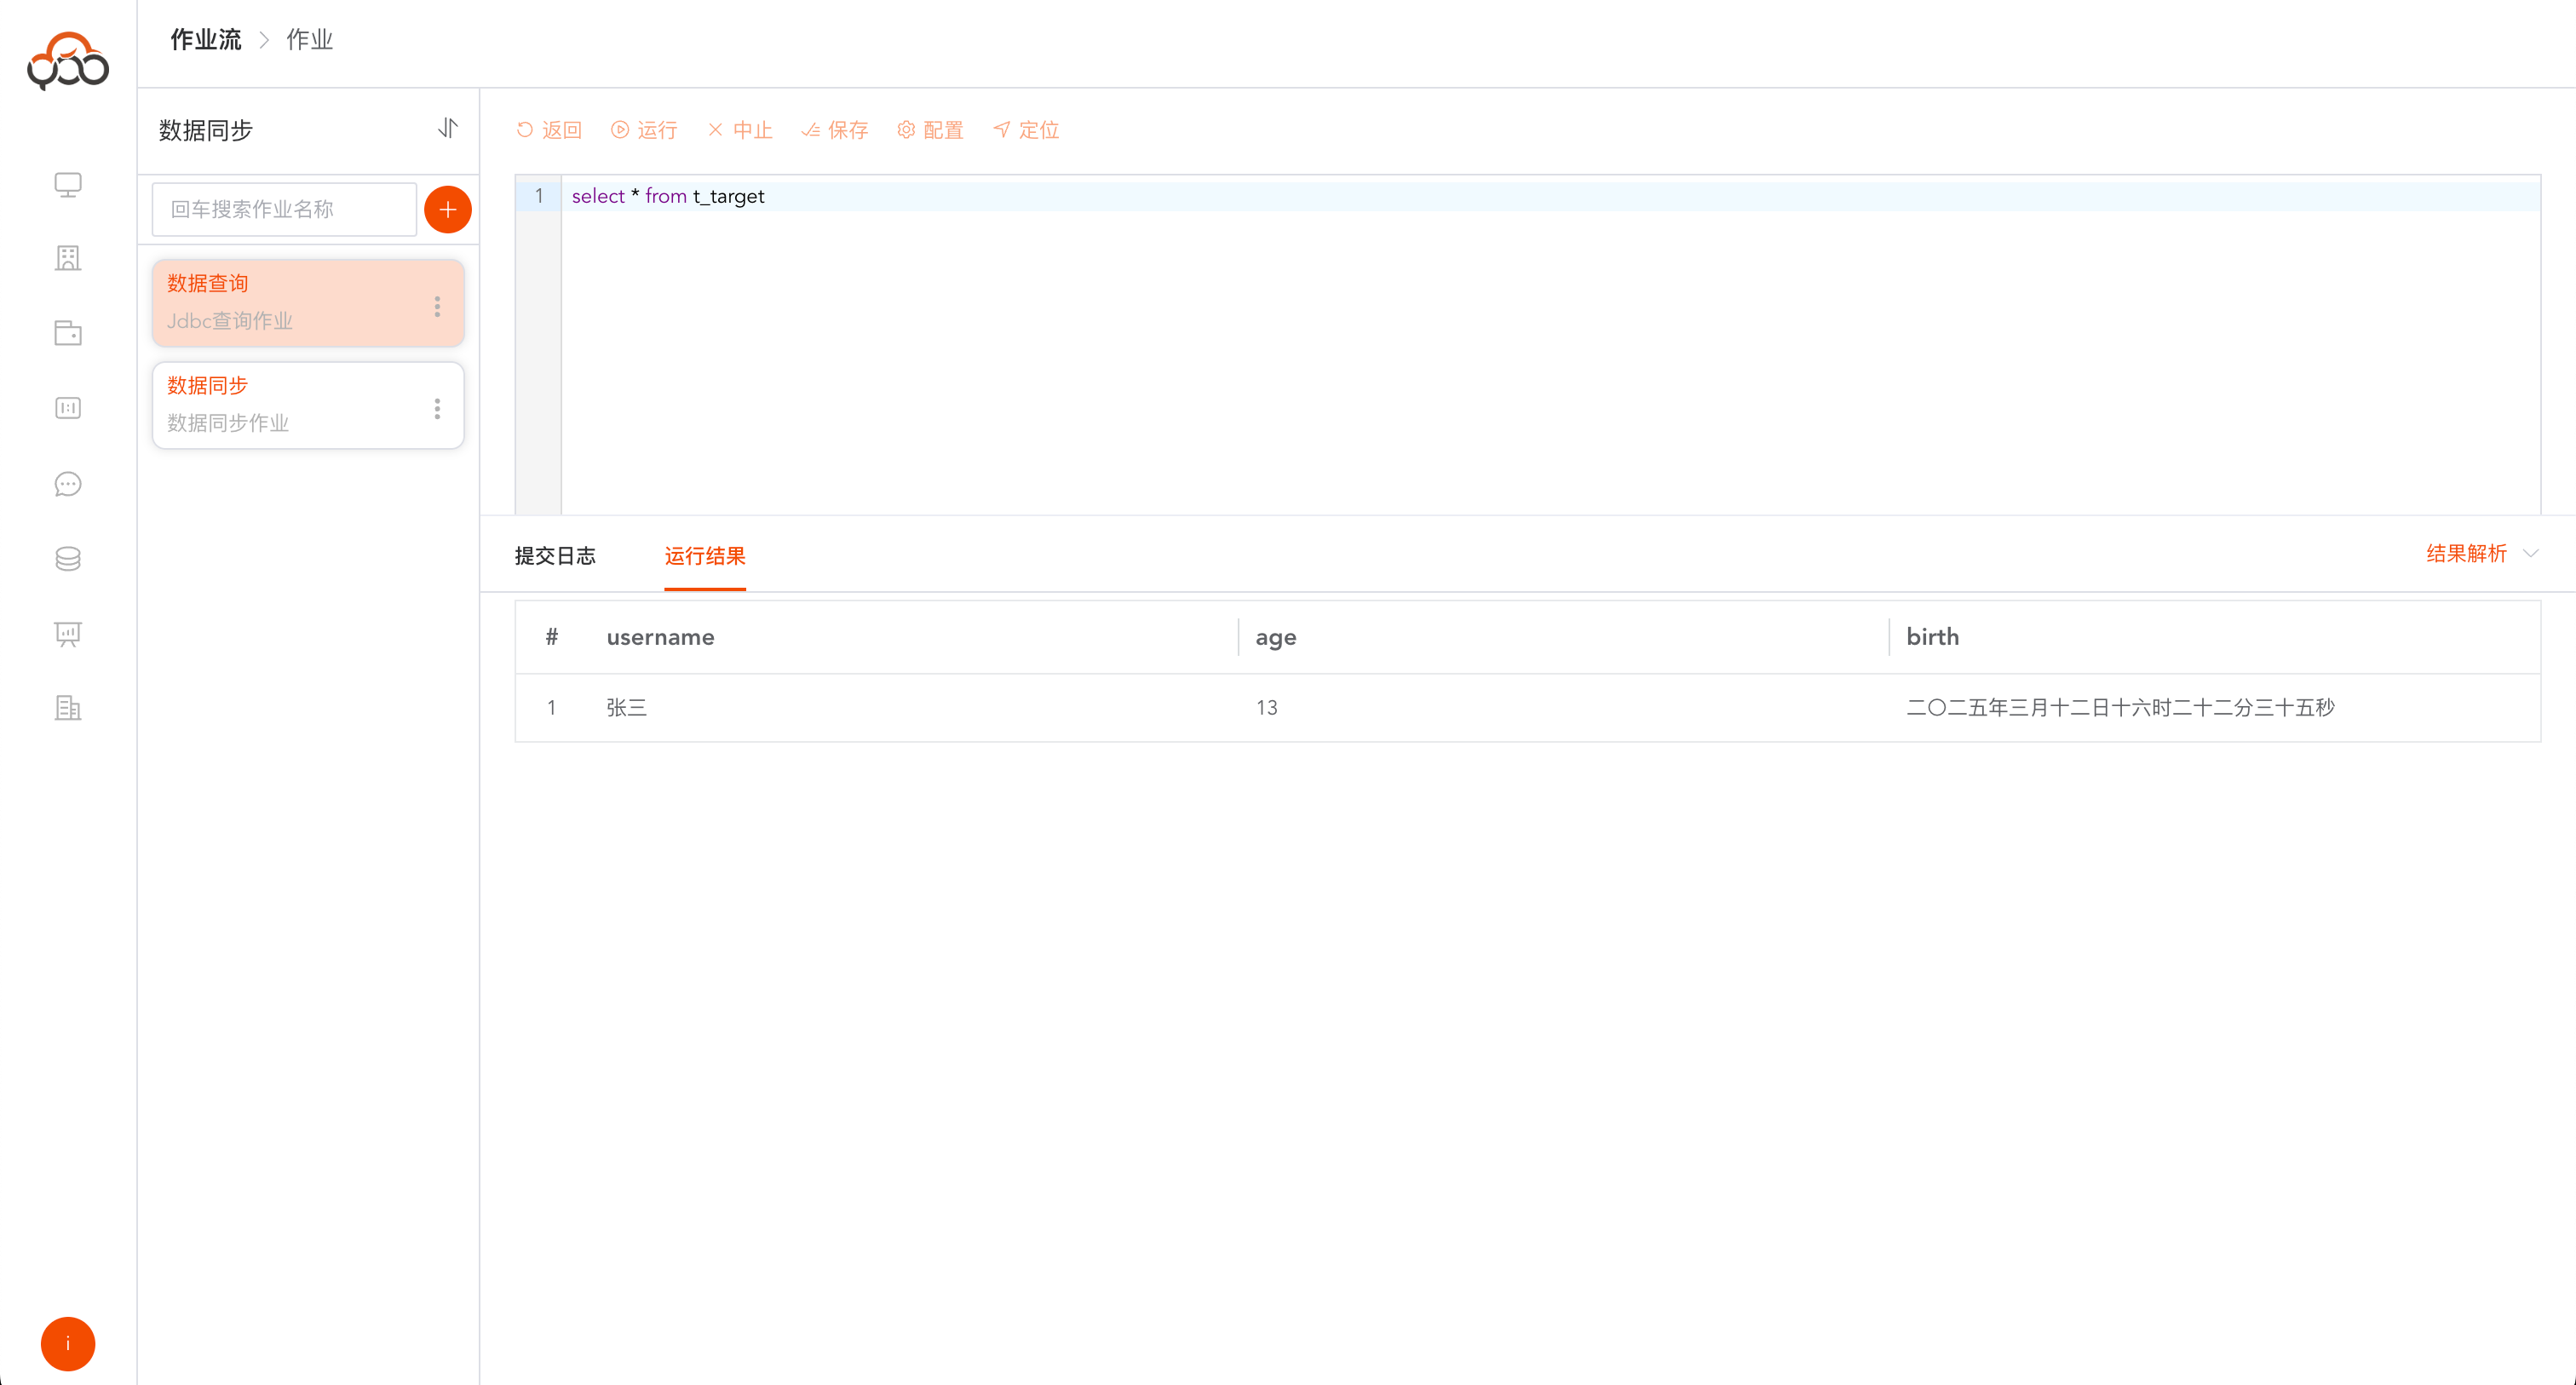
After synchronization is complete, the result table data can be viewed through a JDBC query job.
select * from users_result;
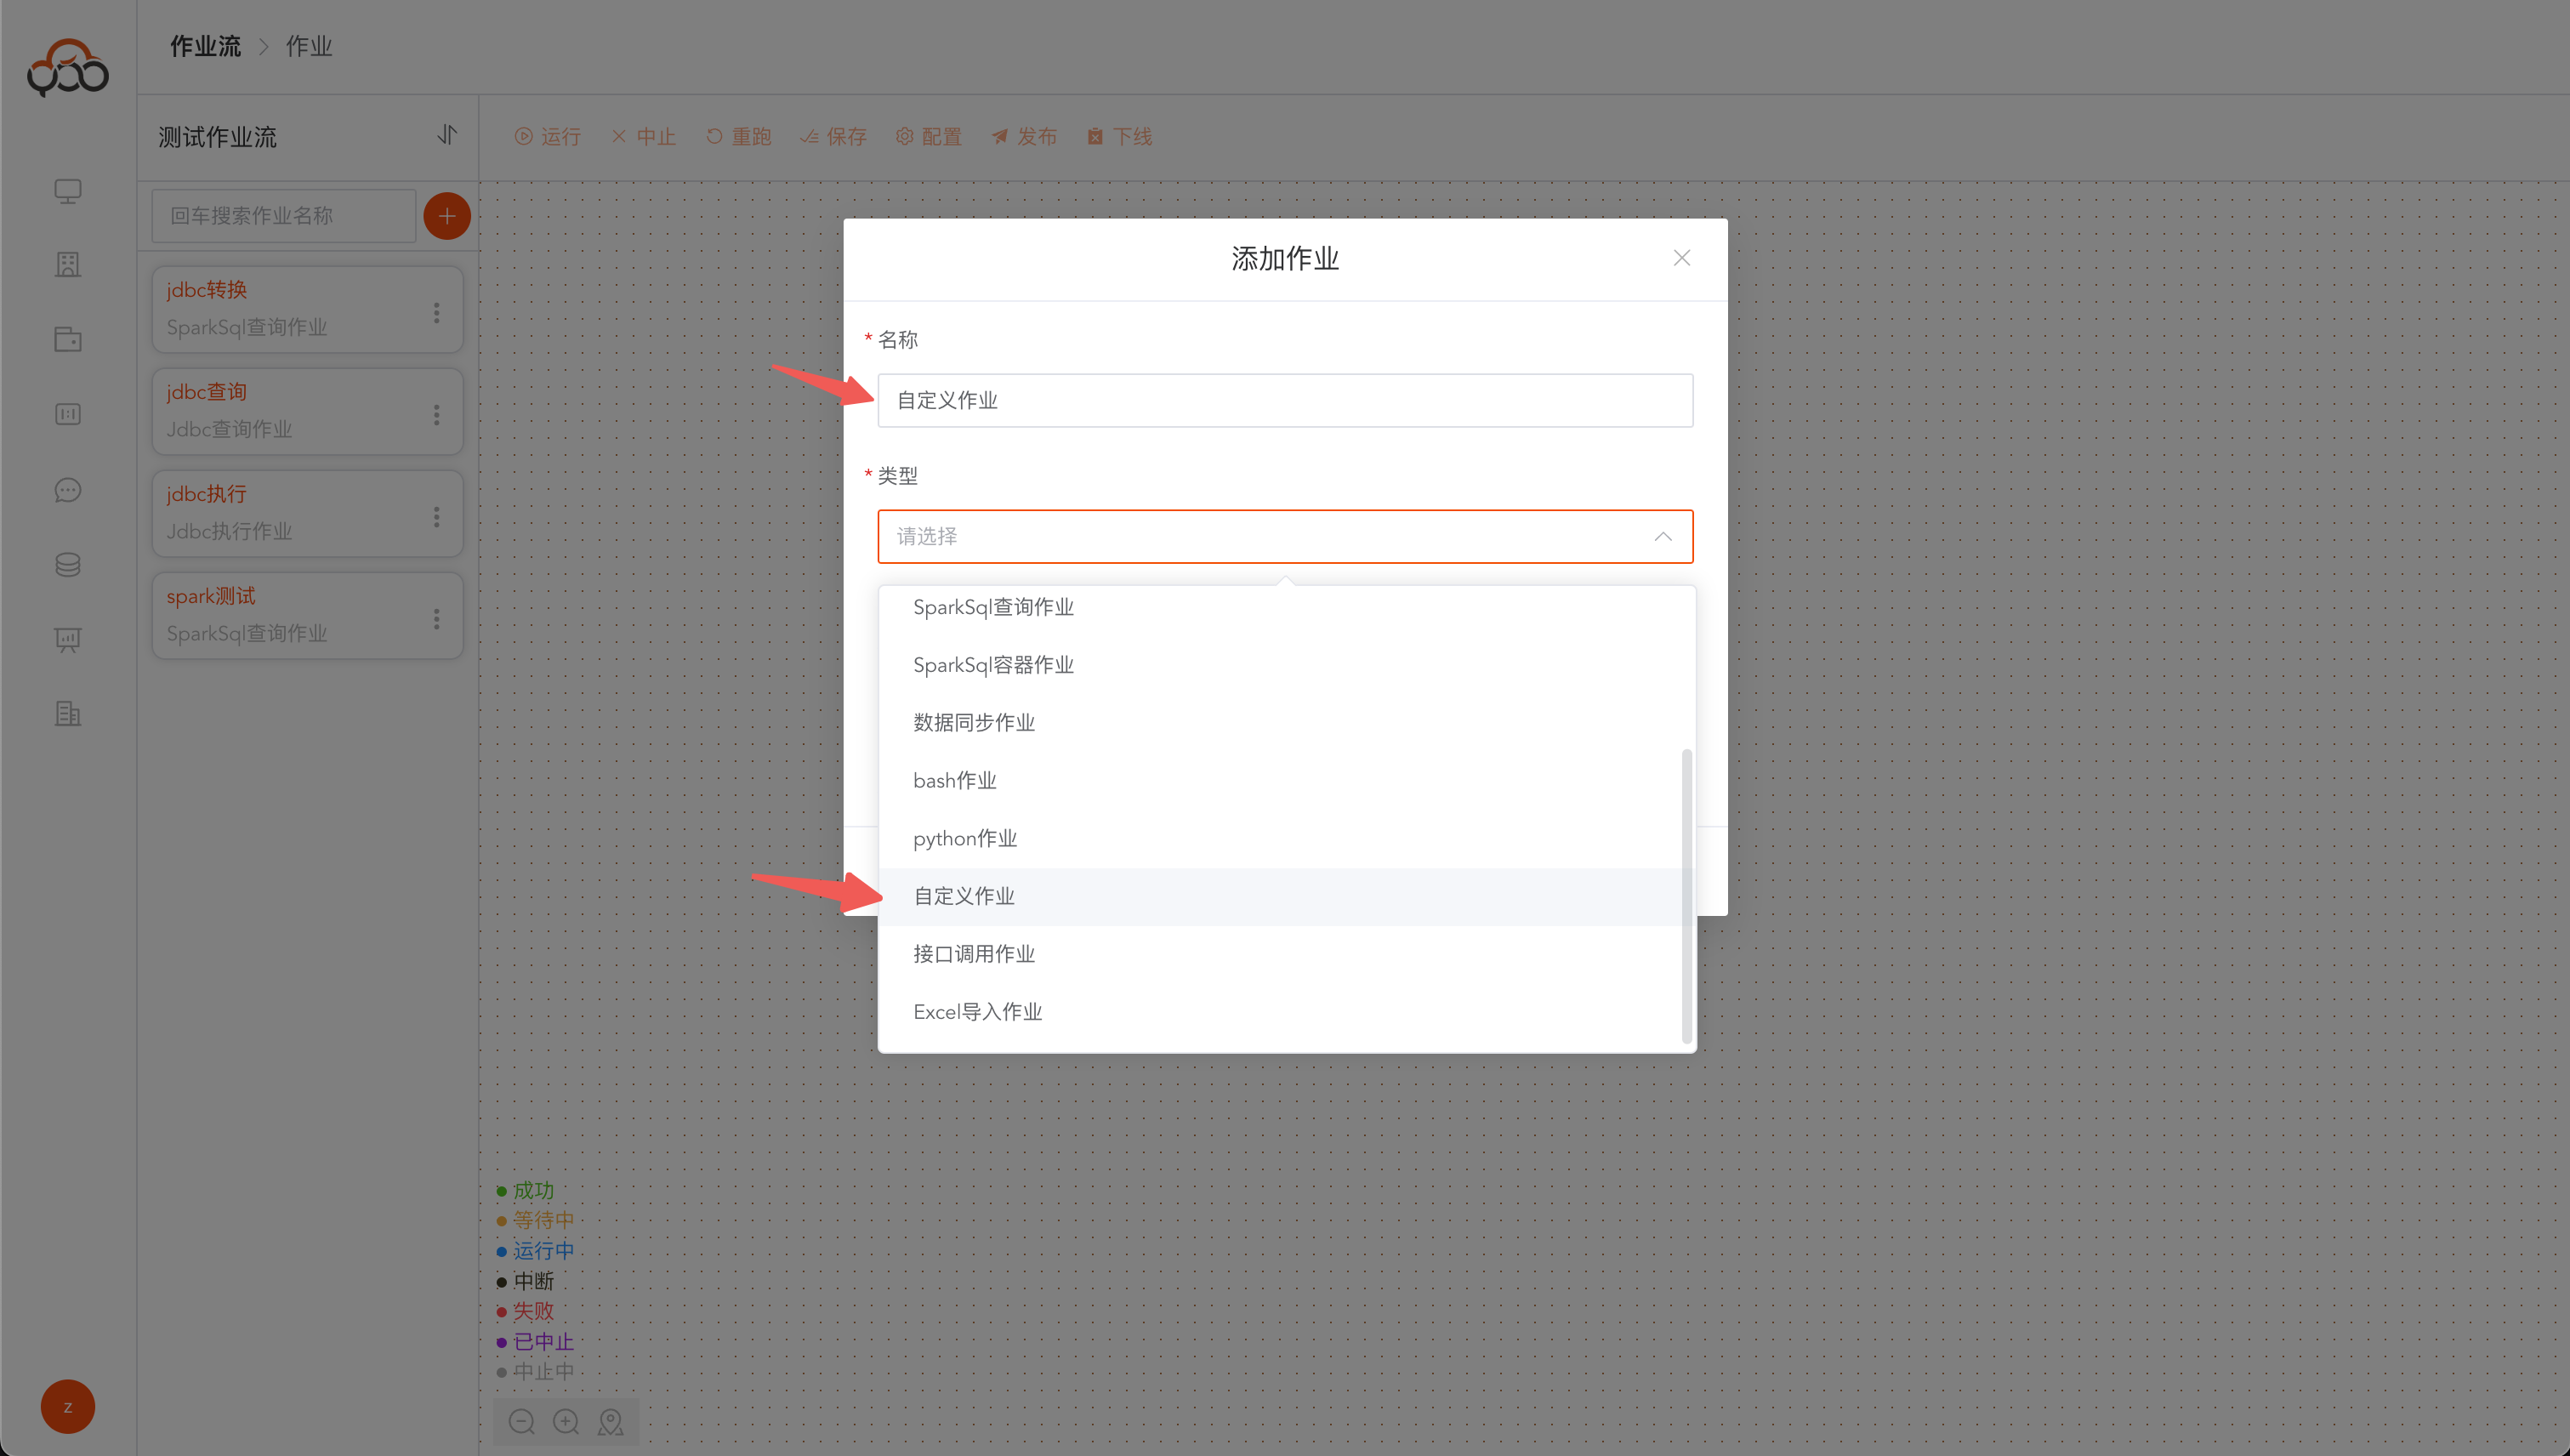
15. Create a new Spark custom job
Create a Spark custom job to verify the platform's ability to submit and run custom Jar jobs. The example in this article uses the Spark official sample program to calculate the Pi value.
For customized job templates, please refer to:
https://github.com/ispong/spark-job-template
Sample Jar download address:
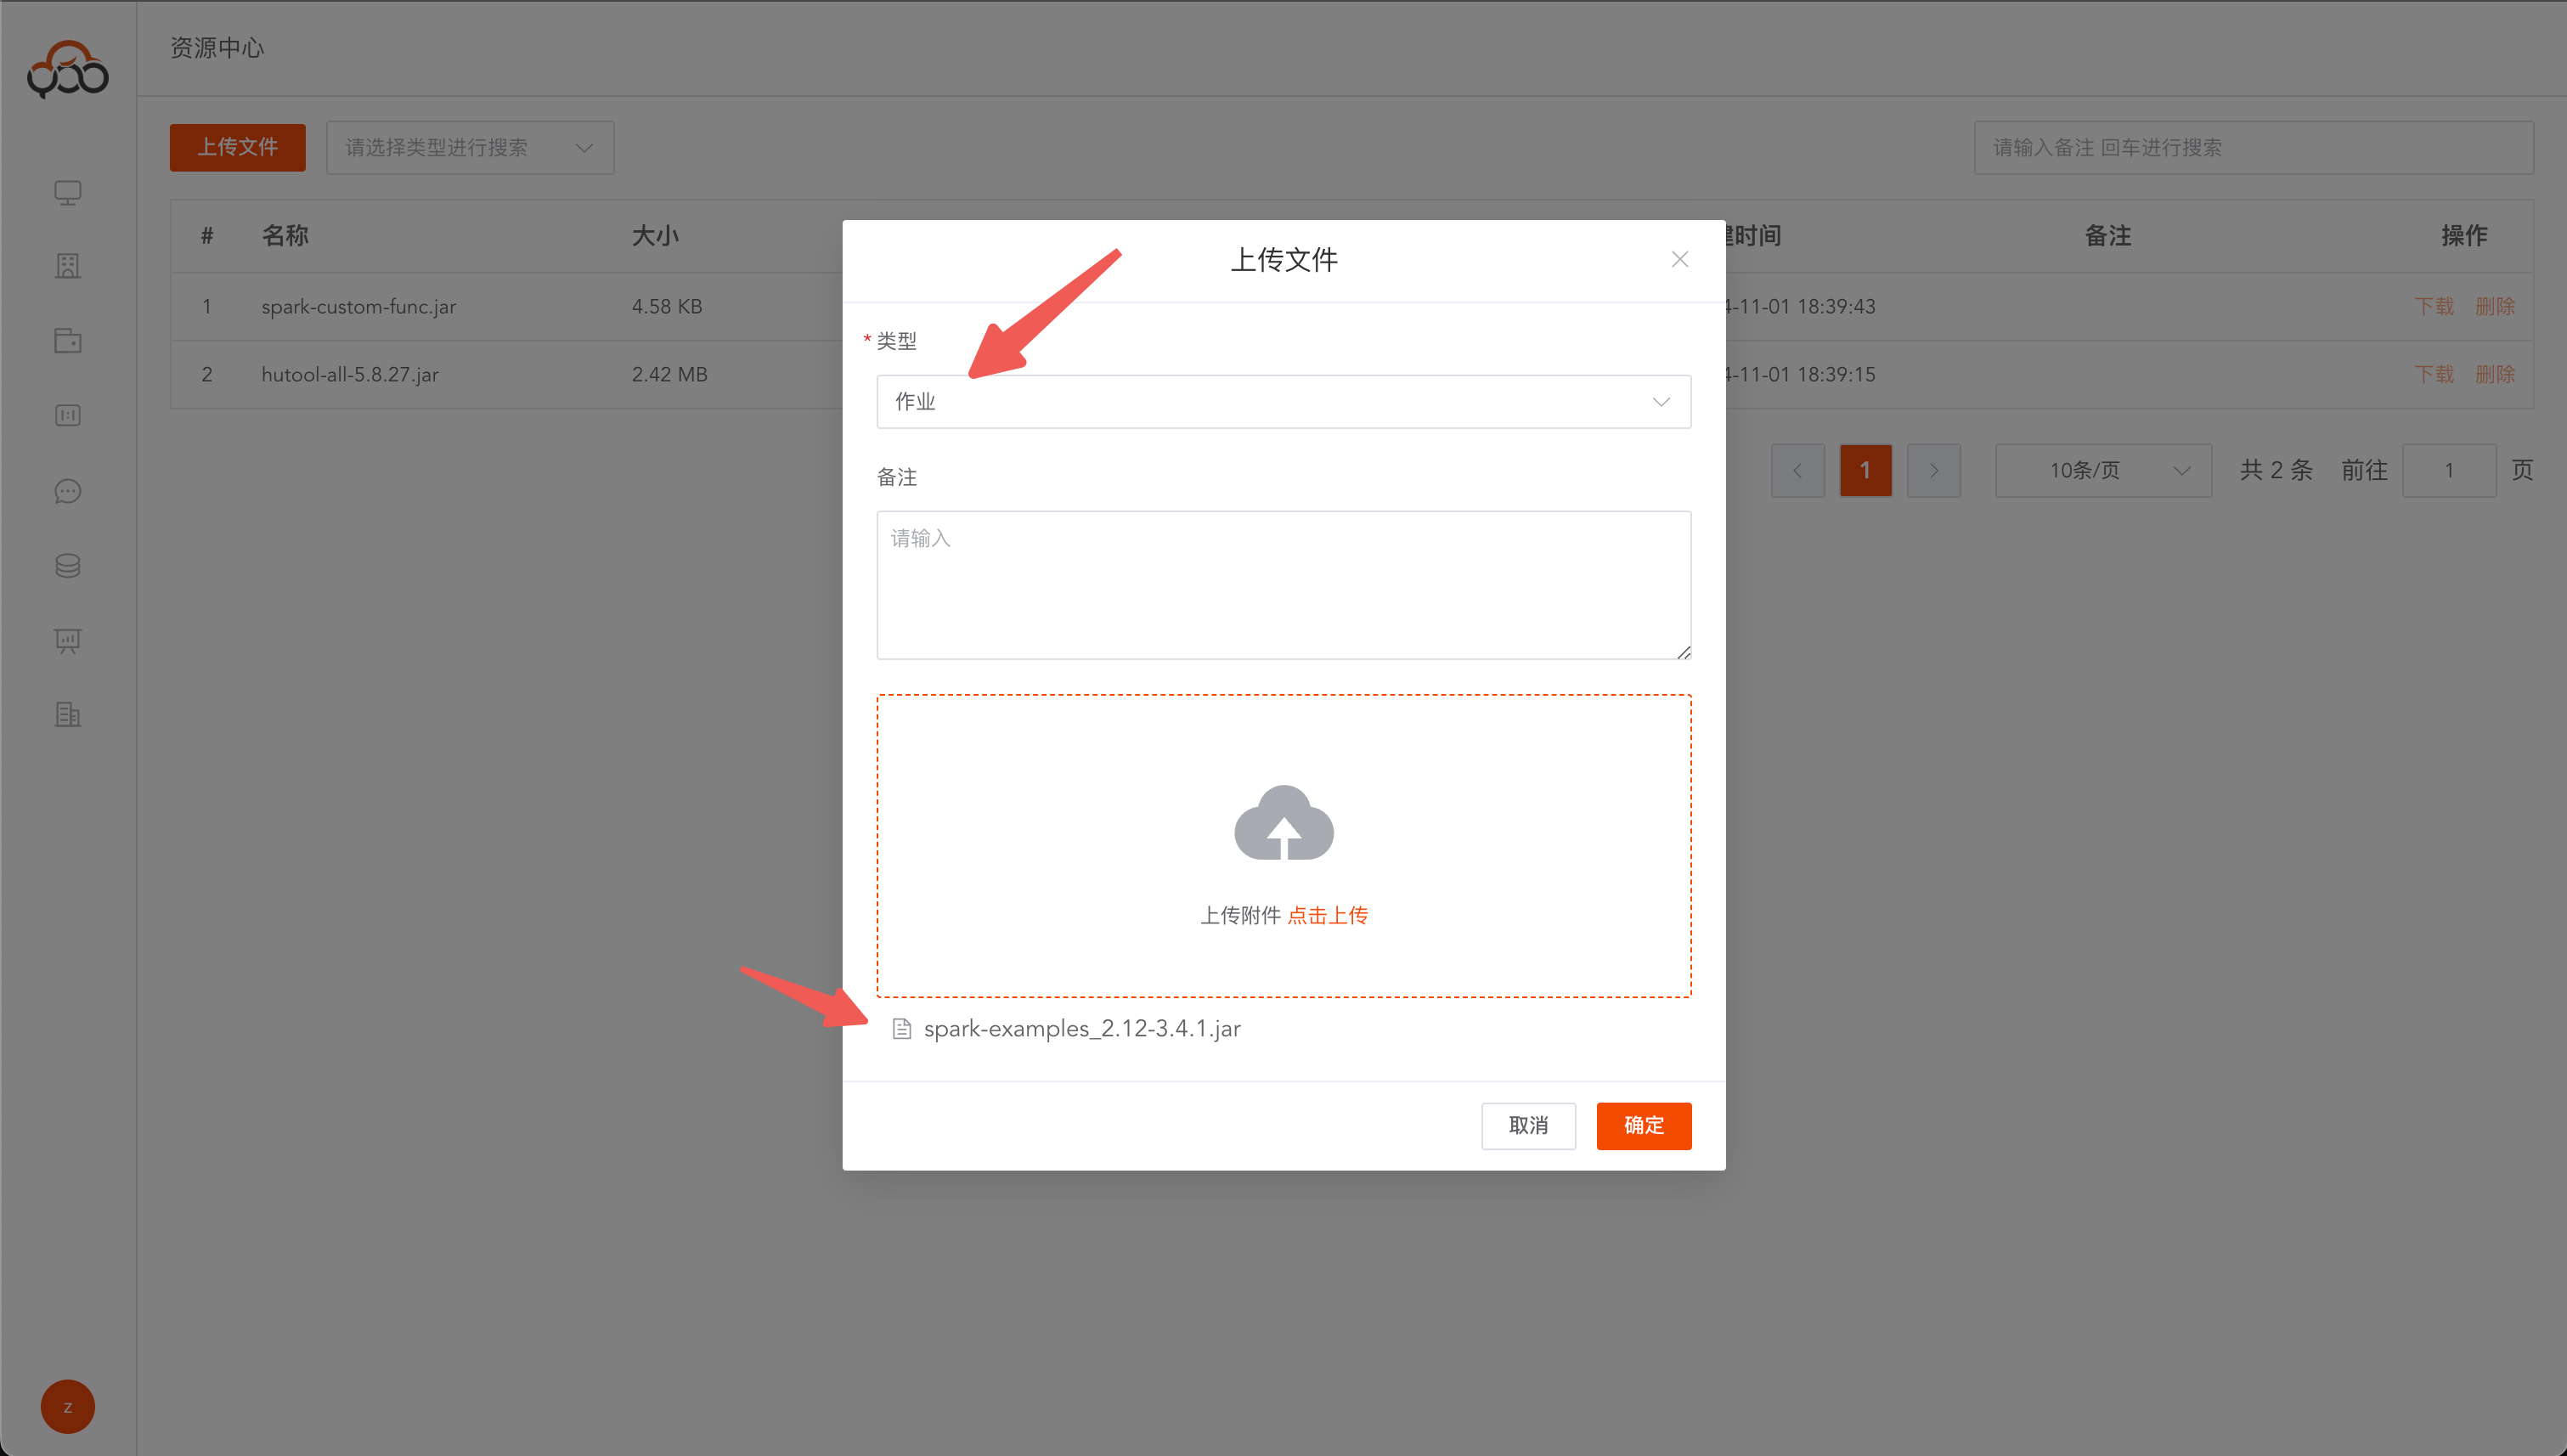
https://zhiqingyun-saas.isxcode.com/tools/open/file/spark-examples_2.12-3.4.1.jar
Upload the Jar to the resource center and select the resource type as job.
The job parameters are configured as follows:
| Configuration items | Example value |
|---|---|
| Application name | pi-demo |
| Main Class | org.apache.spark.examples.SparkPi |
| Request parameters | 10 |
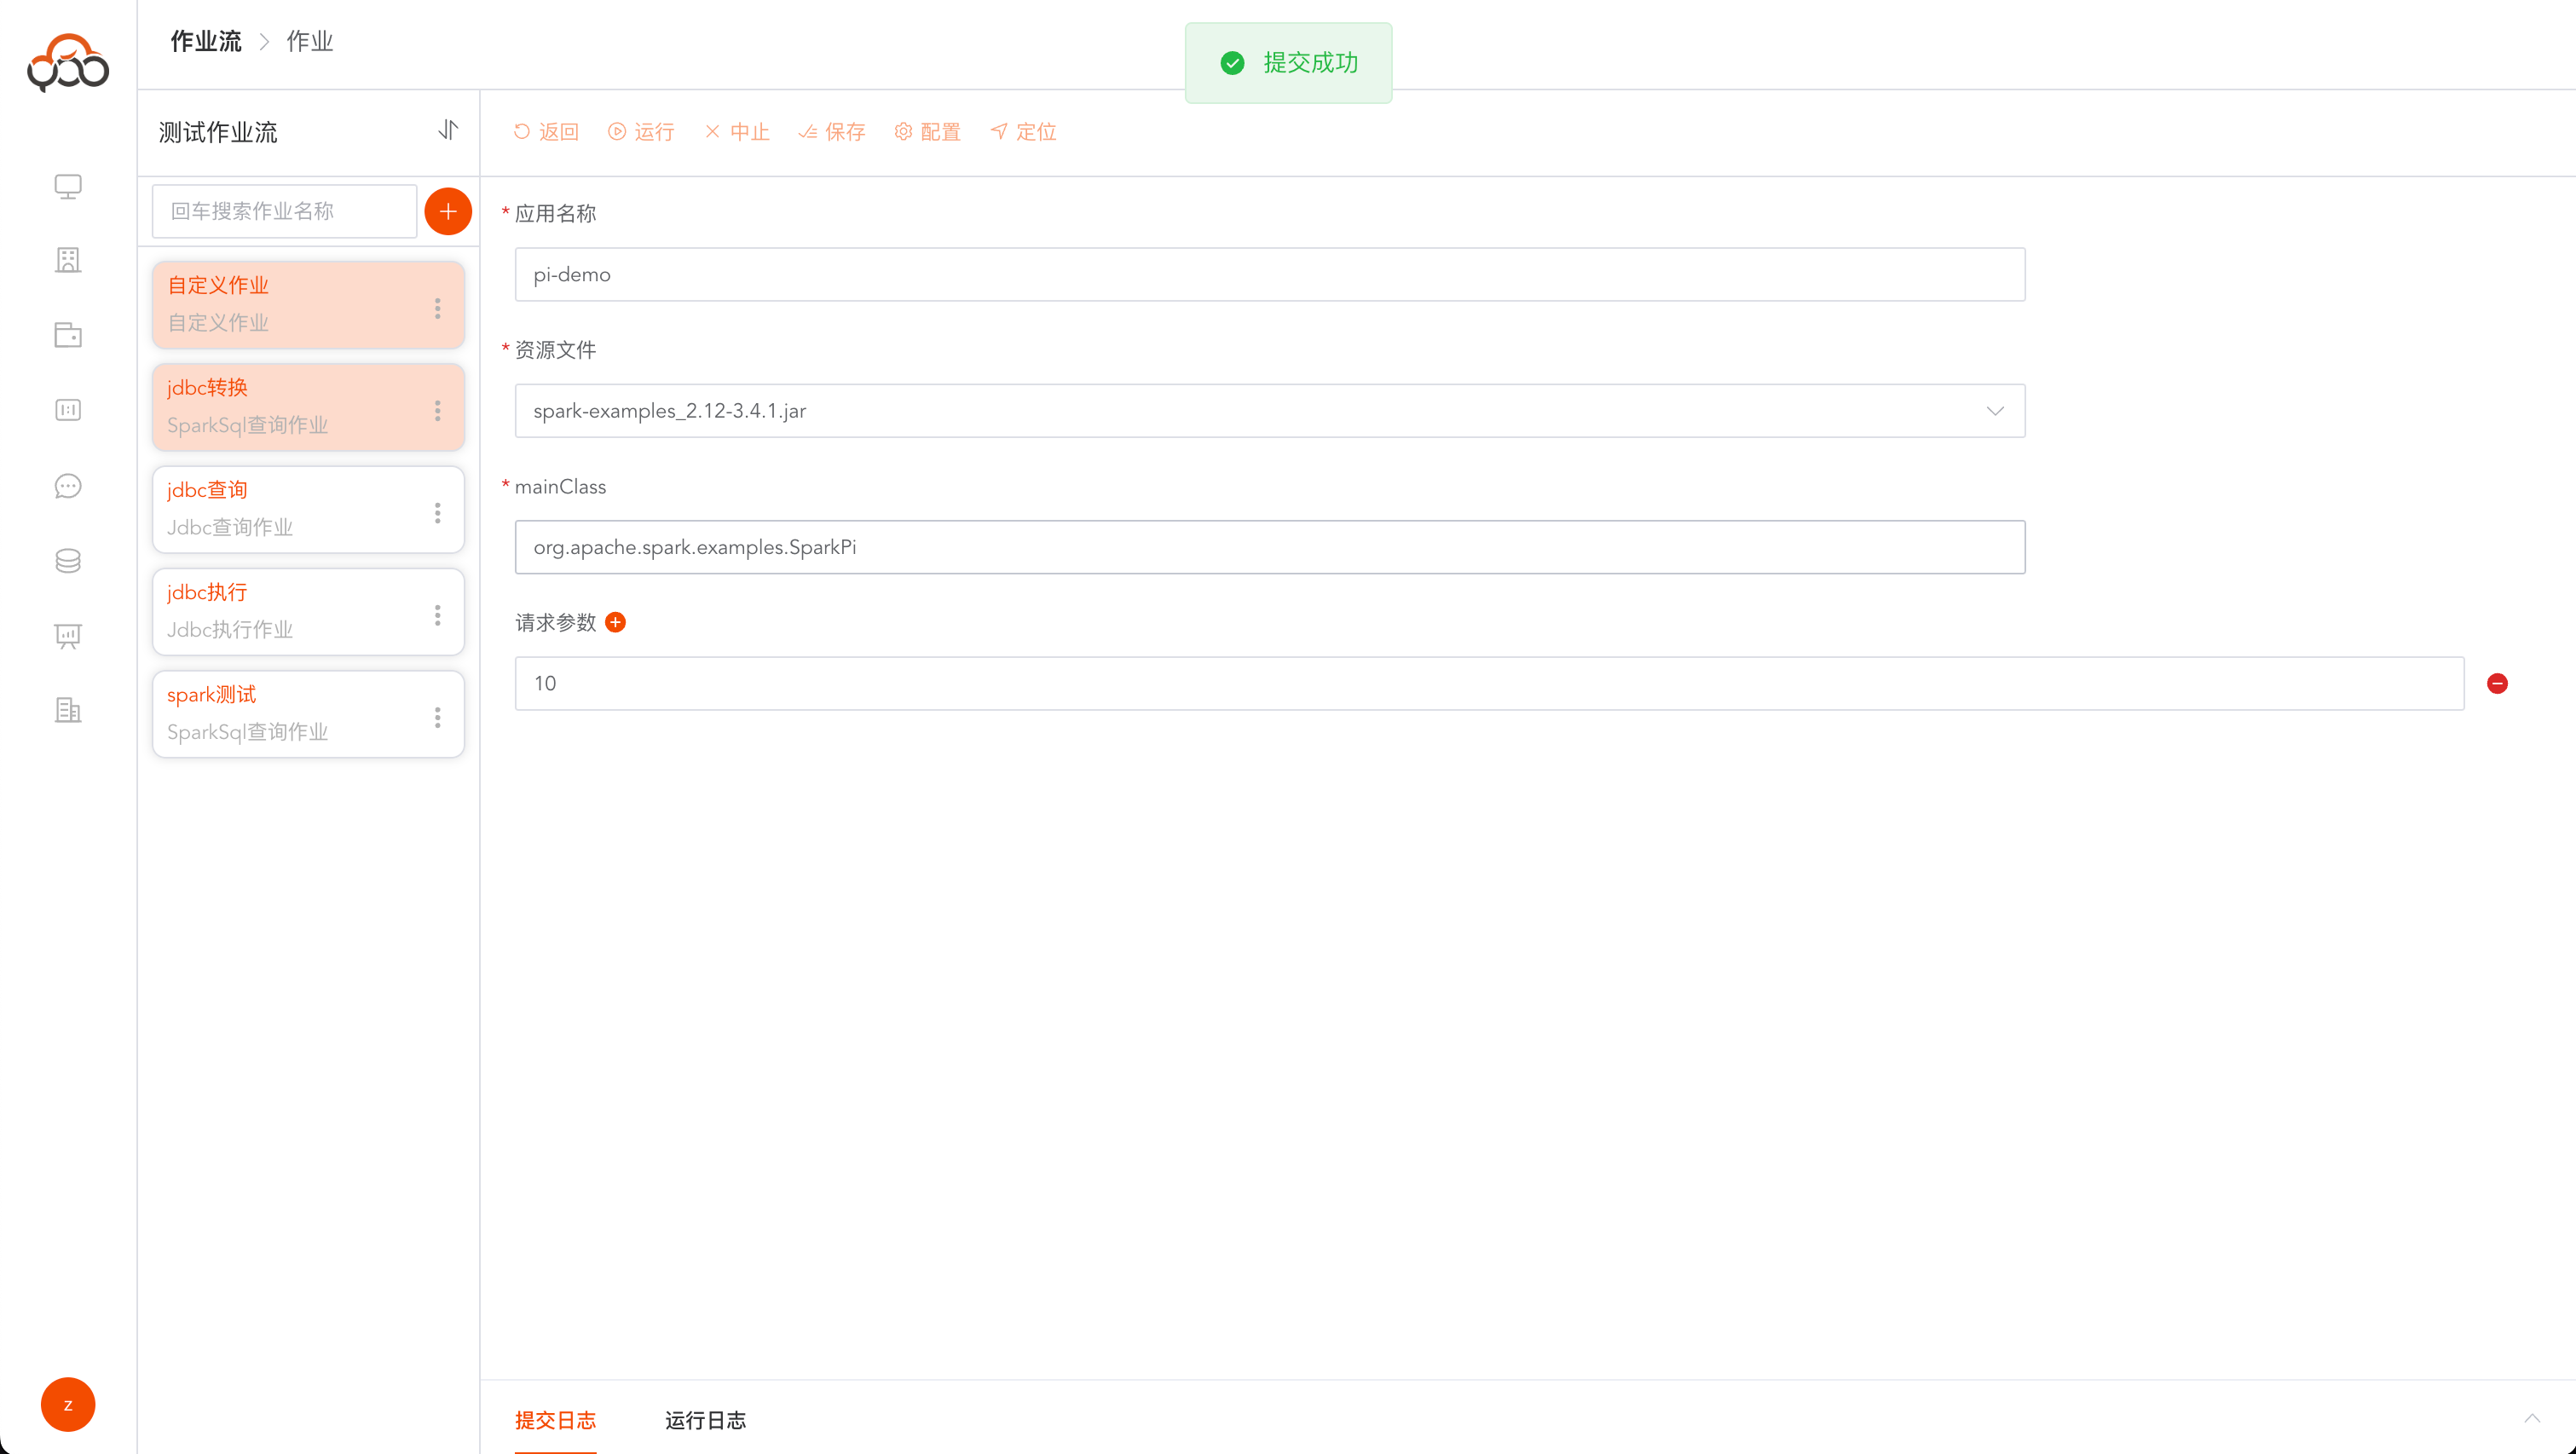
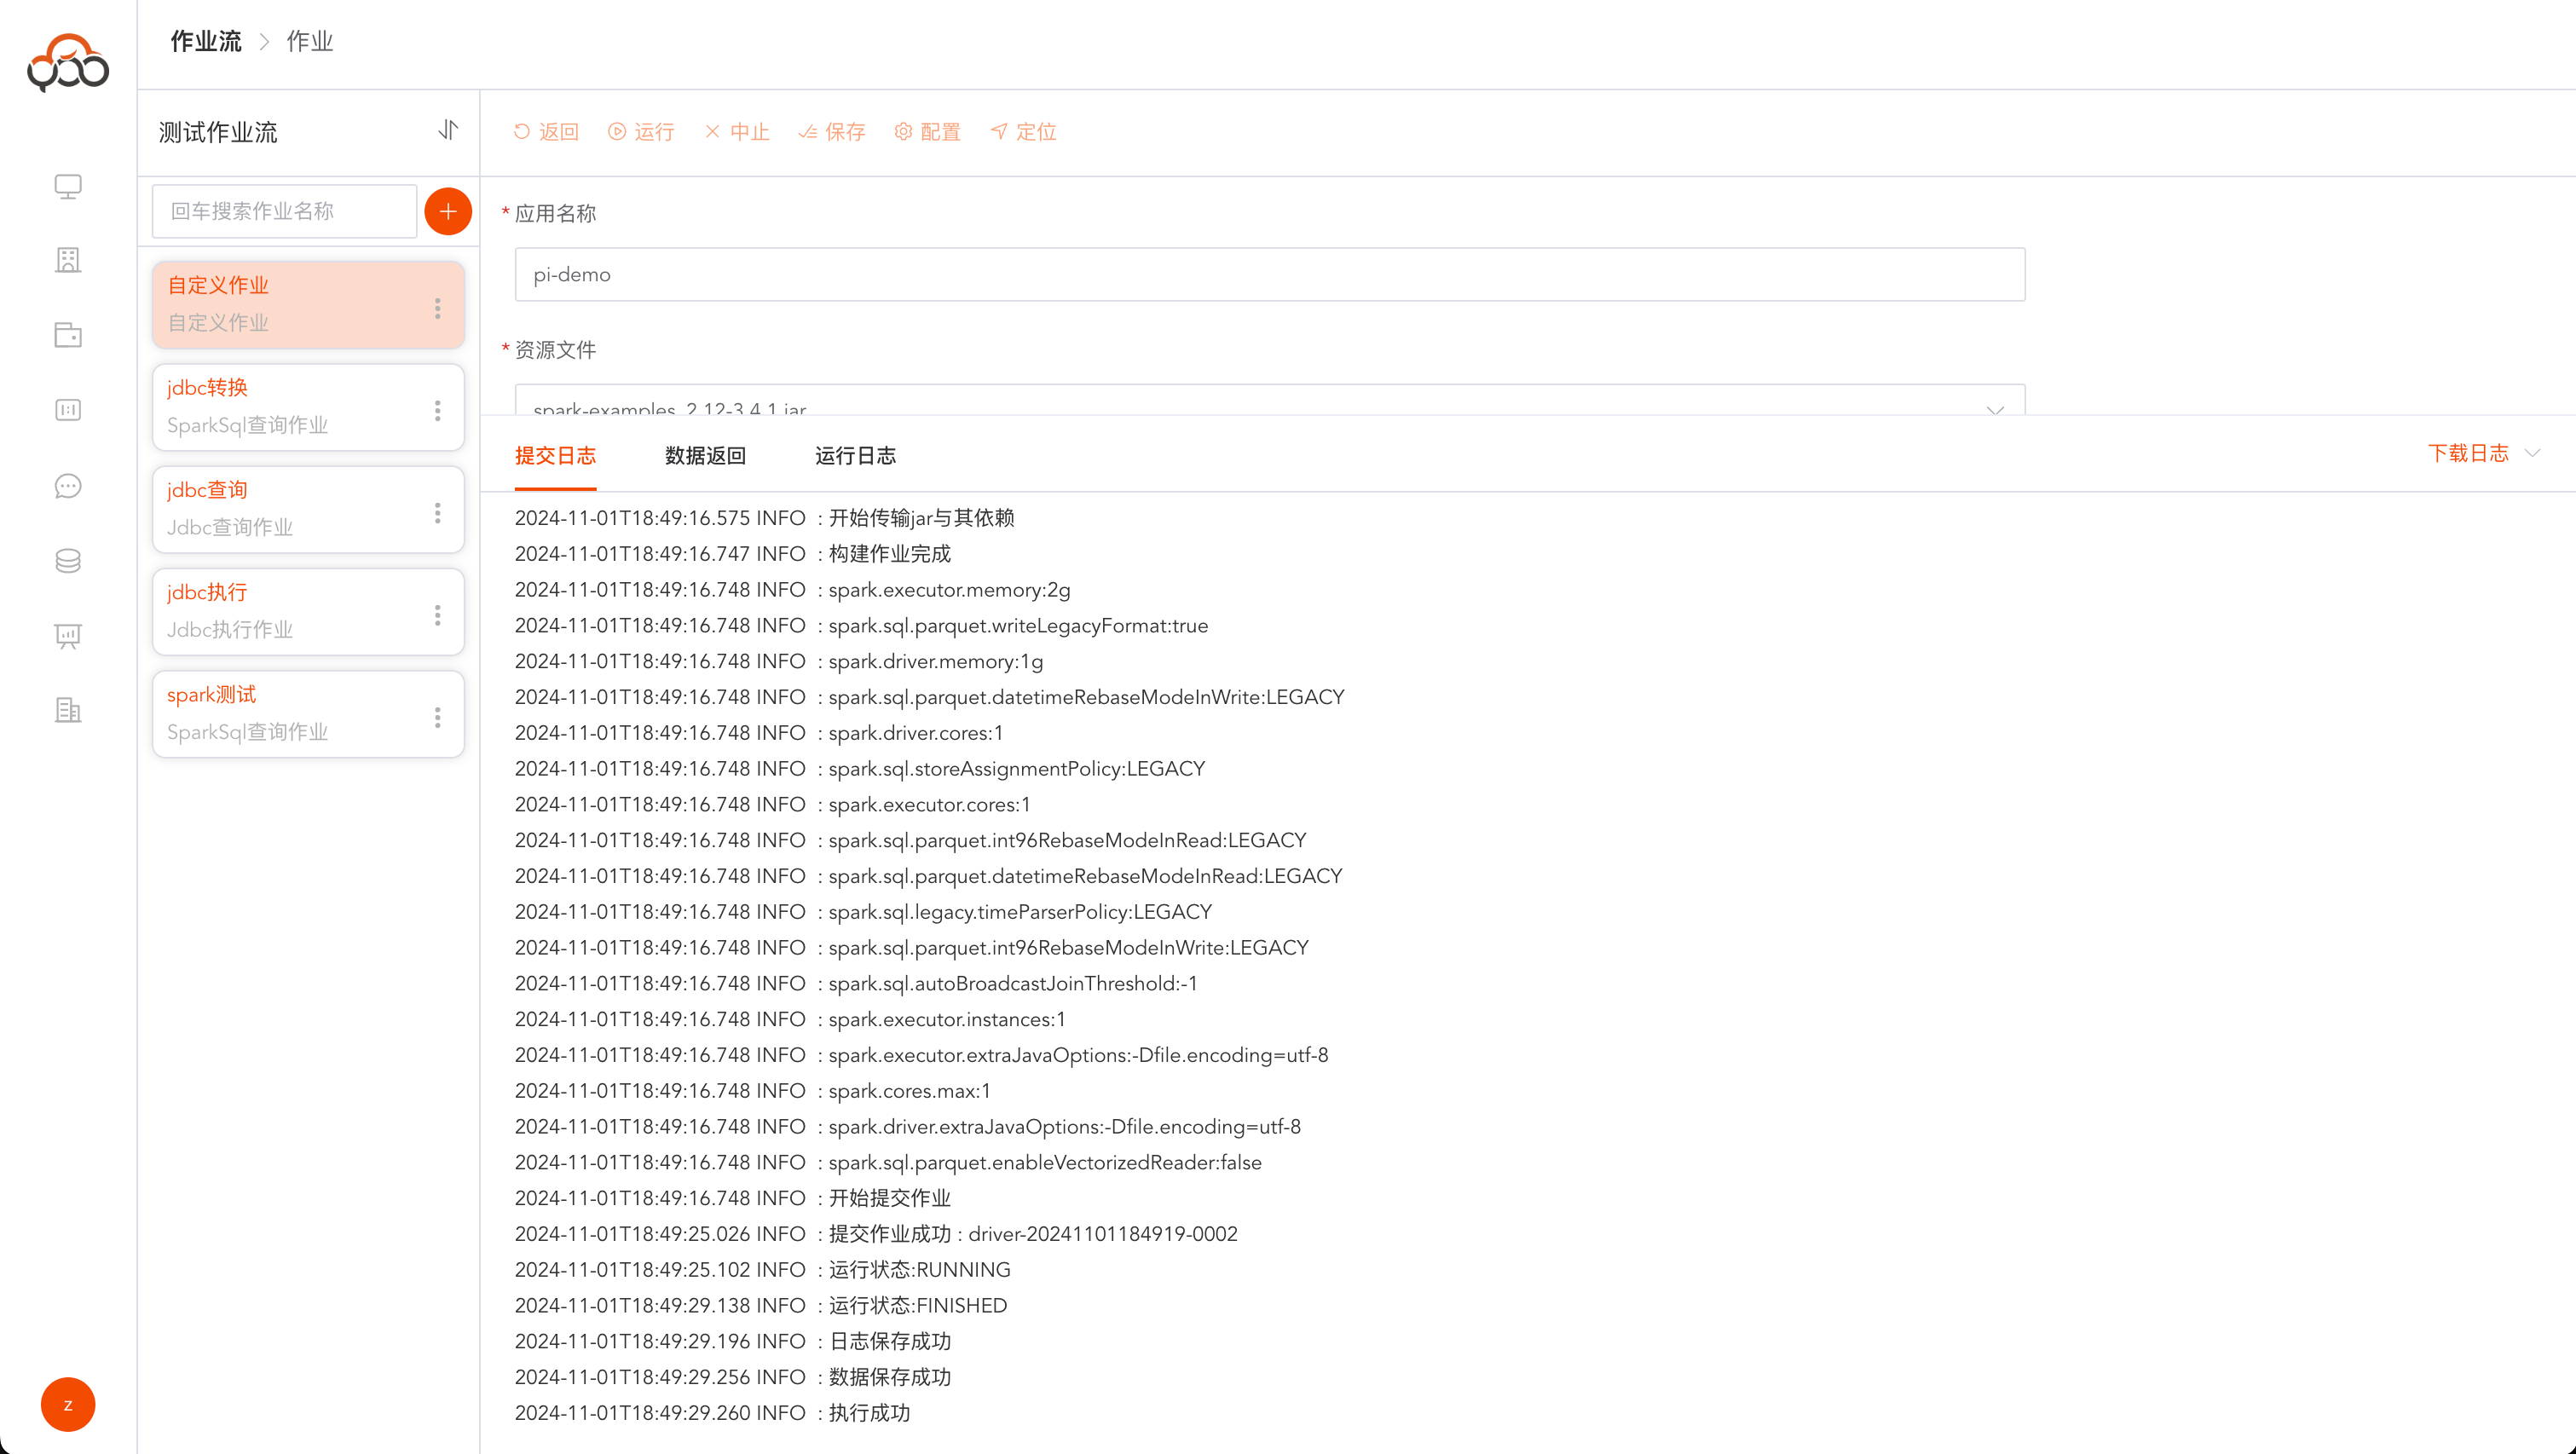
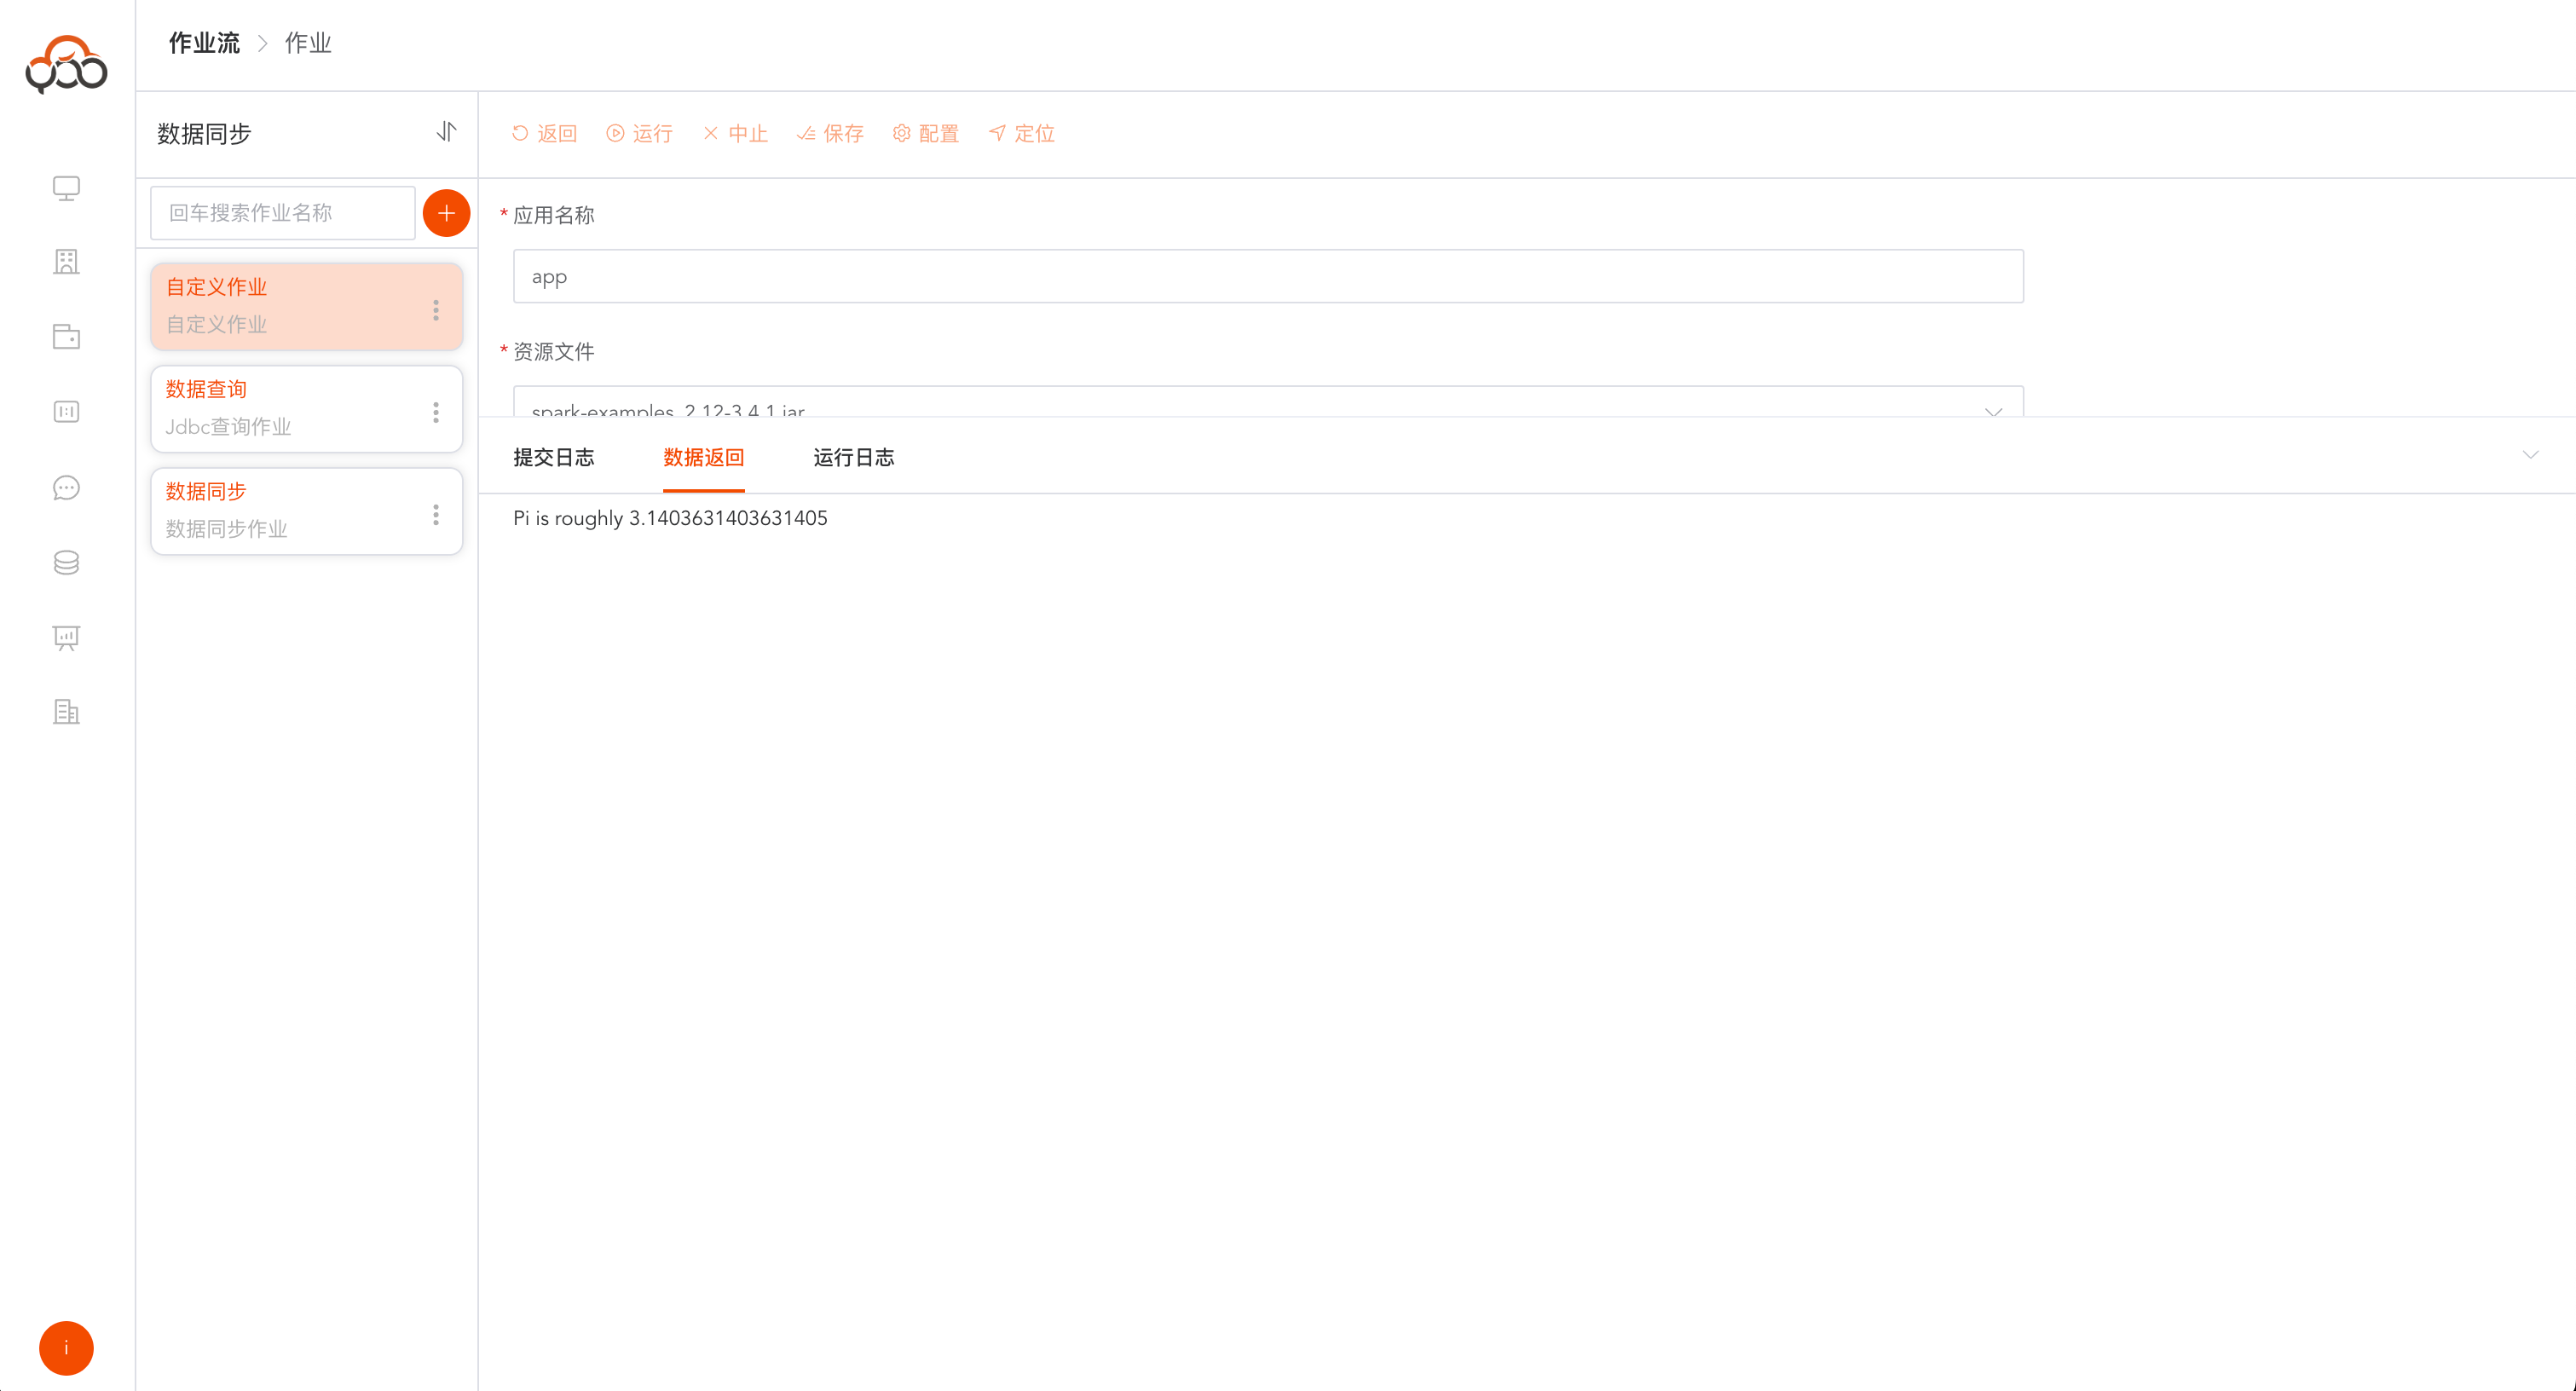
After the job execution is completed, click on the data to return to view the Pi calculation results.
Further reading
After completing the above steps, the basic deployment and core function experience of Zhiqingyun on Alibaba Cloud ECS have been completed. Please refer to the product manual for more function descriptions.